
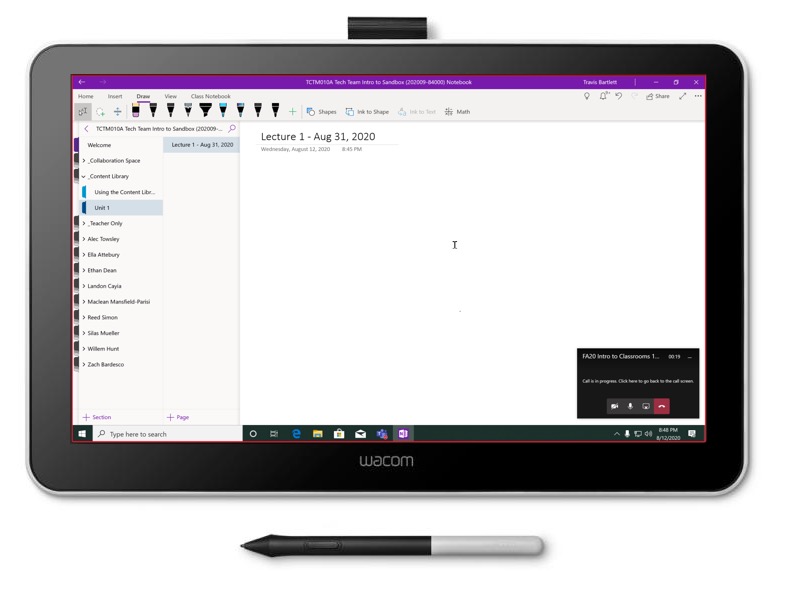
Faculty equipped with a Wacom One pen display for at-home use can follow these instructions to install drivers and ensure successful function of the device.
Downloading and installing required software
Both macOS and Windows users will have to download driver software for the Wacom One tablet. You can follow these steps before plugging in the Wacom One.
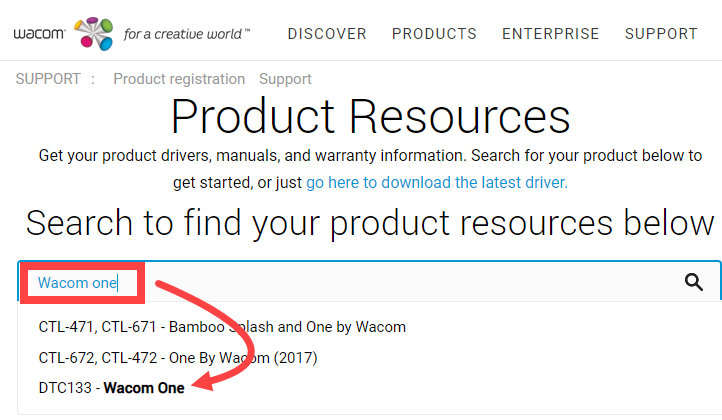
- Visit www.wacom.com/en-us/support/product-support/drivers and search for Wacom One
Wacom One
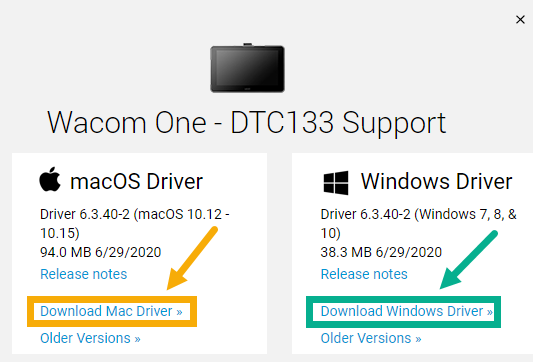
- Click the appropriate Download button for your operating system.
- Click Confirm Download to start the driver download
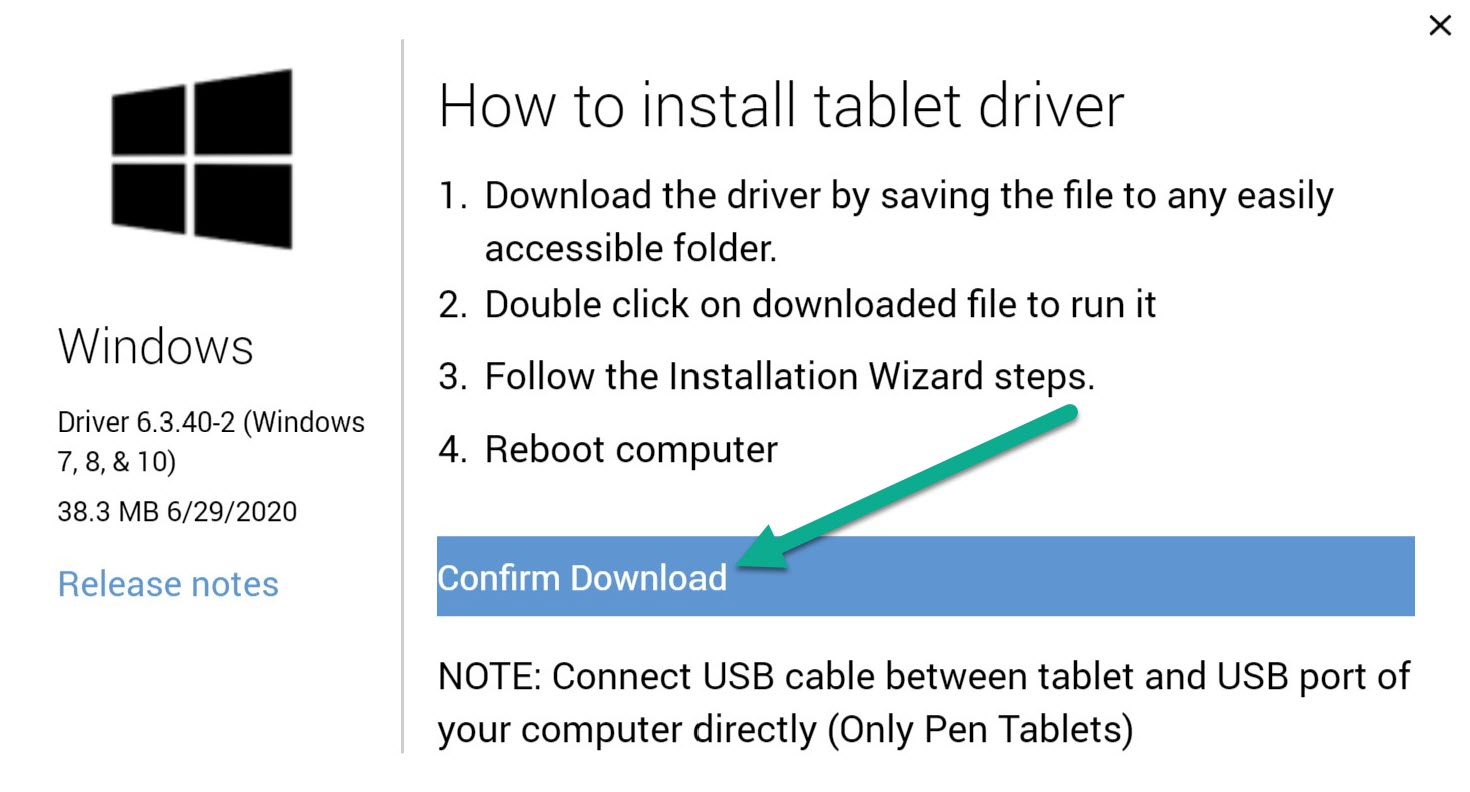
- When the installer downloads, double click it and proceed through each step as normal, then restart your computer.
Connecting the Wacom One to your computer
The Wacom One cable has 2 connections on each end. All cables must be plugged in appropriately for the pen display to function.
On the same end as the wall outlet plug is a USB-C connection. The USB-C connection plugs into the Wacom One.
The other end has both an HDMI and a USB-A connection, both of which must be plugged into your computer. If you do not have an available HDMI and/or USB-A port, you will need to get an adapter.
If you do not have an adapter, please check with your department or business manager who may already have a solution in place, or may be able to contact the UVM Tech Store to obtain a suitable dongle.
At the moment of writing this guide, the Tech Store offers this adapter for 2016+ MacBook Pro and 2018 MacBook Airs. Windows may also be able to use that adapter, but should contact the UVM Tech Store for recommendations.
Windows Setup
If the Wacom One driver is installed and properly connected to your computer, you should be able to use the tablet without further configuration. If desired, you can proceed through the Wacom One Setup wizard steps.
Changing Display Settings
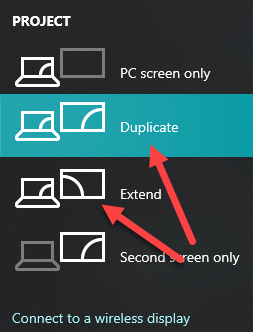
Depending on your setup, you may prefer to have the Wacom One extend or duplicate your display.
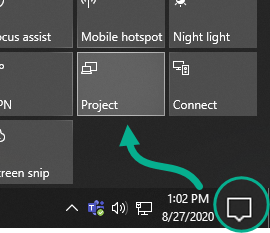
- Click the button in the bottom right corner to view the Notifications Area, and click Project. Alternatively, hold the Windows key and press P and proceed to the next section: + P
- Select the preferred option to extend or duplicate your display.
You can adjust the Wacom One to function as an extended or duplicate display by
macOS Setup
Depending on the version of macOS you are running, you may be all set after installing the macOS drivers.
Granting Security & Privacy Permissions
Users running macOS 10.15 Catalina will likely be familiar with the security features included in Catalina that require your approval before running or enabling software not obtained directly from developers or from elsewhere on the internet.
Changing Display Settings
You can configure your display settings in System Preferences to set your Wacom One to extend or duplicate your existing monitor.
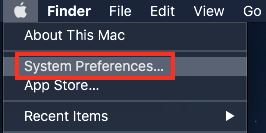
- Click the Apple icon () in the top right corner of your screen, then select System Preferences…
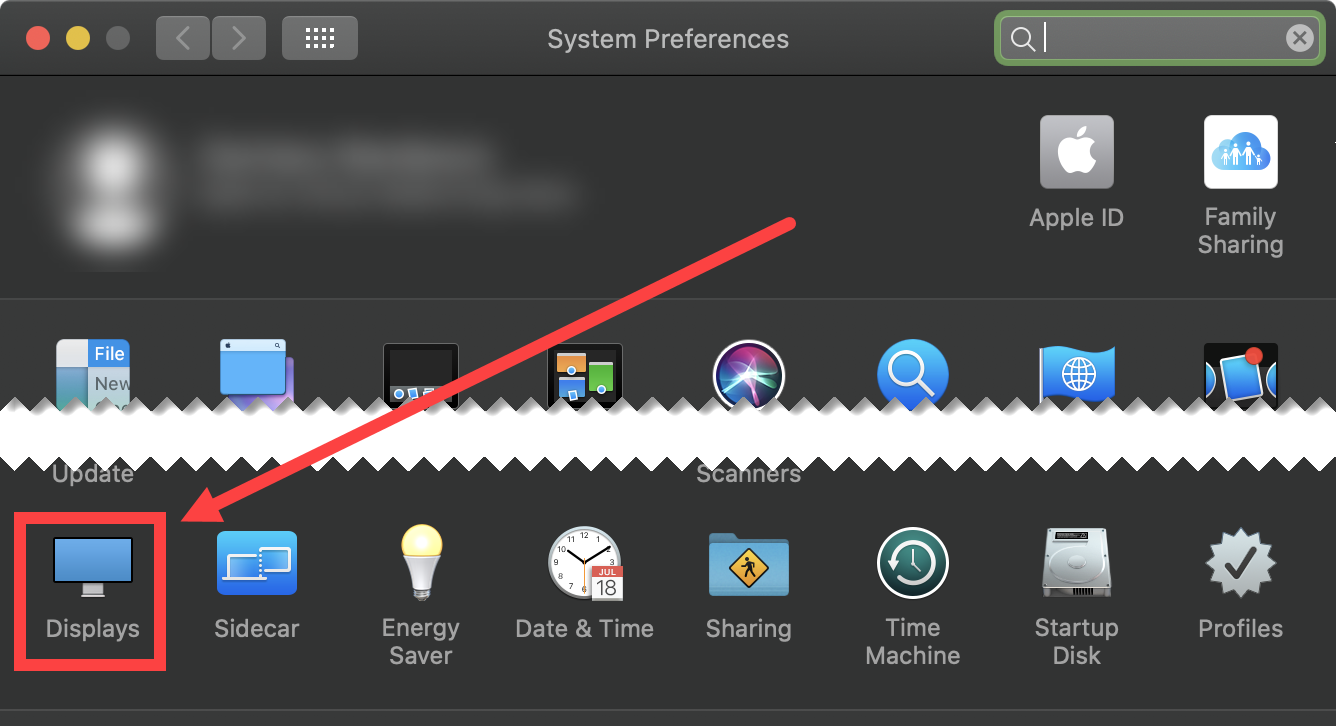
- Click the option marked Displays.
- Mirror/duplicate your displays by pressing the Mirror displays. You can also reorganize your displays by clicking and dragging them around as desired.

Additional information on this process can be found in Apple’s documentation for using external monitors with your Mac.