
Course Registration Advising Appointments for the coming semester are conducted using Microsoft Teams. As an advisor, you will be using the Meet now feature in Teams to communicate with incoming students.
Meeting with your Advisee in Microsoft Teams
- Open Microsoft Teams.
- If you don’t have it installed, please follow the installation instructions on our dedicated Microsoft Teams guide.
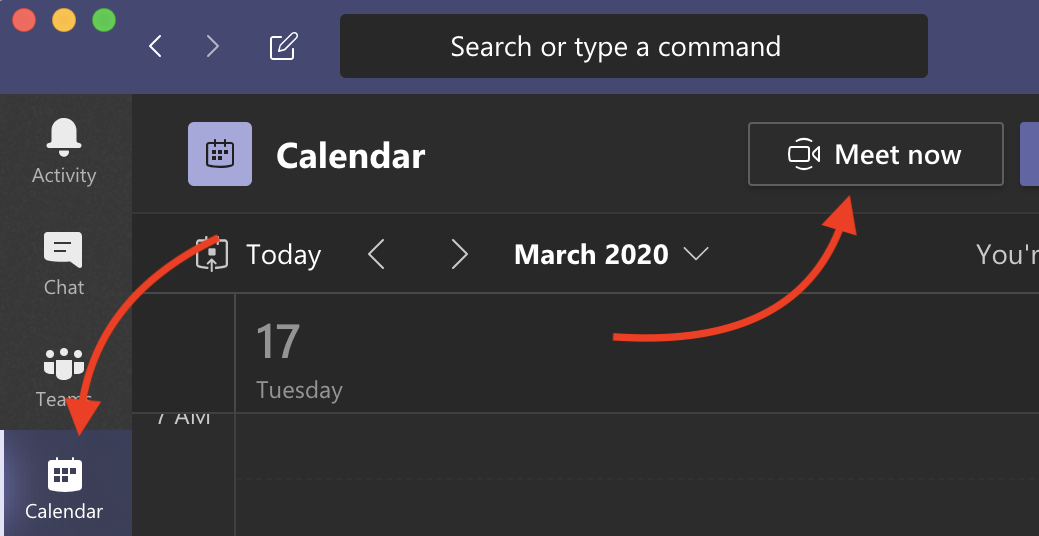
- In the Calendar section of Teams, click Meet now in the upper right corner.
- Change the meeting title to include the advisee’s name. Ensure your microphone and webcam are toggle on, then click Join now.

- Click the People icon in the center of your screen, then search for your advisee’s NetID (preferred) or name, and invite them to the meeting.

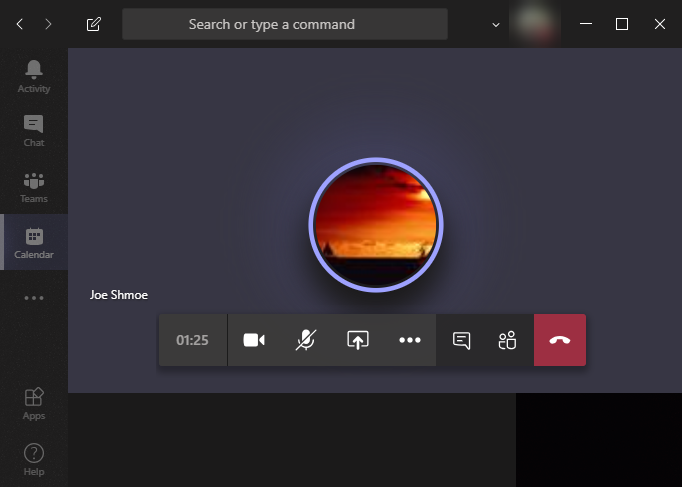
- You should now be connected with your advisee
Share your Desktop or a Window
Source: Microsoft
Teams allows you to share your entire desktop, an application window, or PowerPoint presentations.
- From an active meeting or video call, click the Share button.

- Select what you want to share – choose from Desktops, application windows, PowerPoints, or Browse to a file you’d like to show.

- A red border will appear around the item you’re sharing. In this example, we’re sharing a Chrome browser window.

- When you’re done, click the “Stop Sharing” button.


Troubleshooting
People can't hear me
If an advisee cannot hear you, you may have muted your mic or you might need to configure your mic settings.
- Ensure that your microphone is not muted. If people still can’t hear you after unmuting your mic, continue on to step 2.

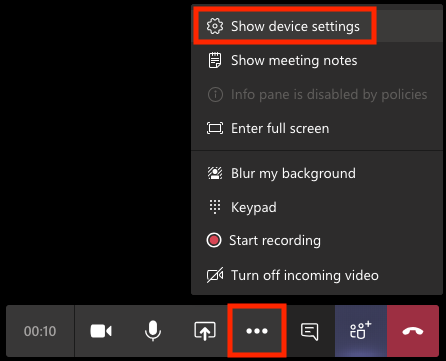
- Select the More options menu . From the list that appears, select Show device settings.
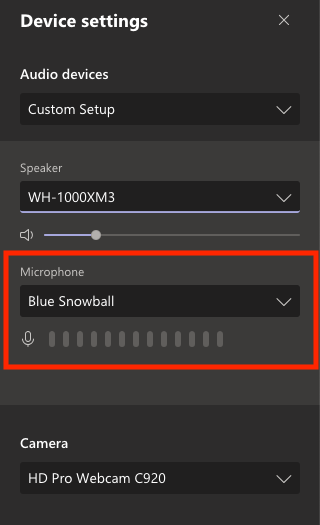
- Make sure that the correct Microphone device is selected from the microphone drop-down menu.
I can't hear others
If you can’t hear an advisee, you may need to adjust the volume on your speakers or headset, or you might need to configure your speaker settings.
- Select the More options menu . From the list that appears, select Show device settings.
- Make sure that the correct Speaker device is selected from the speaker drop-down menu. Adjust to volume slider as needed.

People can't see me
If you are using a webcam during your meeting, but an advisee cannot see you, you may have your camera turned off or you might need to configure your camera settings.
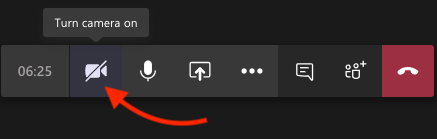
- Ensure that your camera is toggled ON. If your camera still doesn’t display, continue to step 2.
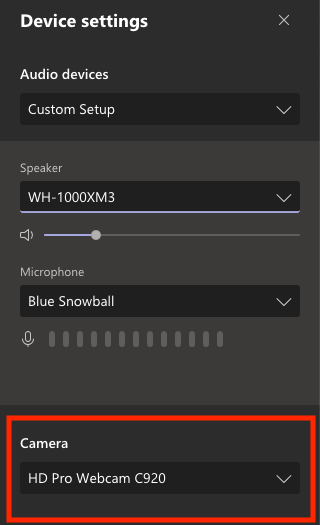
- Select the More options menu . From the list that appears, select Show device settings.
- Make sure that the correct Camera device is selected from the Camera drop-down menu.
macOS - Allow Webcam, Microphone, and Screen sharing access
macOS Catalina 10.15 and macOS 11 Big Sur introduced new security controls to better protect your computer. For example, apps are now required to ask your permission before accessing your webcam, microphone, or recording/sharing your screen. This has a direct impact on Microsoft Teams as all of these settings must be allowed to use MS Teams at its full capacity.
To configure your security settings for MS Teams, please do the following:
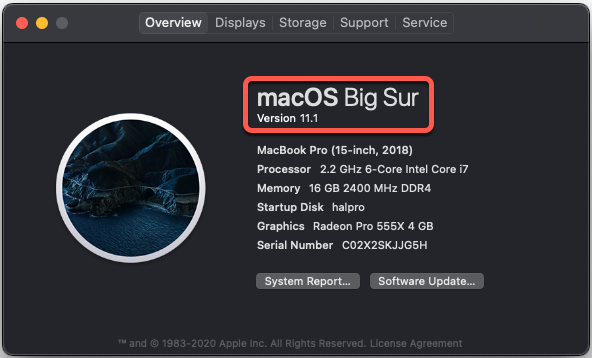
- Check your macOS version – the following steps are only available in macOS 10.15 and macOS 11. To check your macOS version click the menu in the top-left corner, then select “About This Mac“.
- If you’re running macOS 10.15.x or macOS 11, continue on:
- If you’re running macOS 10.15.x or macOS 11, continue on:
- Click the menu in the top-left corner, then select “System Preferences…“. From the window that appears, select “Security & Privacy”

- Click the padlock in the lower-left corner of the window. Enter your computer username and password – this will allow you to make the necessary changes.

- You’ll need to allow MS Teams to access your Camera, Microphone, Accessibility, and Screen Recording. To do this, select the item from the left column, scroll through the list of applications, and make sure that Teams is checked.

- Repeat this process for:
- Camera
- Microphone
- Accessibility
- Screen Recording
- Quit and relaunch Microsoft Teams for these changes to take effect.