
Microsoft has changed the way MS Teams meeting recordings are stored and accessed. Microsoft Stream (Classic) has been replaced by Microsoft Stream (on SharePoint). The way recordings are started through Teams has not changed.
FAQ
Why is this changing now?
Microsoft required all clients (including UVM) to migrate to the new platform as of August 16th, 2021.
Where do I find my Microsoft Teams meeting recordings?
When a meeting has been recorded, Teams adds a meeting summary “card” to the meeting chat that includes a link to the recording and the auto-generated transcript once that recording has finished processing.
To see all your recordings in one place — including those for meetings you attended or were shared with you — go to stream.office.com. New recordings made from Teams will no longer appear automatically in the MS Stream Classic interface.
Where are my Microsoft Teams recording stored?
Meeting recordings will now be stored in OneDrive and Teams, both of which use SharePoint Online behind the scenes.
If you record a normal, scheduled Teams meeting, that recording will be saved to a Recordings folder in your OneDrive. All other meeting participants are granted read access to that file. You can manage this file like other content in OneDrive.
If you record a channel-based meeting, such as a meeting in a class team, that recording will be saved to the team channel’s Files tab in a Recordings folder. All the members of the team will have access to the meeting recording.
If you accidentally delete a meeting recording file, you can restore it from the OneDrive Recycle Bin.
What will happen to my MS Teams videos from before August 2021?
You will still be able to access videos that were recorded in teams prior to August 14th 2021 in MS Stream Classic. It’s also possible your recordings were migrated to the new version of Stream (on SharePoint).
How do I record Teams meetings now?
To start a meeting recording, you still choose the Start recording option from the More options (···) menu in the meeting. Choosing this option will automatically start the Live Transcription process, too.
Features
Transcript and captions
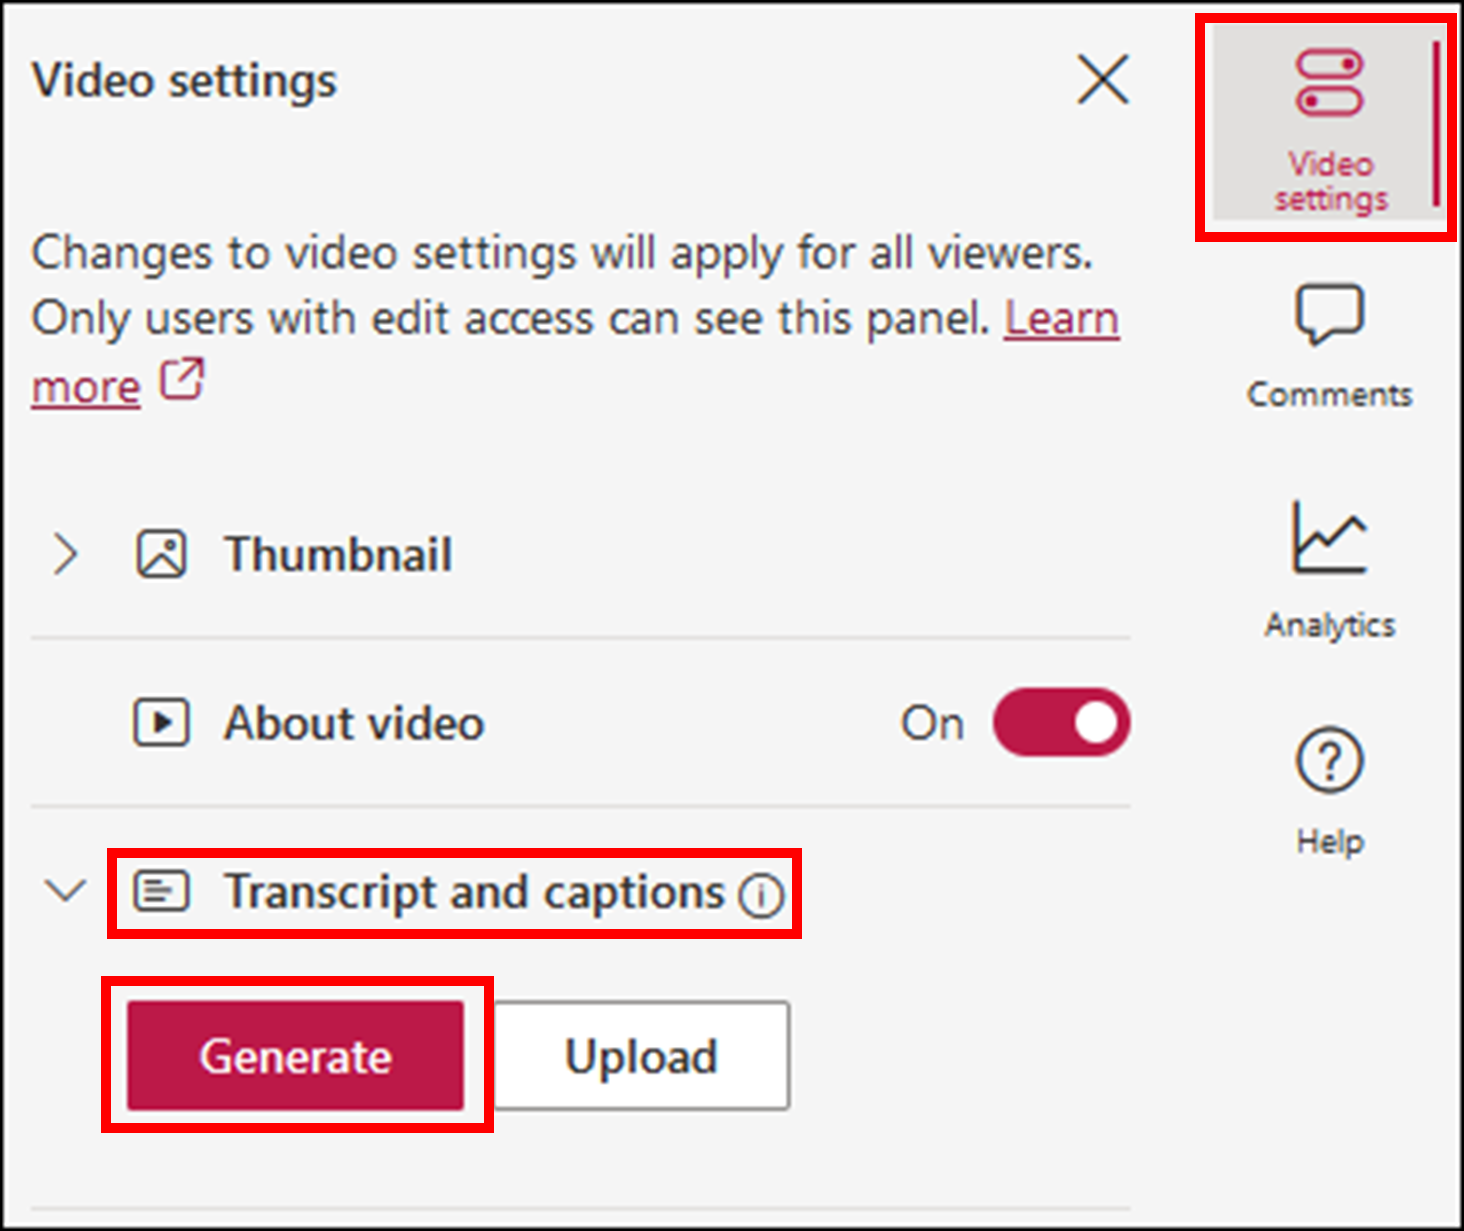
Transcripts in MS Stream (on SharePoint) can be generated automatically or uploaded from a local file. To do so:
- Navigate to stream.office.com and open the video you want to caption.
- Click Video settings in the upper-right corner.
- Expand the Transcript and captions section.
- If you already have a subtitle file, you can click Upload and Select file, then find and select your caption file from the window that appears, click Open, then Done. Otherwise, just click Generate to generate subtitles automatically.
Embed recordings on external site
The best way to make a Microsoft Stream available on sites like Brightspace or your personal Silk page is to “Embed” the video using a special link:
- Navigate to stream.office.com and open the video you want to embed.
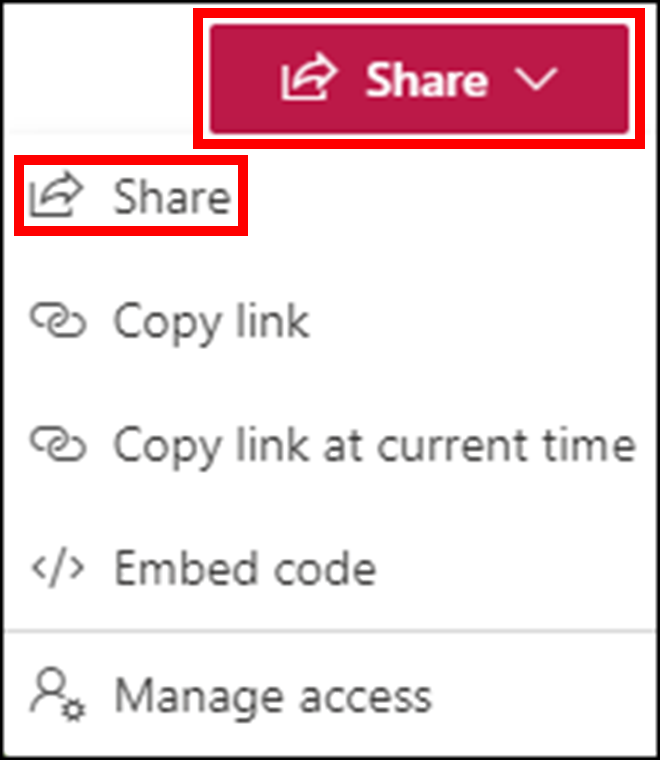
- Click Share in the upper-right corner.
- Select Embed code.
- Adjust the settings or leave the defaults, and click Copy embed code.
- The embed code can then be pasted in to an HTML page. For Brightspace, navigate to a module, click the Source Code icon, paste in the embed code, click Save and then Update.
Share recordings with others
- Navigate to stream.office.com and open the video you want to share.
- Click Share in the upper-right corner and then select Share from the menu.
- Enter all or part of the recipient’s name in the box provided, and then select their account from the drop-down that appears. Repeat this for as many recipients as you like.
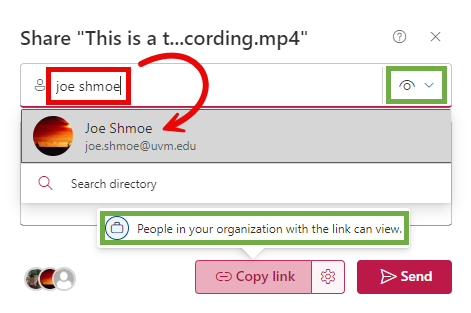
- Enter an optional message to the recipient(s) in the text box provided.
- Note the two items in green above.
- The eyeball indicates that the recipients will be able to view the stream only. If you’d like them to be able to edit the video settings, click the eyeball and select Can edit.
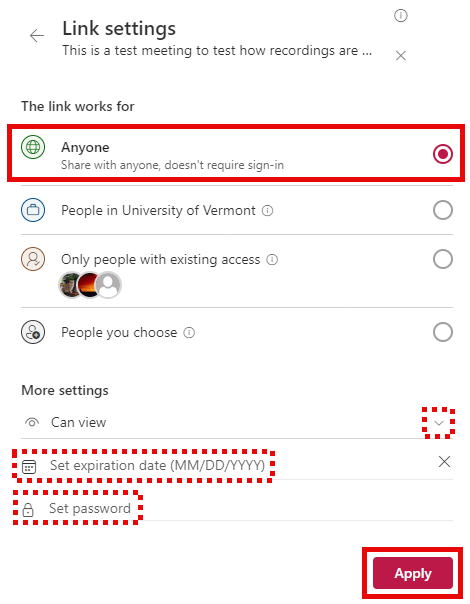
- The “People in your organization with the link can view” text indicates that only UVM accounts will be able to access your recording. To share outside the organization, click the Gear icon () and select Anyone from the window that appears. From that same window you can optionally set an expiration date and an access password for the share link. Open the access level drop-down () and adjust as necessary. Click Apply.
- Click Send.
Revoke access
- Navigate to stream.office.com and open the video you no longer want to share.
- Click Share in the upper-right corner and then select Manage access from the menu.

- From here, there are several ways to revoke access:
- To revoke all non-owner access, click Stop sharing.
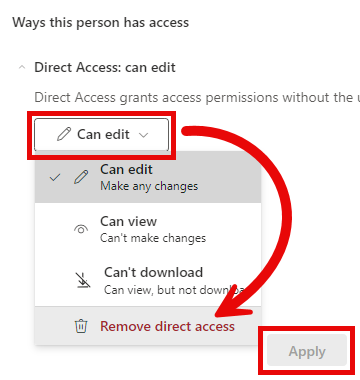
- To revoke access from individual users, select their name from the People tab, expand the drop-down menu that shows their current access level, click Remove direct access, and then Apply.
- To revoke access from a whole Teams channel, click Groups, and then the Trash can icon () to the right of the group you’d like to remove. Click Remove.
- To revoke access from previously shared links, click Links, and then the trash can icon () to the right of the link you’d like to remove. Click Remove.
What are the differences between Stream Classic and New Stream?
The following features are unavailable on New Stream:
- Videos cannot be edited or trimmed within the new Stream interface.
- Video channels (not to be confused with Teams channels) are no longer available.
New features:
- Links to videos can be shared publicly, including for viewers outside of UVM.
- Meeting recordings (and other video content) can be managed just like other files in OneDrive, Teams, and SharePoint.
- Videos uploaded to Teams via OneDrive will automatically appear on stream.office.com.
- Find meeting recordings based on what was said in the meeting using the transcript.
Troubleshooting
Error: The video you are trying to transcribe does not have audio, try transcribing a video with audio.
If you receive this message, you can try uploading an existing subtitle file by clicking Upload.
![]()
However, if you do not already have a subtitle file, you can try to Generate a transcript again after first downloading, converting, and re-uploading the recording:
- Click the three dots above the video and then click Download.

- Click Download again and choose a location to Save the file if prompted. Note the save location you chose.
- Navigate to the location you chose above, right-click on the recording, hover over Open with and select Microsoft Clipchamp.
- Click Export and chose your Video quality. I would recommend 1080p.
- Note the save location again and click Save.
- Navigate back to MS Stream and click Upload.
- Find and select the new Mp4 file that you saved above, click Open, then Upload.
- Now, select the newly uploaded recording from the Stream homepage, click Video settings, Transcript and captions, then Generate.
Need additional help?
See the Microsoft documentation below:
- The new version of Microsoft Stream (Microsoft Docs )
- Features in Microsoft Stream (Microsoft Docs )
If you have specific questions or concerns, please contact the UVM Tech Team.