
The following guide is intended to help connect on-campus Kyocera-brand printers, but many of the processes explained below are generic and work for all printers (with some exceptions). Guides for CEMS printing can be found here (students) and here (fac/staff). For help with printing in the Howe Library, see this page. Requests for help with College of Medicine printers should be directed to COMTS.
UVM started using Kyocera Document Solutions of New England as our printer supplier in 2021. Legacy instructions for older Konica Minolta printers, especially those provided by provided by SymQuest, can be found here.
Printer Delivery and Setup Process
To obtain a new printer, contact Kyocera Document Solutions of New England or UVM Purchasing.
For help with new printer delivery and initial setup, please reach out to the UVM Tech Team who will redirect your request to the appropriate support hub.
Windows 10
Domain-Joined Computers
The procedure below is the preferred connection method, but requires that you are logged into the CAMPUS domain with your NetID credentials (not a local account like .\Administrator). To verify your computer is domain joined, see this article.
- Open the Windows Settings app. One way to do this is to hold down the Windows key on your keyboard and tap the I key (+I).
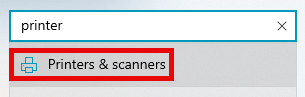
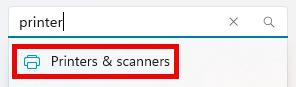
- Open the Printers & Scanners menu. One way to do this is to use the Find a setting search box.
- Click + Add a printer or scanner.
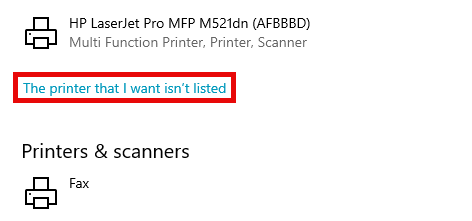
- Scroll down to the bottom of the list of available printers that appears and click The printer that I want isn’t listed.
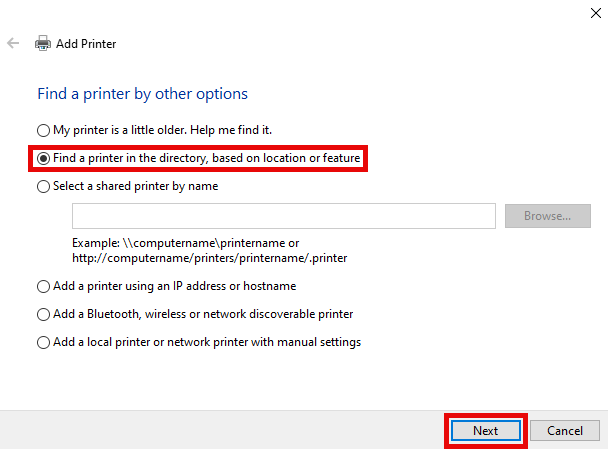
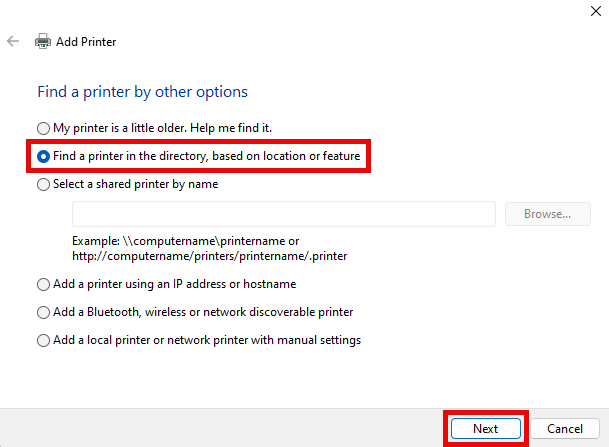
- Select Find a printer in the directory, based on location or feature. Click Next.
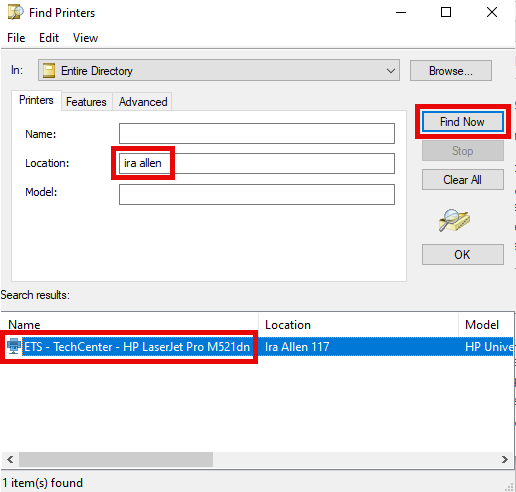
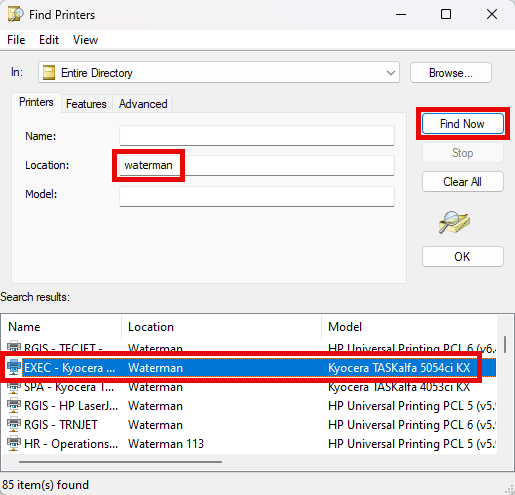
- Use any one of the three available search fields to try and find your printer. I prefer to use the Location field entering the building name, but you can also use the Name field entering an abbreviation of your department name. Hit Enter or click Find Now to show the results. Double-click your printer from the search results.
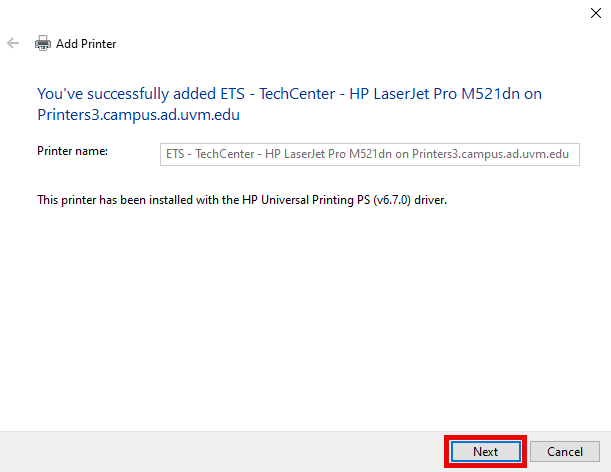
- A message should appear that You’ve successfully added the printer. Click Next.
- Print a test page or just click Finish.
Non-Domain-Joined Computers
The procedure below is meant mostly for personally-owned computers that need to connect to an on-campus printer, but can be used in some situations from UVM-owned computers as well. An on-campus Ethernet, UVM Wi-Fi, or eduroam connection is required.
- Open the Windows Settings app. One way to do this is to hold down the Windows key on your keyboard and tap the I key (+I).
- Open the Printers & Scanners menu. One way to do this is to use the Find a setting search box.
- Click + Add a printer or scanner.
- Scroll down to the bottom of the list of available printers that appears and click The printer that I want isn’t listed.
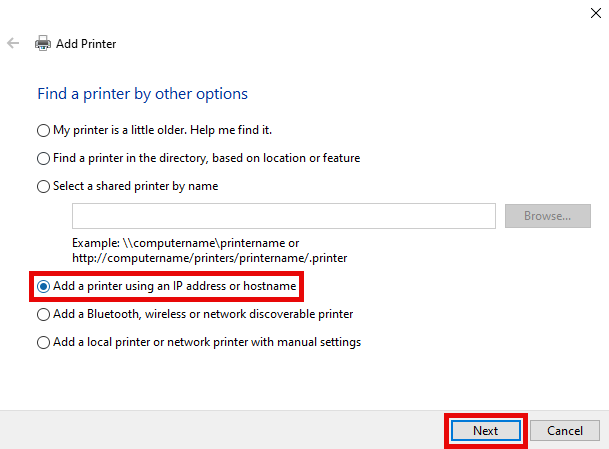
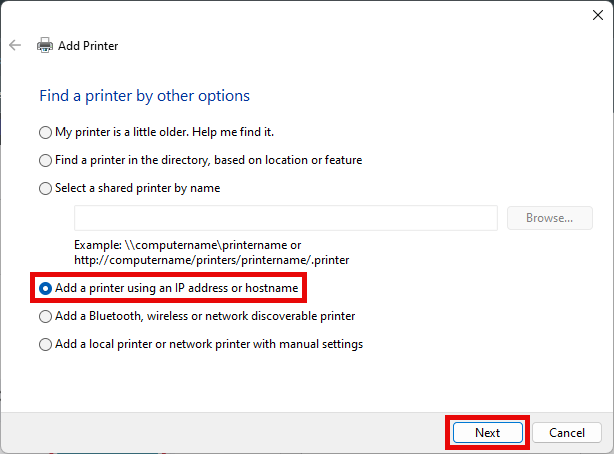
- Select Add a printer using IP address or hostname and click Next.
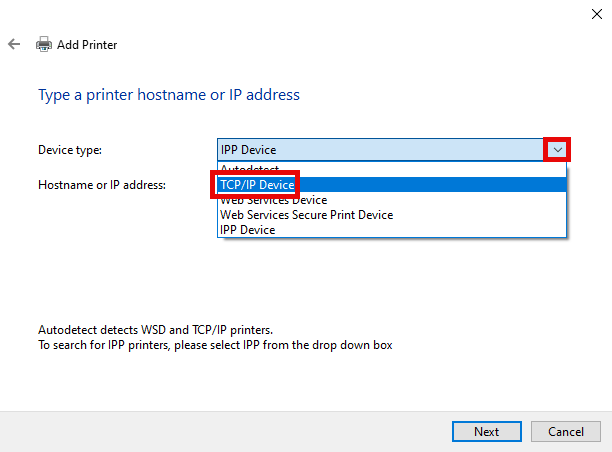
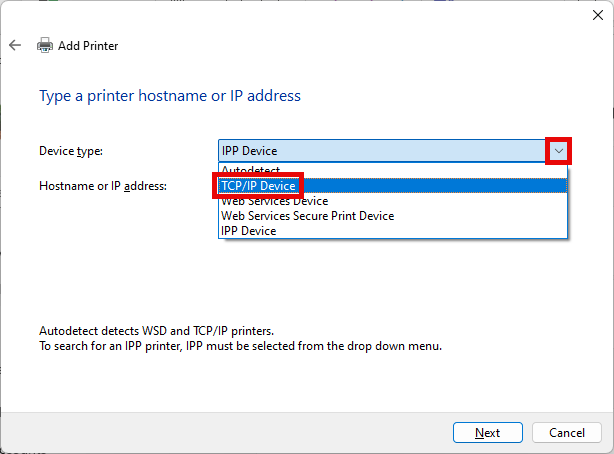
- Click the Device type drop-down menu and select TCP/IP Device.
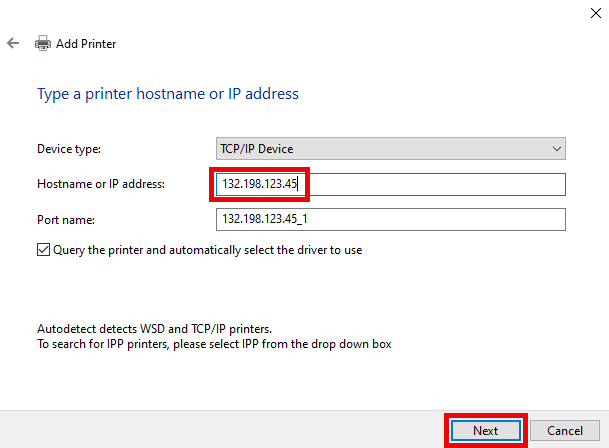
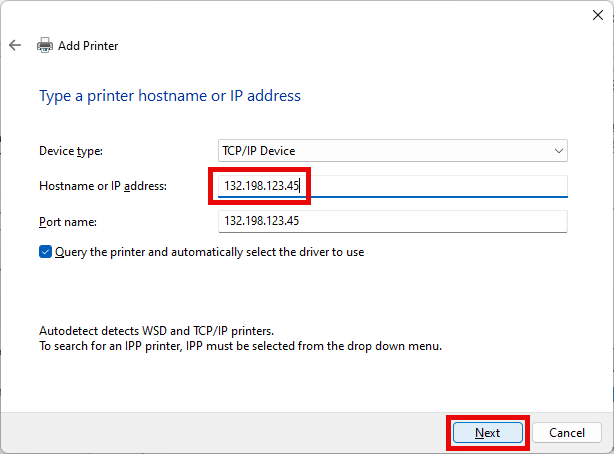
- Enter the IP address of your printer to the right of Hostname or IP address: and click Next.
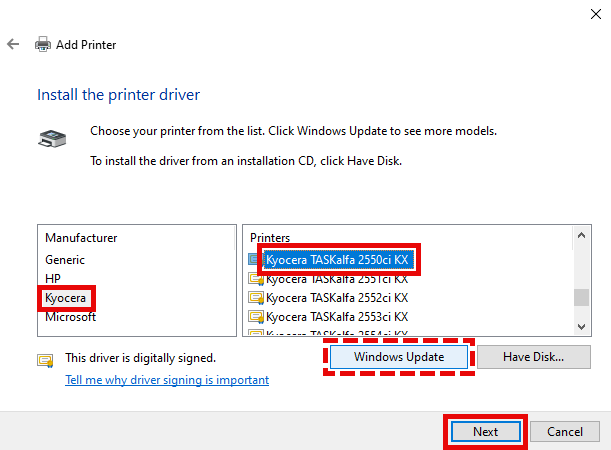
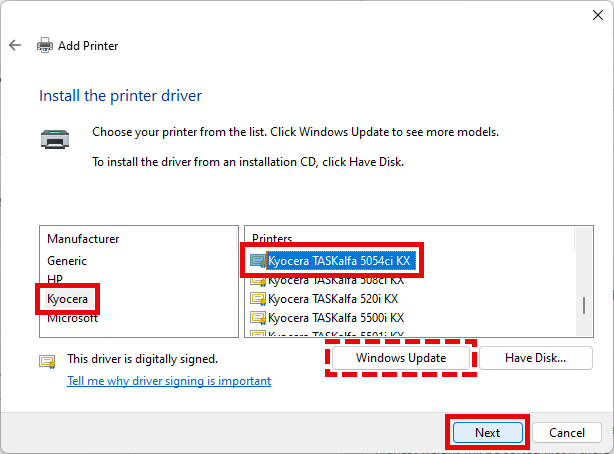
- It may prompt you to Install the printer driver. Select the Manufacturer and model of your printer. Click Windows Update if yours doesn’t appear on the list yet. Loading additional models this way takes time. Once selected, click Next.
- Enter whatever you like for the Printer name or just leave it as-is. Click Next.
- Once installed, Print a test page or just click Finish.
Manual Driver Installation (Optional)
Occasionally, certain features are missing after adding a printer using the above instructions. In these cases, special driver software needs to be downloaded and installed from the printer manufacturer’s website. This example is for Kyocera printers:
- Navigate to the Kyocera Download Center.
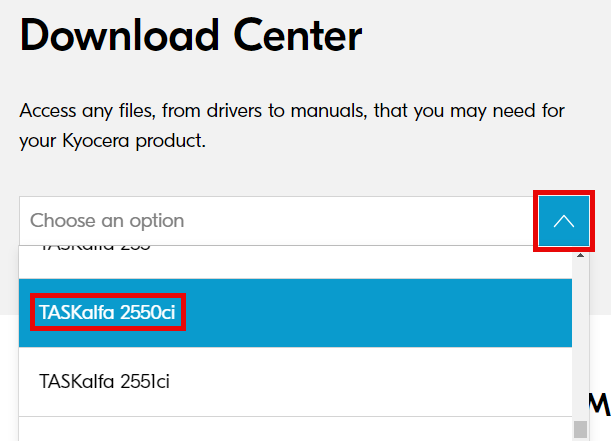
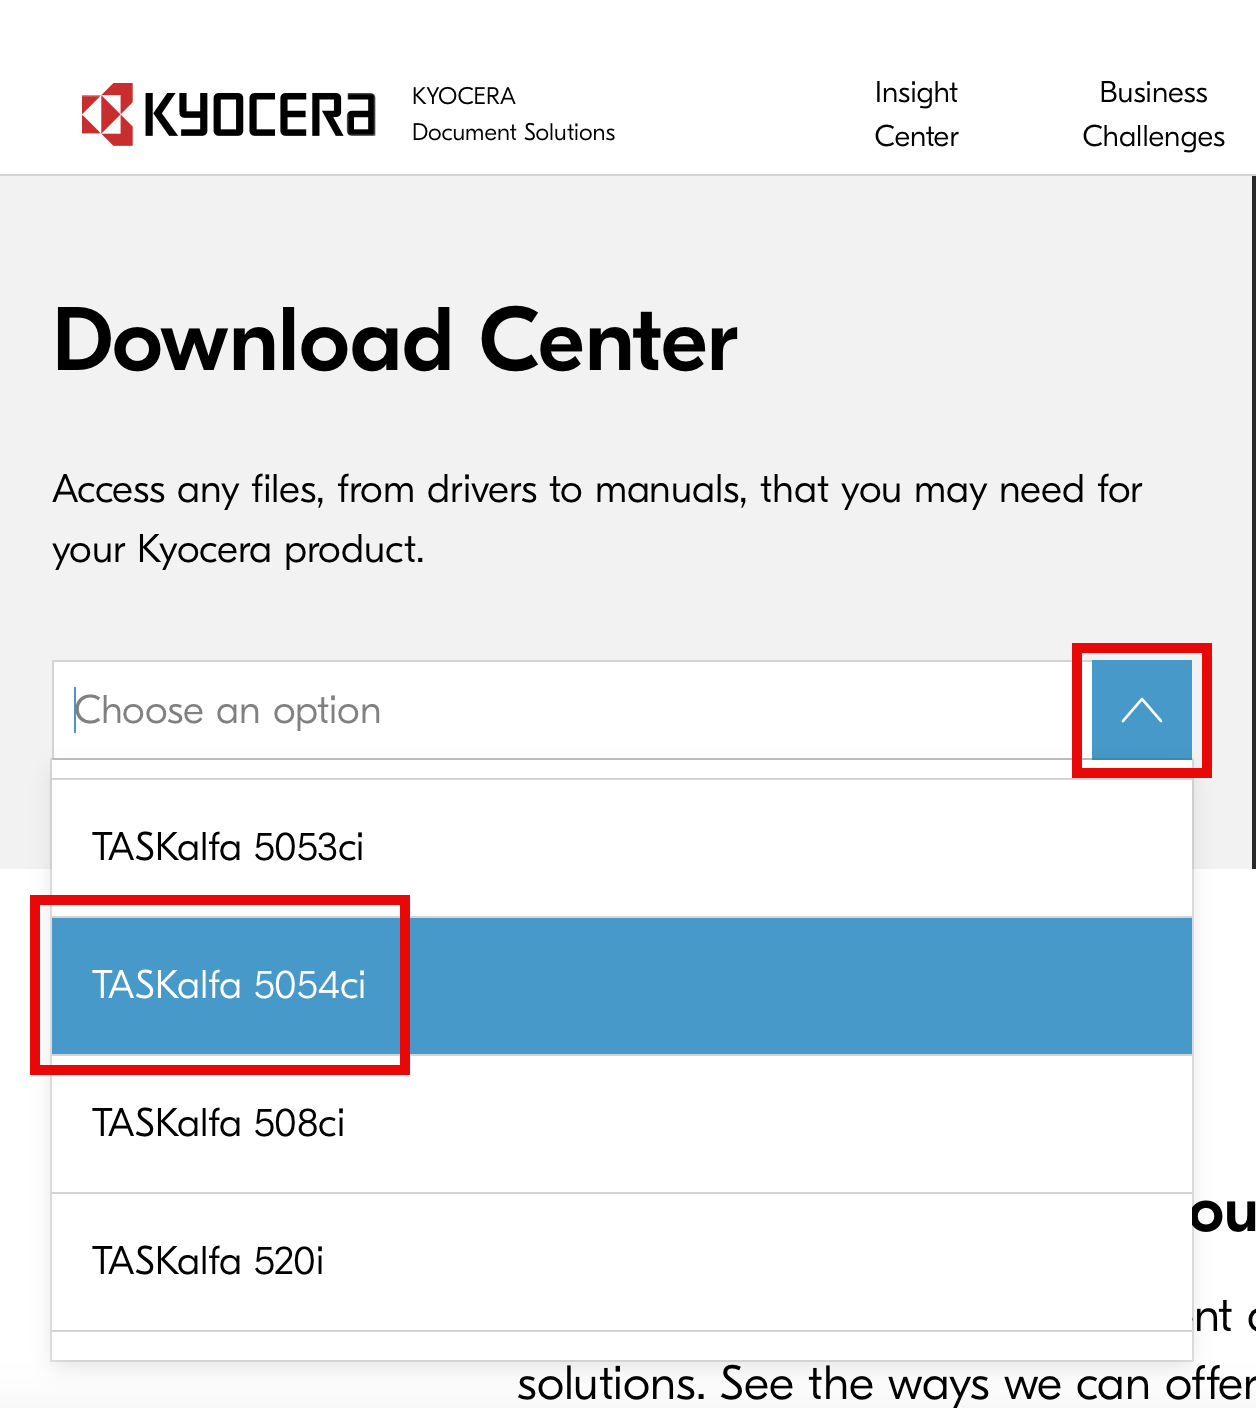
- Choose your printer model from the Choose an option drop-down menu.
- Scroll down and download the latest version of the KX Print Driver.

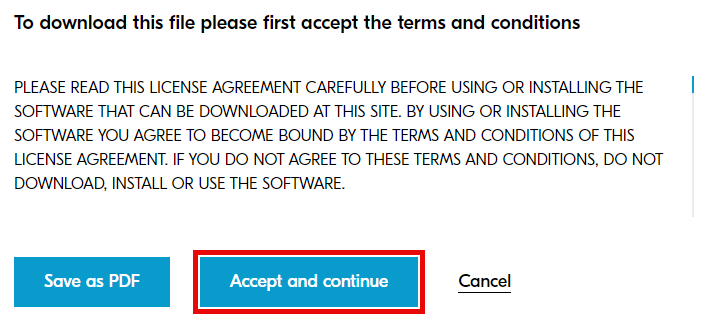
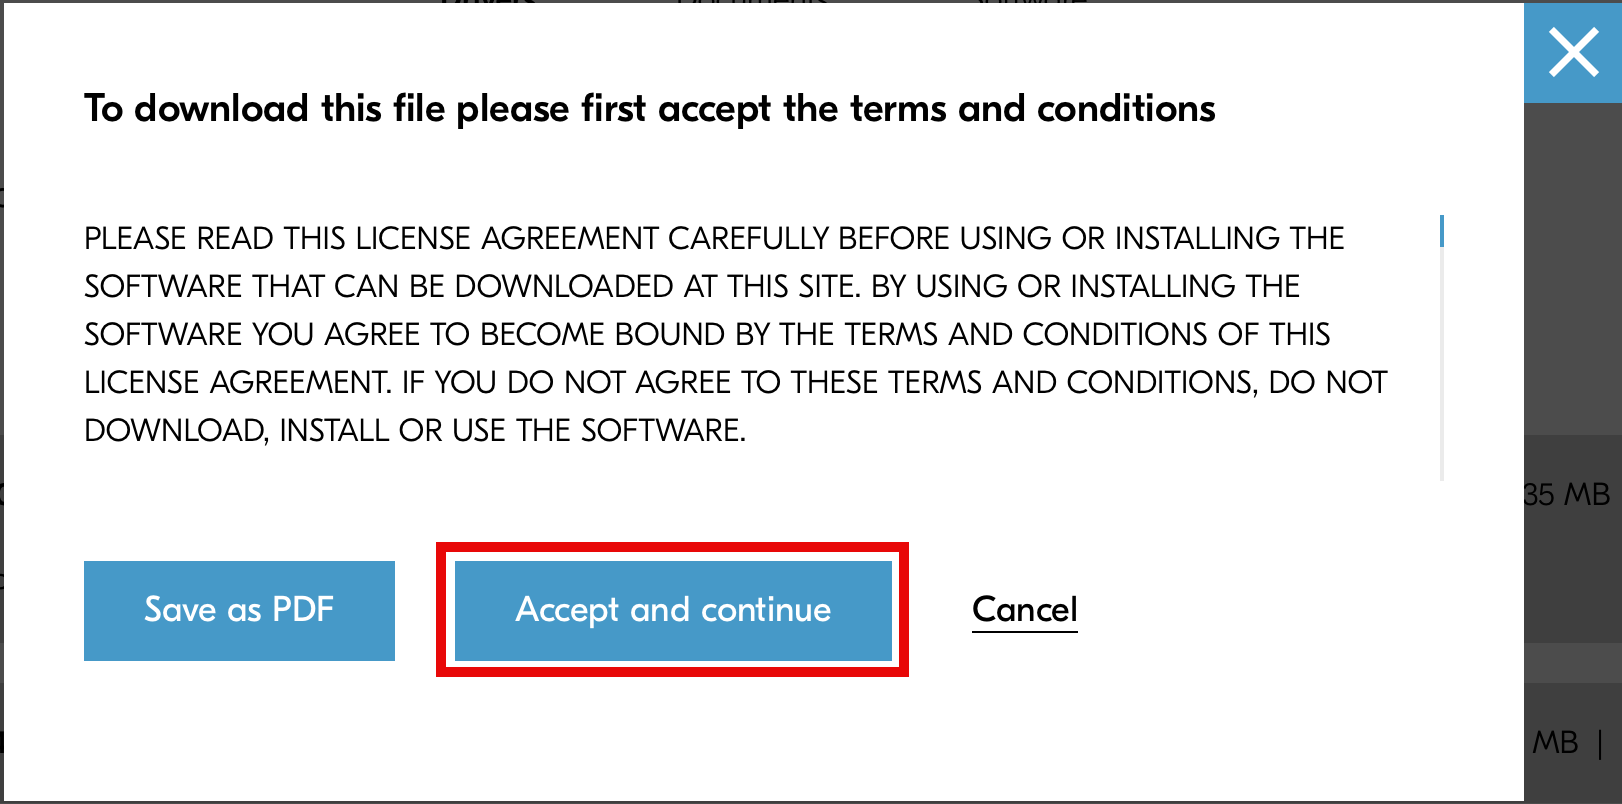
- You may have to click Accept and continue to agree to the terms.
- Open the downloaded file. If you are presented with a User Account Control window asking for a username and password, you can enter your local .\Administrator password or contact the UVM Tech Team.
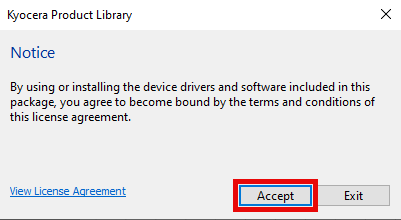
- You may have to Accept another license agreement, and then click OK.
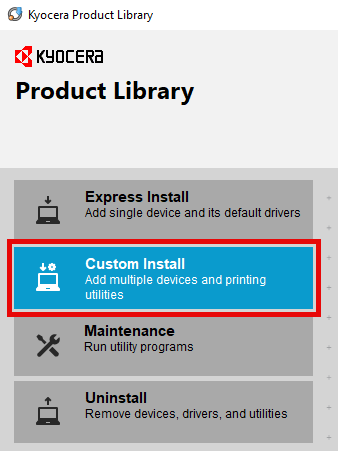
- Select Custom Install.
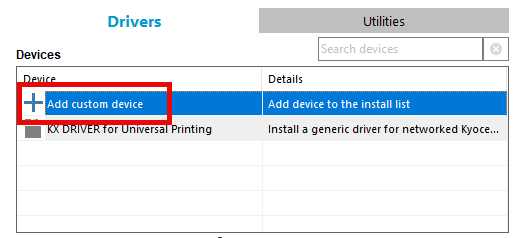
- Double-click Add custom device.
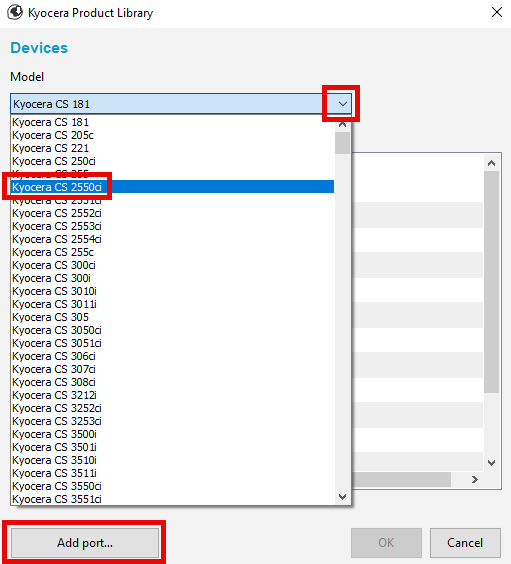
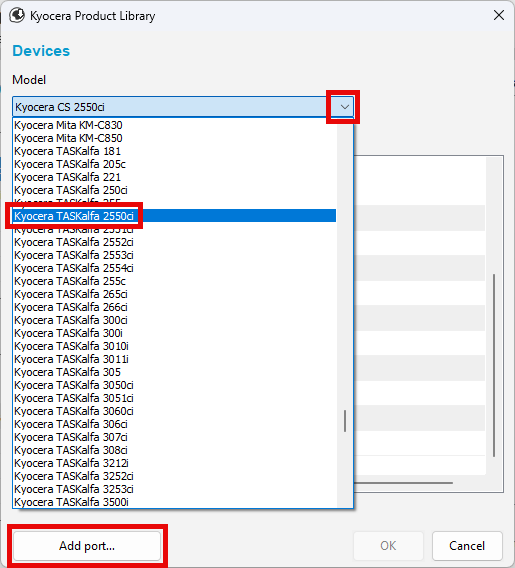
- Select your Model number from the drop-down menu and then click Add port….
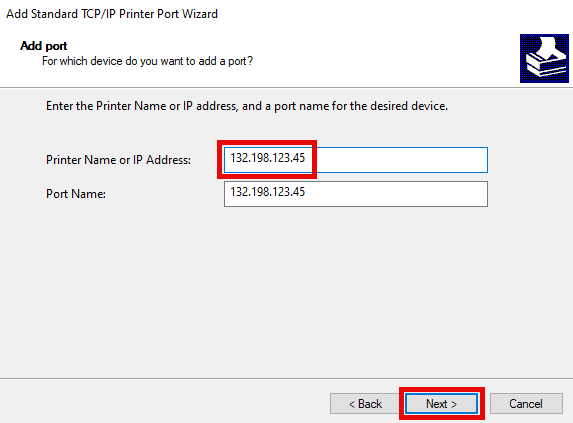
- Click Next, enter the IP Address for your printer, and click Next again.
- Click Finish and OK, then double-click KX Driver and click Install.

- Click Finish when the install is complete. You can close the Kyocera Product Library window.
Print Codes
Some printers require the entry of an additional password. This is most common for printers in hallways and other public areas as an additional way to restrict access to only certain departments. To enter the print code on a Windows 10 computer for a Kyocera printer:
- Open the Windows Settings app. One way to do this is to hold down the Windows key on your keyboard and tap the I key (+I).
- Open the Printers & Scanners menu. One way to do this is to use the Find a setting search box.
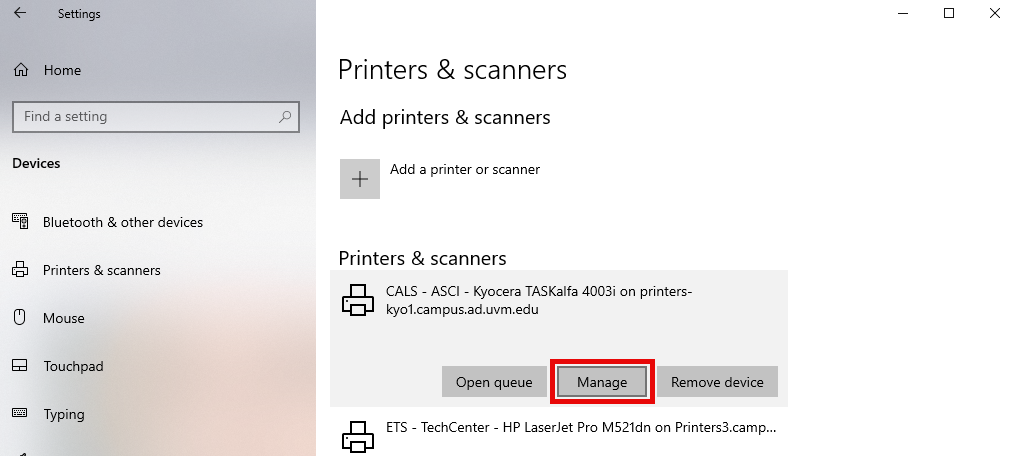
- Select your printer from the list and click Manage.
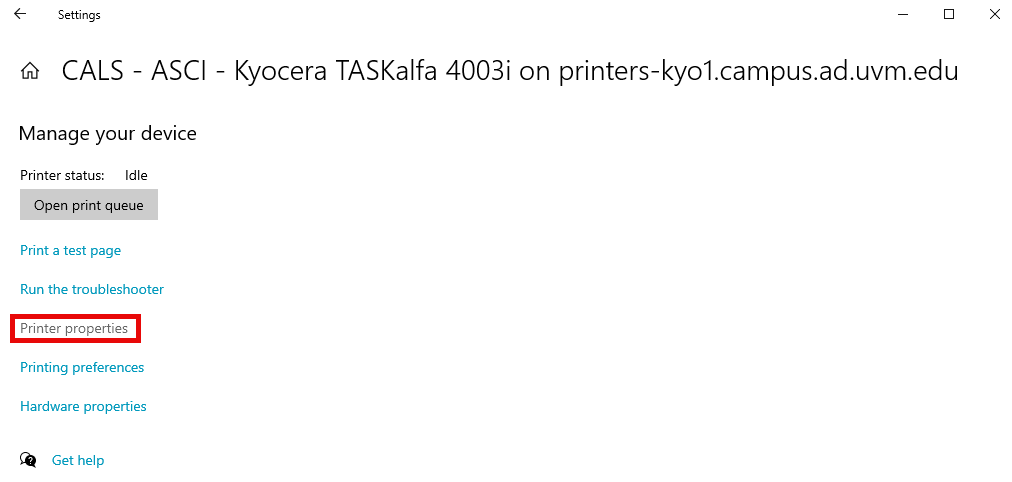
- Click Printer properties.
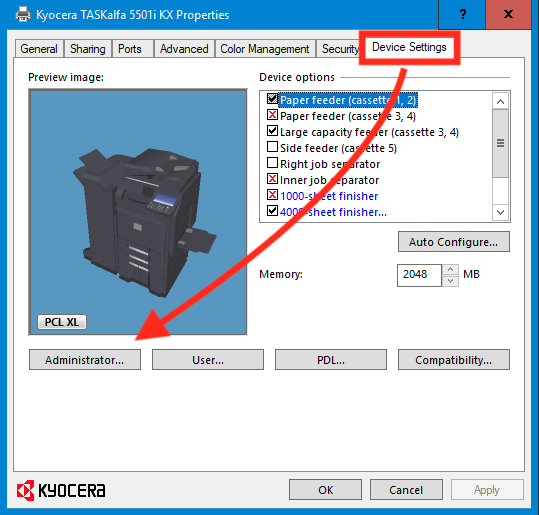
- Under the Device Settings tab, select Administrator.

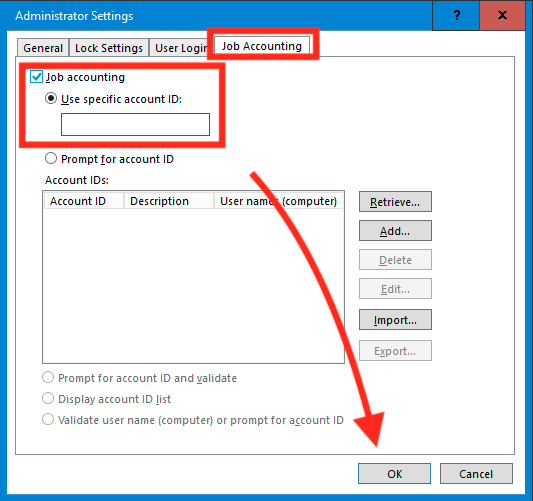
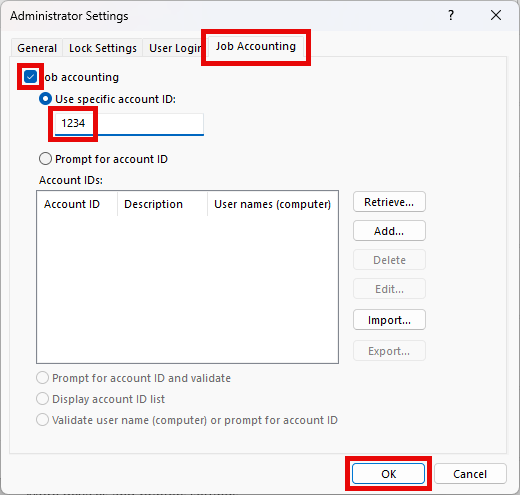
- Under the Job Accounting tab, enable Job accounting, enter the account ID (AKA your job accounting code), then click OK.

Windows 11
Domain-Joined Computers
The procedure below is the preferred connection method, but requires that you are logged into the CAMPUS domain with your NetID credentials (not a local account like .\Administrator). To verify your computer is domain joined see this article.
- Open the Windows Settings app. One way to do this is to hold down the Windows key on your keyboard and tap the I key (+I).
- Open the Bluetooth & devices > Printers & scanners menu. One way to do this is to use the Find a setting search box.
- Click Add device.

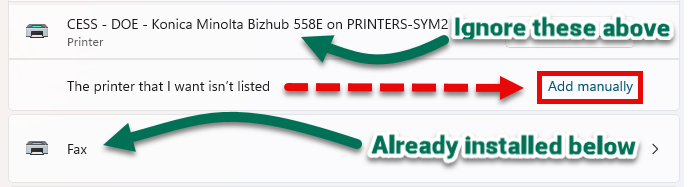
- Scroll down to the bottom of the list of available printers but above the list of printers already installed on your device, and click Add manually.
- Select Find a printer in the directory, based on location or feature. Click Next.
- Use any one of the three available search fields to try and find your printer. I prefer to use the Location field entering the building name, but you can also use the Name field entering an abbreviation of your department name. Hit Enter or click Find Now to show the results. Double-click your printer from the search results.
- Once successfully added, click Next. Click Print a test page or just click Finish.
Non-Domain-Joined Computers
The procedure below is meant mostly for personally-owned computers that need to connect to an on-campus printer, but can be used in some situations from UVM-owned computers as well. An on-campus Ethernet, UVM Wi-Fi, or eduroam connection is required.
- Open the Windows Settings app. One way to do this is to hold down the Windows key on your keyboard and tap the I key (+I).
- Open the Bluetooth & devices > Printers & scanners menu. One way to do this is to use the Find a setting search box.
- Click Add device.
- Scroll down to the bottom of the list of available printers but above the list of printers already installed on your device, and click Add manually.
- Select Add a printer using an IP address or hostname. Click Next.
- Select TCP/IP Device from the Device type drop-down menu.
- Enter the IP address of your printer in the Hostname or IP address box. Leave the Port name and Query the printer boxes as-is. Click Next.
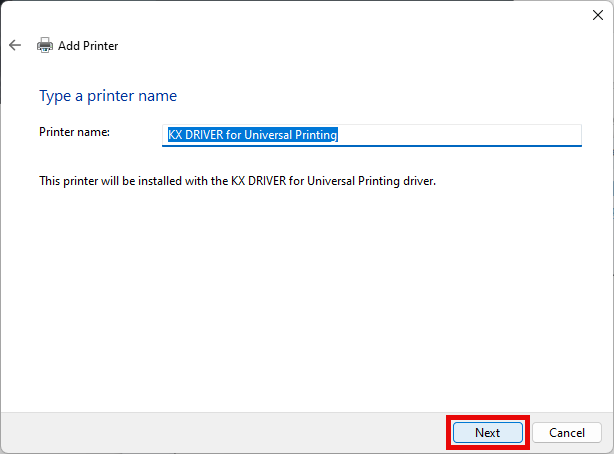
- On the next screen, select the Manufacturer and Model of your printer. The model number will likely be appended with something like “ci KX” which is fine. If your printer or manufacturer does not appear on the list, click Windows Update and wait for the expanded list of printers load, or just select the universal print driver from the top of the list (for example, KX DRIVER for Universal Printing). Click Next.
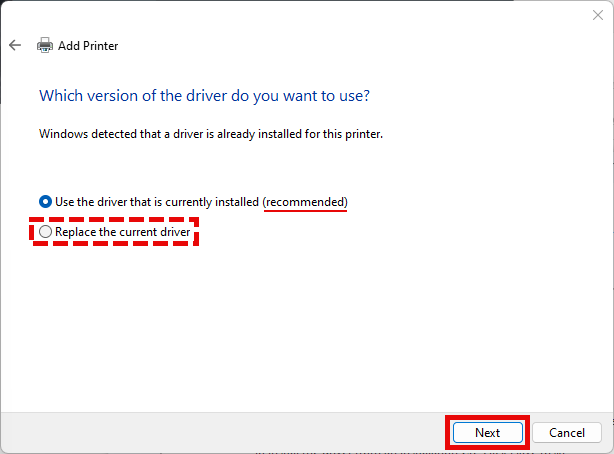
- If the following window appears, leave the recommended choice as-is and click Next. However, if this is your second attempt to add the printer, you can try the Replace the current driver option instead.
- Choose anything you like for the Printer name or just leave the default choice as-is. Click Next.
- Once successfully added, Print a test page or just click Finish.
Manual Driver Installation (Optional)
Occasionally certain features are missing after adding a printer using the above instructions. In these cases special driver software needs to be downloaded and installed from the printer manufacturer’s website. This example is for Kyocera printers:
- Navigate to the Kyocera Download Center.
- Choose your printer model from the Choose an option drop-down menu.
- Scroll down and download the latest version of the KX Print Driver.
- You may have to click Accept and continue to agree to the terms.
- Open the downloaded file. If you are presented with a User Account Control window asking for a username and password, you can enter your local .\Administrator password or contact the UVM Tech Team.
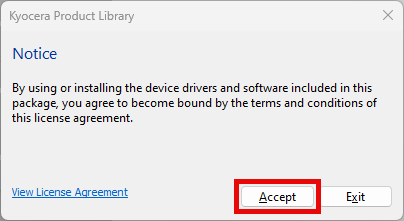
- You may have to Accept another license agreement, and then click OK.
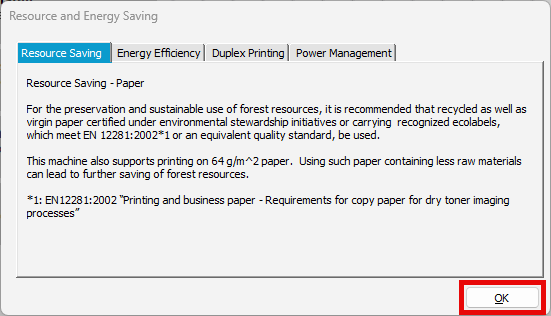
- A box may appear with information about the energy saving features of your printer. Read through the various tabs or just click OK.
- Select Custom Install.
- Double-click Add custom device.
- Select your Model number from the drop-down menu and then click Add port….
- Click Next, enter the IP Address for your printer, and click Next again.

- Click Finish, OK, double-click KX Driver, then click Install.
- Click Finish when the install is complete. You can close the Kyocera Product Library window.
Print Codes
Some printers require the entry of an additional password. This is most common for printers in public areas to restrict access top only those in certain departments. To enter the print code on a Windows 11 computer for a Kyocera printer:
- Open the Windows Settings app. One way to do this is to hold down the Windows key on your keyboard and tap the I key (+I).
- Open the Bluetooth & devices > Printers & scanners menu. One way to do this is to use the Find a setting search box.
- Select your printer from the list.
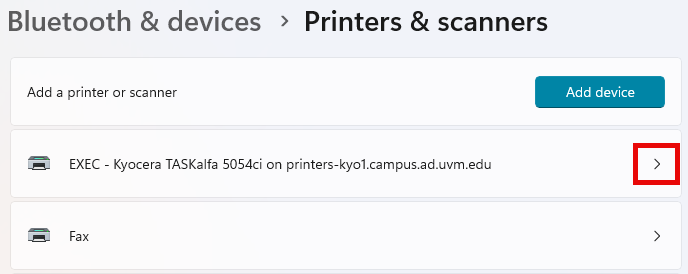
- Open Printer properties.
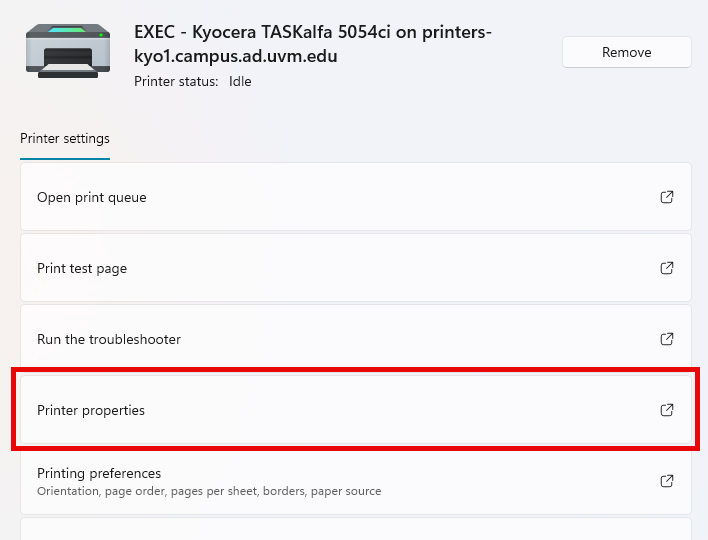
- Under the Device Settings tab, select Administrator.
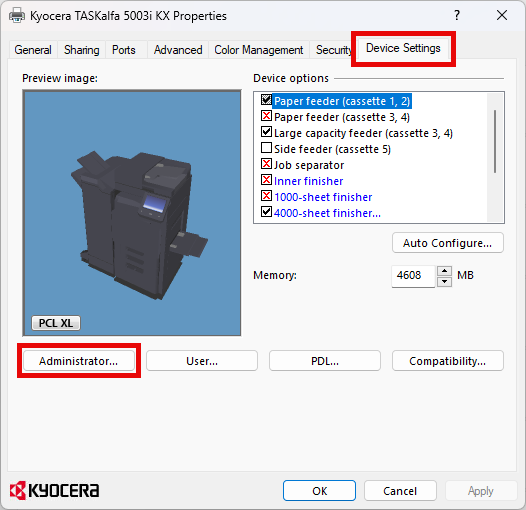
- Under the Job Accounting tab, check the Job accounting checkbox, enter the account ID (AKA the passcode to connect to your printer), then click OK.
macOS
Downloading and Installing Drivers
Drivers enable your computer’s Operating System to interact with physical devices, including a printer or copier.
For most printers, your operating system can provide generic printer drivers as the default selection when adding a printer. However, your multi-function printing device may have additional functionality in the form of a punch unit, automatic stapler, or account tracking. To utilize these functions, you must download and install the appropriate driver.
Below are instructions for finding and installing drivers for Kyocera printers.
- Visit the Kyocera Download Center support site:
https://www.kyoceradocumentsolutions.us/en/support/downloads.html - Select your printer model from the drop-down menu.
- Scroll down to find the latest version of the Mac Print Driver and click the down arrow to download.

- Click Accept and continue to agree to the software license terms.
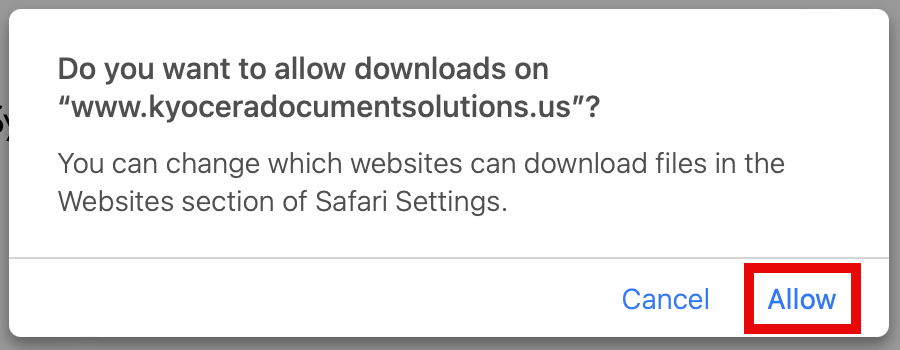
- Click Allow to allow downloads from this website.
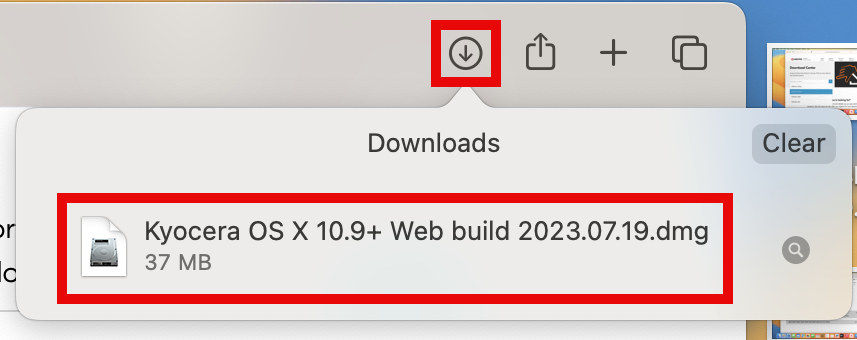
- Find the downloaded file in your Downloads folder or the downloads list () in the upper-right corner of your web browser. Double-click the disk image (.dmg) file.
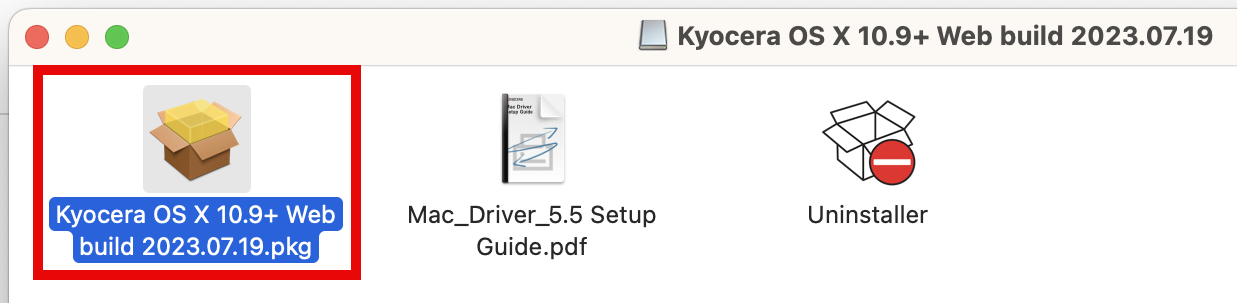
- Double-click the package installer (.pkg) file.
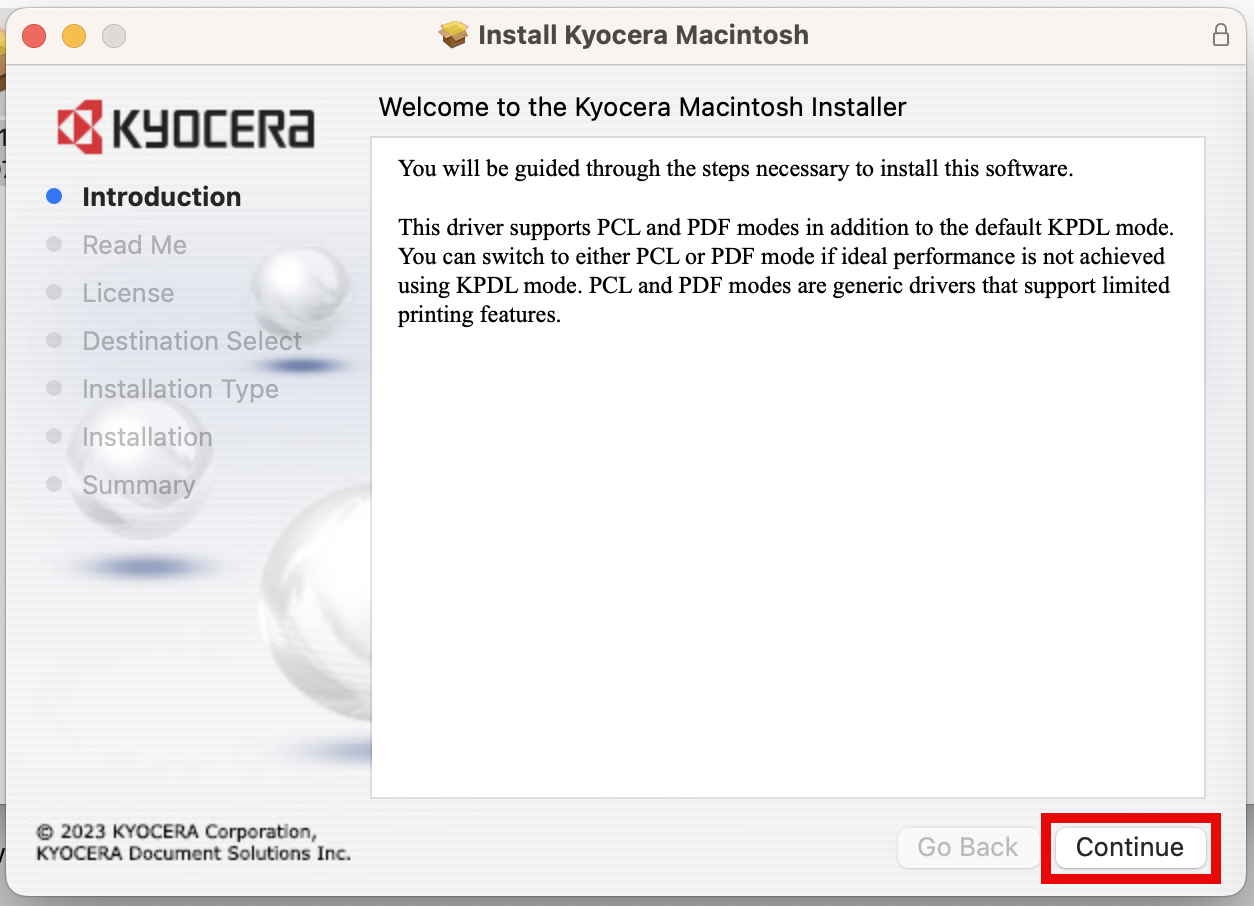
- Step through the install wizard clicking Continue, Agree, and Install.
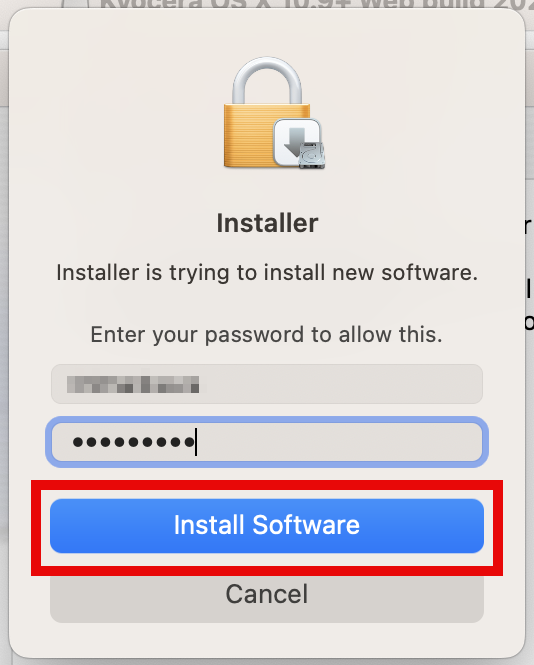
- When prompted, enter the admin password for the computer. Click Install Software.
When the installation was successful, click Close and then OK, and finally Move to trash if prompted.
Add a Printer
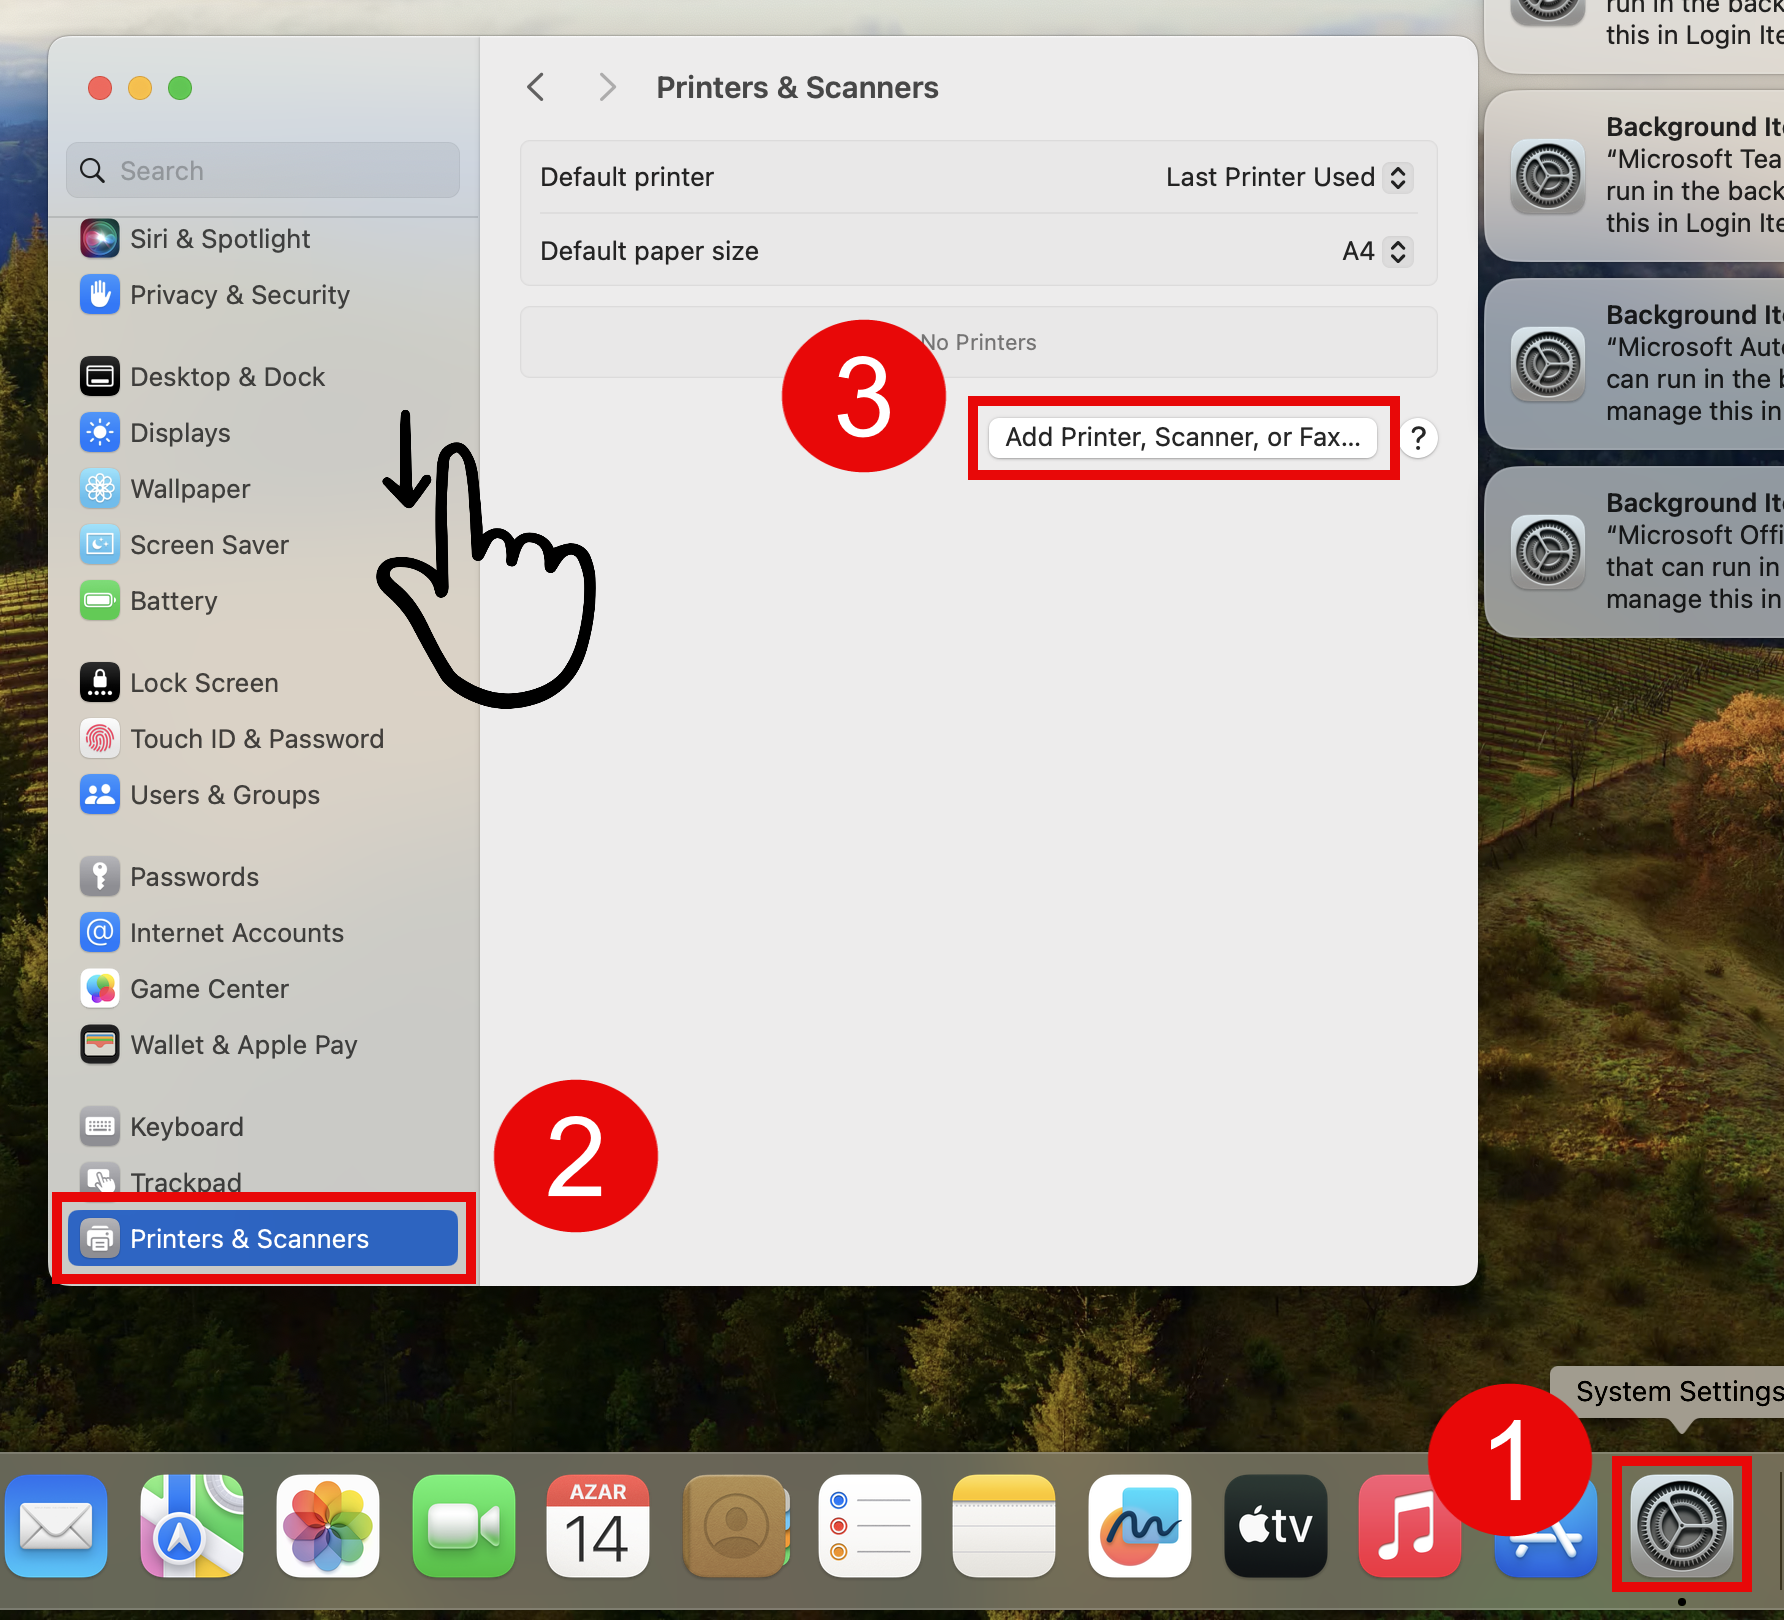
- Open System Settings.
- Scroll down to the bottom of the menu on the left and select Printers & Scanners.
- Select Add Printer, Scanner, or Fax….
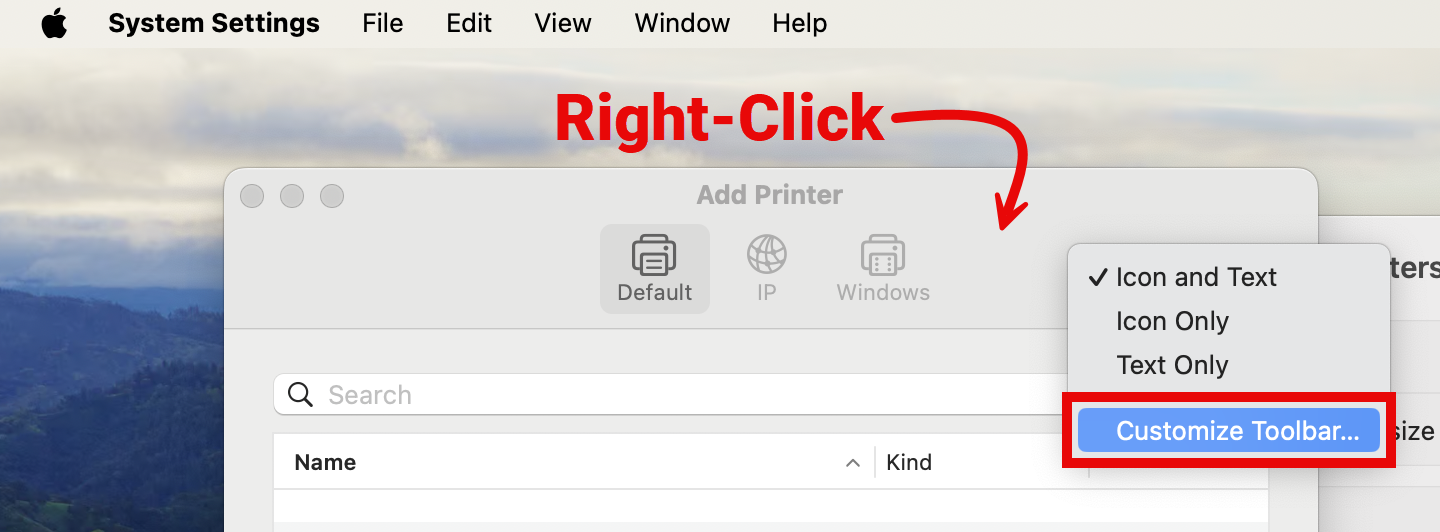
- Right-click (or control+click) in the blank space near the top of the Add Printer window. Select Customize Toolbar….
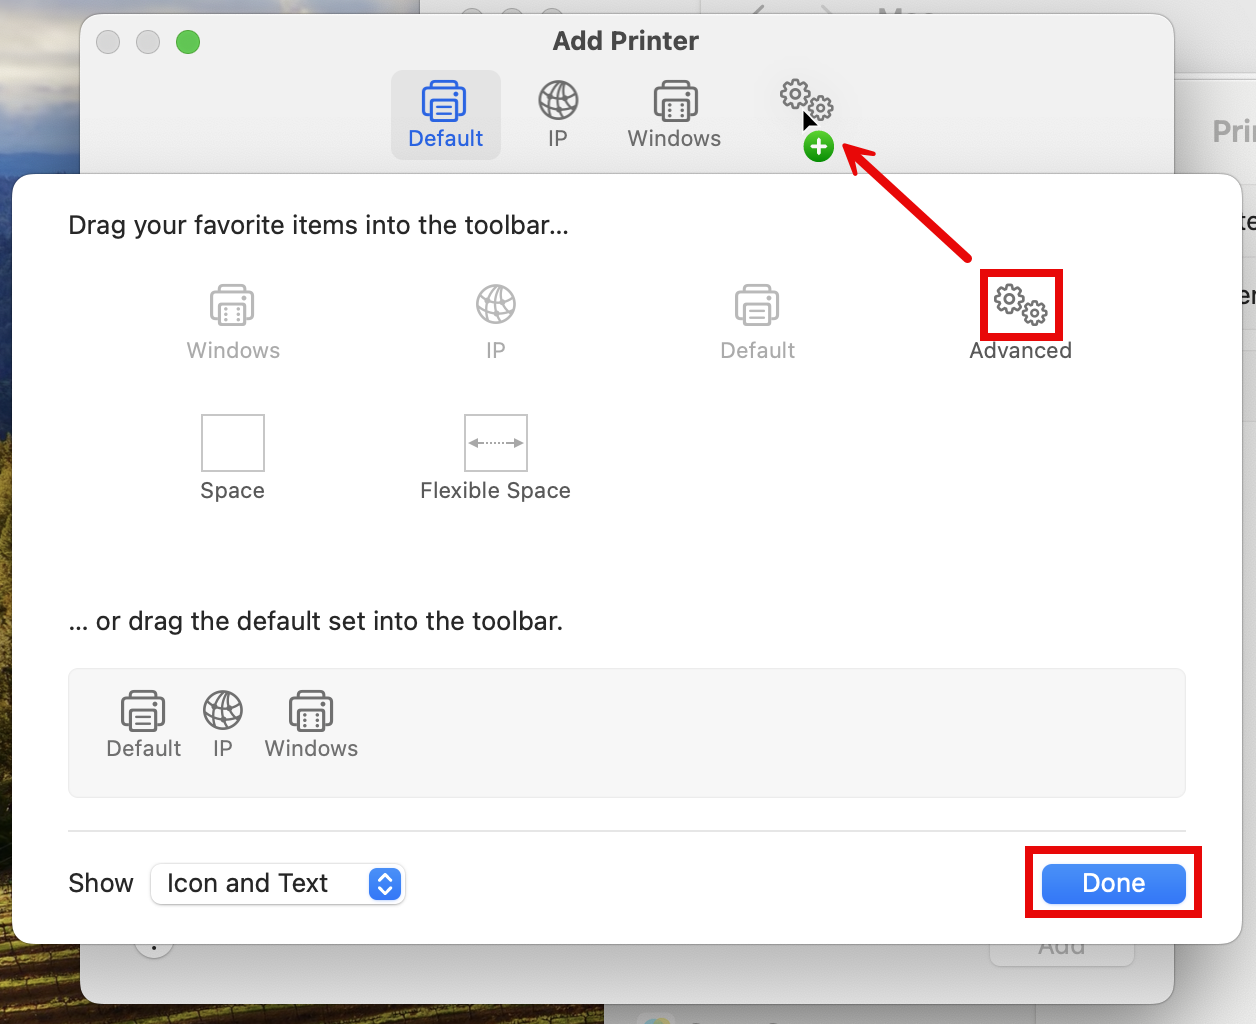
- Click-and-drag the Advanced gear icons to the place you right-clicked in the previous step to add that option to the toolbar. Click Done.
- Select the Advanced option that you just added. At this point it will try to search for printers, but it won’t find anything. Go to the next step.
- For the Type drop-down menu, select LPD/LPR Host or Printer.
- For URL, enter the IP address of your printer to the right of the prepopulated “lpd://“.
- Enter anything you like for the Name and Location, but I would recommend the printer model number and the building/room number that houses the printer.
- The “Use:” drop-down menu should populate automatically with the printer driver. “Generic PostScript Printer” will likely work fine for basic printing, but not for more advanced features. Instead, click the drop-down menu, choose Select software… and choose your printer from the list. If your printer does not show up on the list, close that window and Download & Install the driver using the instructions above on this page.
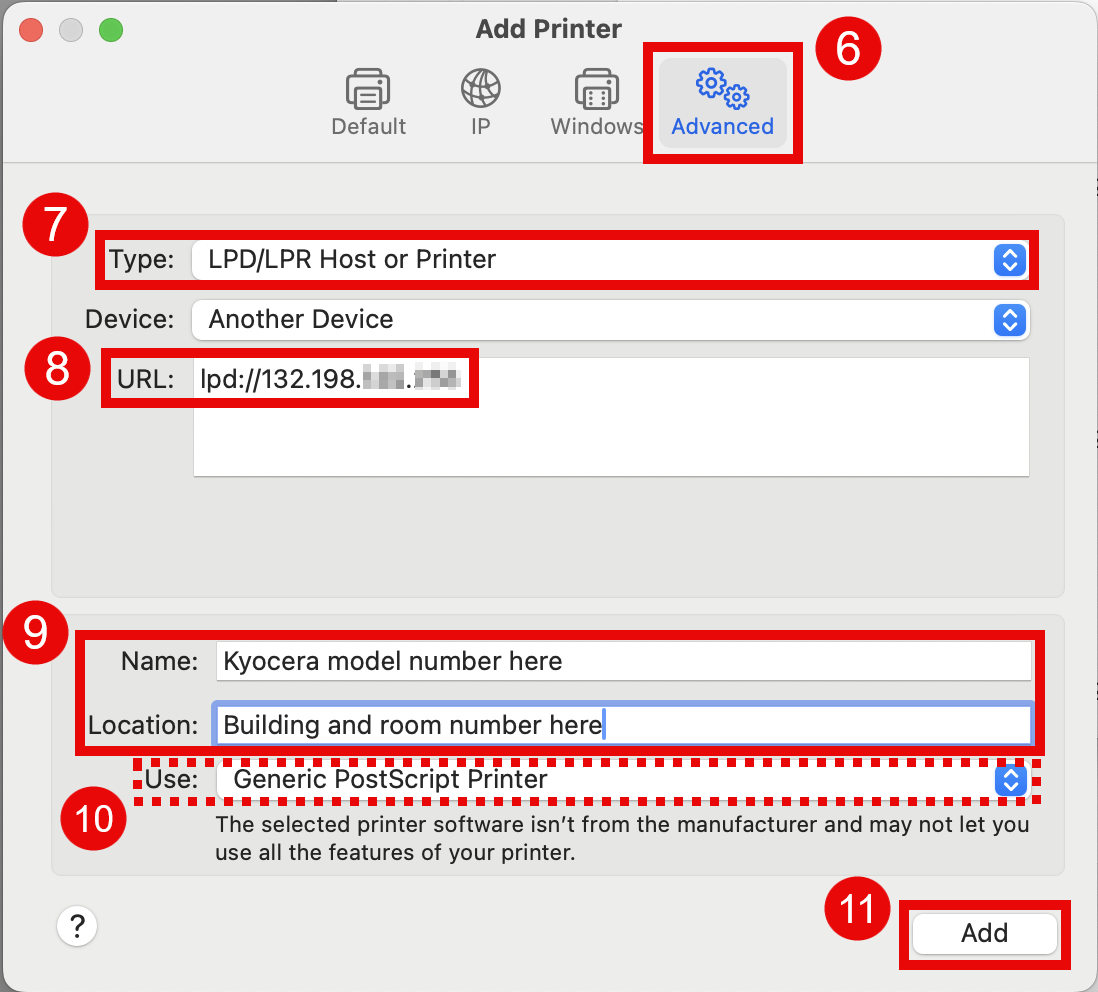
- Click Add.
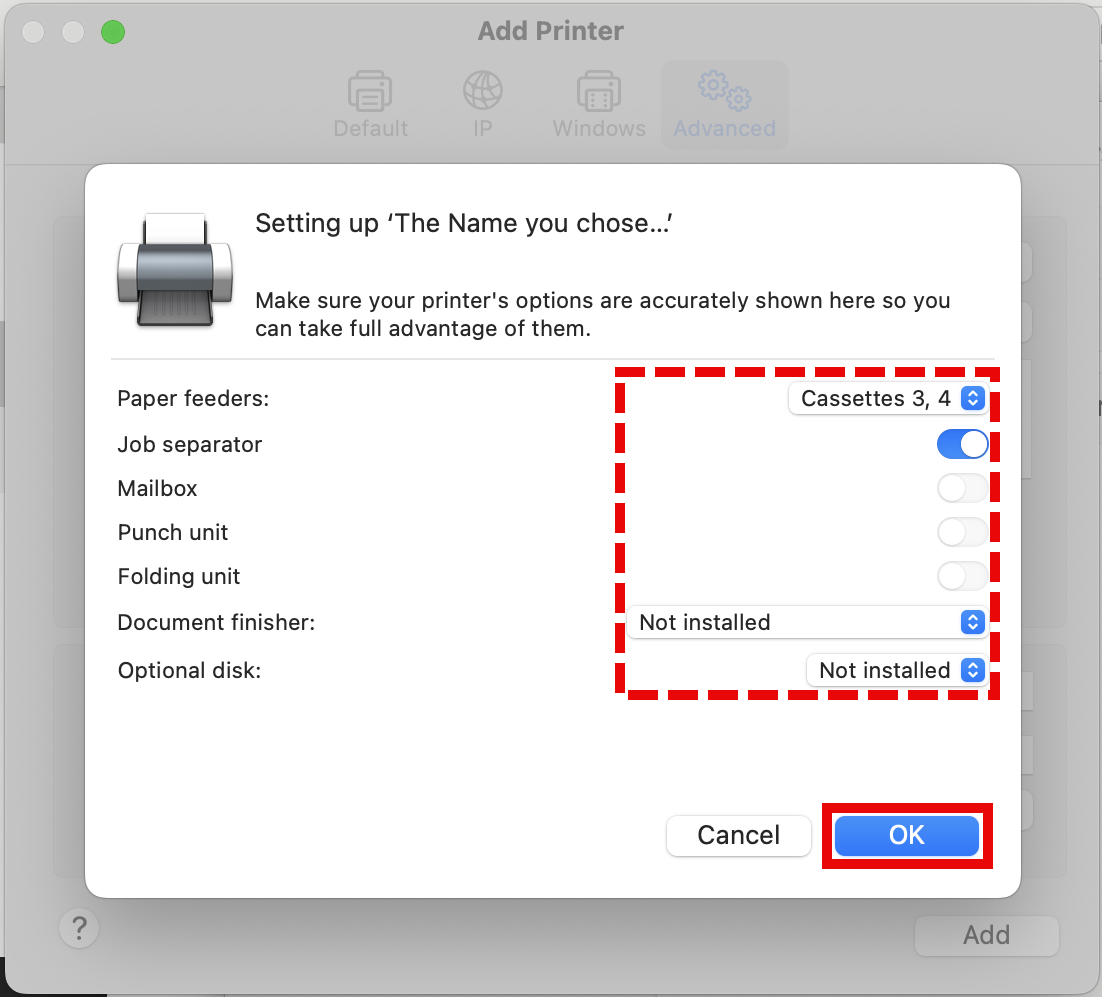
- You may now be prompted to choose some additional features like “Duplex Printing Unit”. I would only recommend enabling any feature on this screen if you are sure your printer has it. You may be able to find some of these details by navigating to the web Command Center for your printer, which you can do by entering the IP address of your printer into a web browser like it’s a web site URL. Once there, select Device Information > Configuration. This step is pretty advanced, so I would recommend reaching out to the Tech Team or others in your department if you are unsure. Click OK when finished.
Print Codes
Some printers require the entry of an additional password. This is most common for printers in public areas like hallways to prevent unauthorized use. To enter that password on a Mac computer for a Kyocera printer:
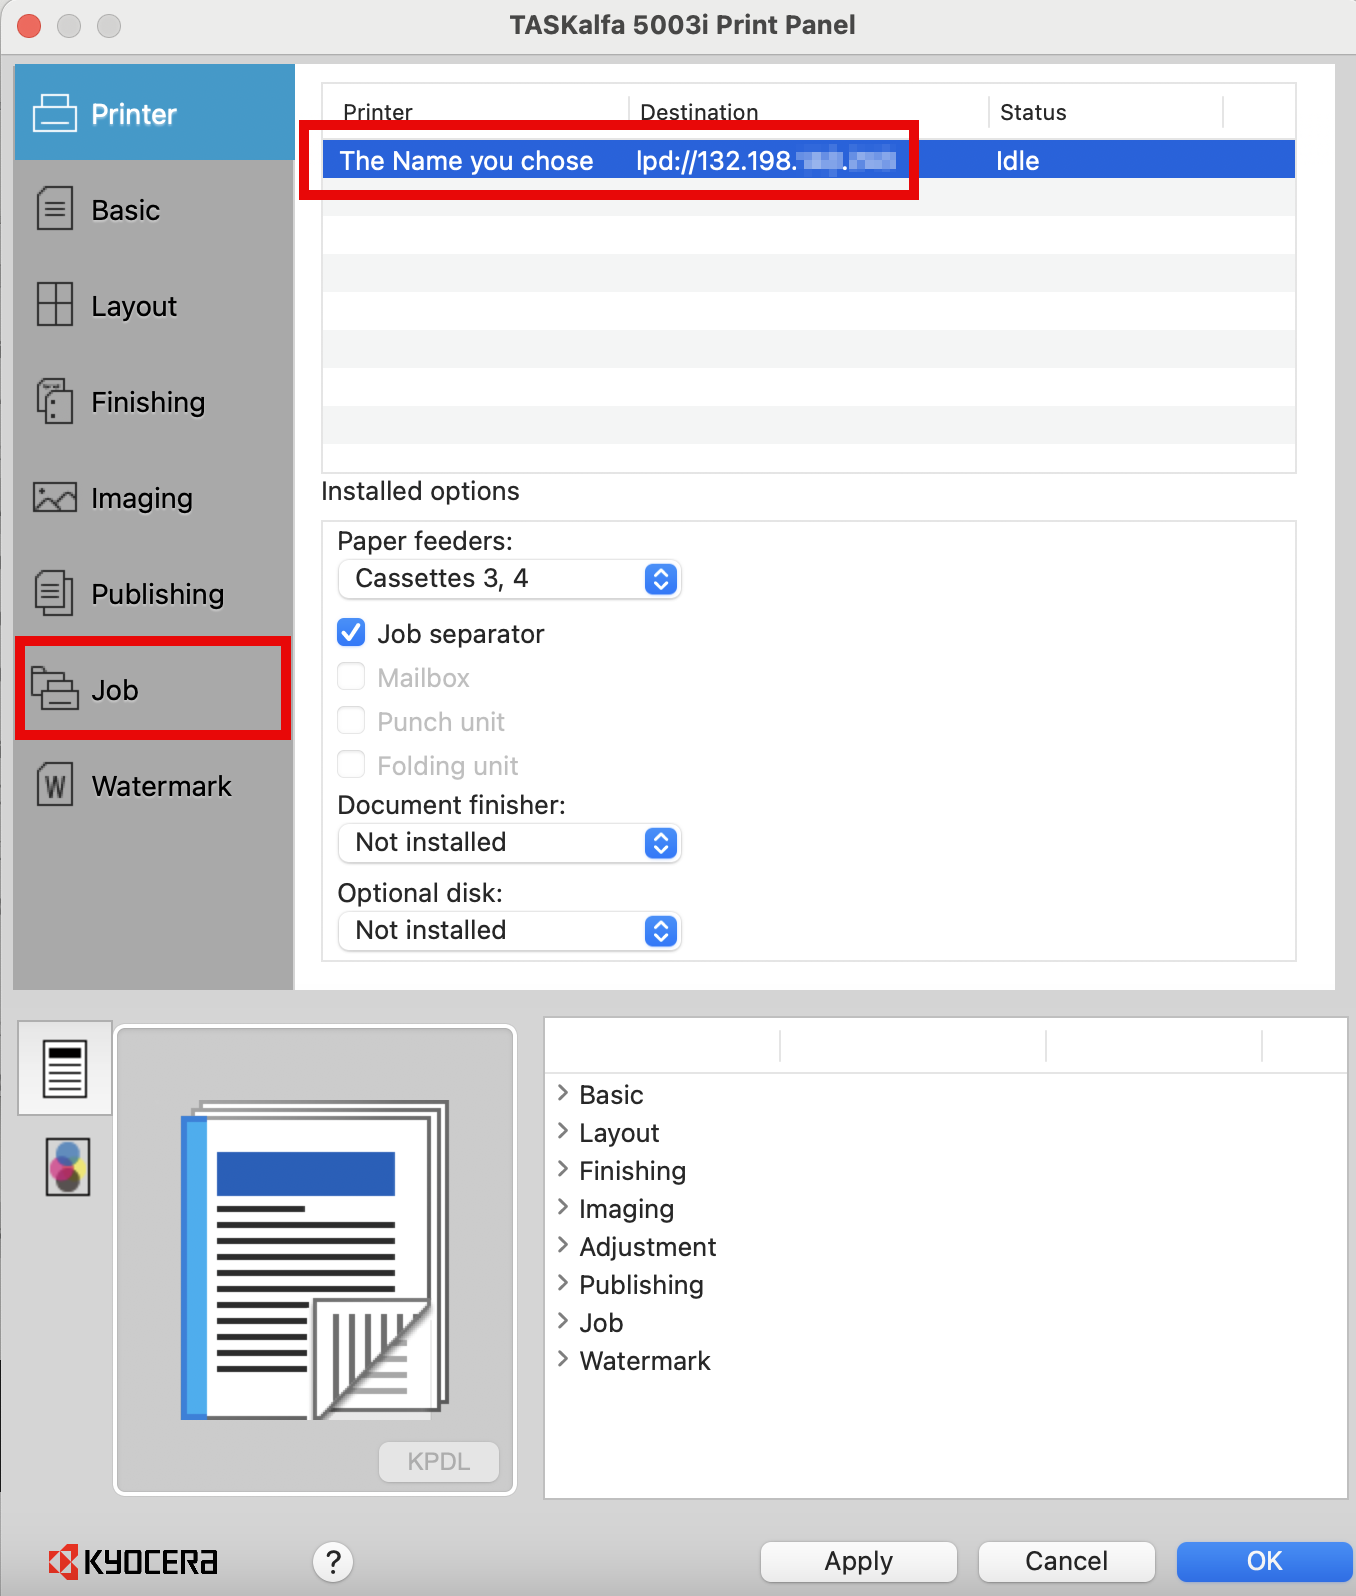
- Open the Kyocera Print Panel application, which was installed along with the printer drivers if you followed those instructions above. You can find this app in the Applications folder.
- Select the correct device from the list, then select Job from the left hand menu.
- Turn on the check mark next by the icon for Job Accounting then enter your Account ID/print code in the box underneath Account ID.
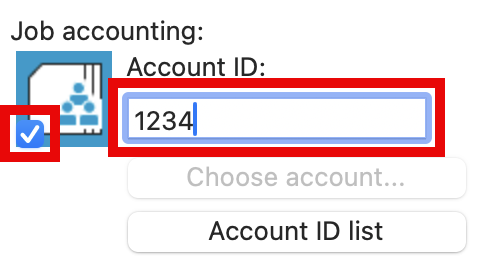
- Click OK.