
When you hit “record” in a Teams (non-Channel) meeting, that file is now stored in your OneDrive. Sometimes you may want to share a Teams meeting recording with someone who wasn’t invited to the meeting (and therefore doesn’t already have access). Follow these steps for any meeting that was scheduled on your calendar.
Note: These steps will only work for non-Channel meetings (e.g., meetings scheduled on the Teams Calendar). To view Channel meeting recordings, go to the Files area of that Channel and look in the Recordings folder.
Find Teams Meetings in OneDrive
- Go to https://onedrive.com.
- If you are not signed in automatically, click the Sign in icon at the top right of the page.

- Type your UVM email address (YourNetID@uvm.edu) and click Next.
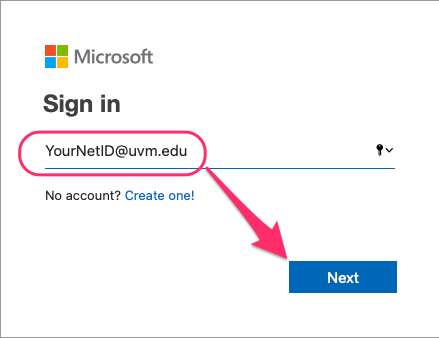
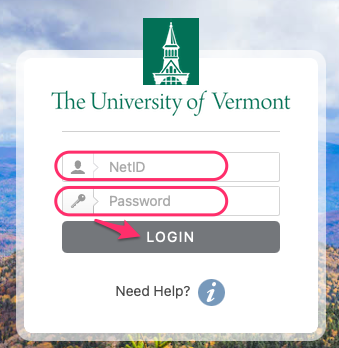
- Enter your NetID and Password on the UVM Authentication page and click Login. You may be asked whether you wish for the browser to remember your login; only say “yes” on a personal device.
- Locate the Recordings folder that was automatically created for you.

- When you open the Recordings folder (click on it), you will see a list of all non-Channel Teams meeting recordings that you recorded (only the owner of the recording will see meeting recordings in this folder). The names of these files correspond with the Teams Meeting names, with a time/date stamp appended.
Share Teams Meeting Recordings from OneDrive
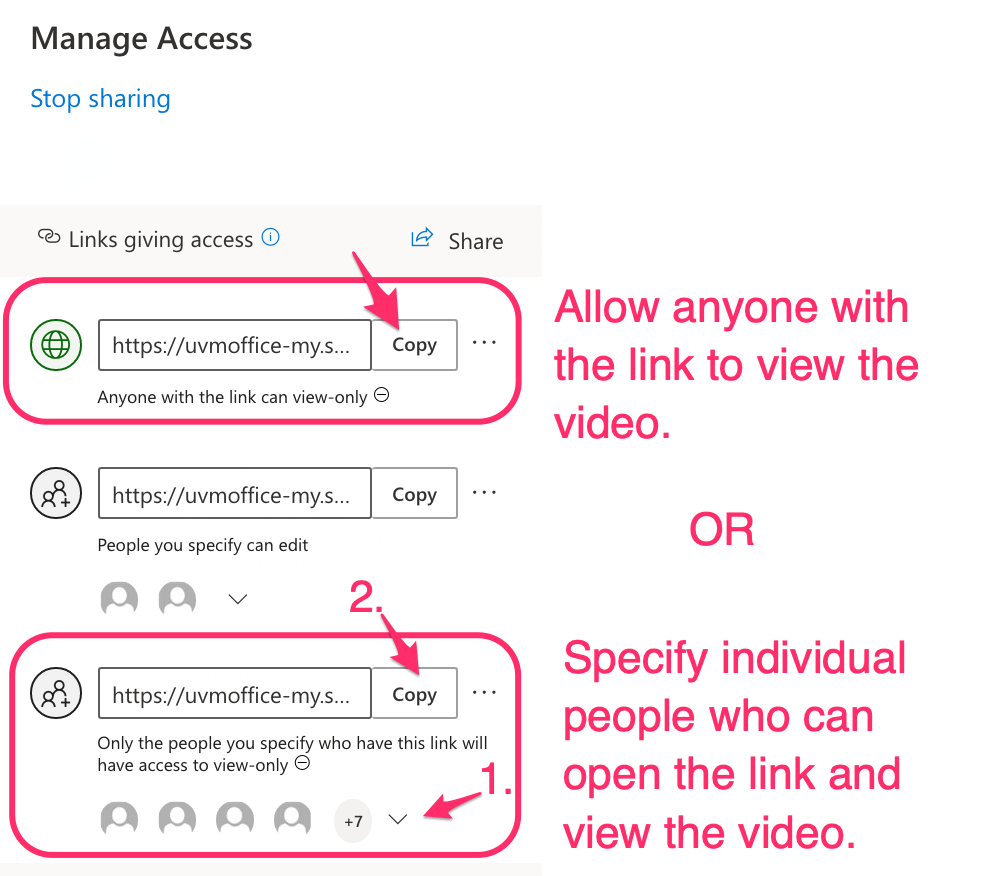
- Once you’ve found the recording you wish to share (see above), click the 3 dots to the right of a recording’s name to access a menu. To share a Teams meeting recording from OneDrive, click Manage access.

- From this new screen, you can either copy the link that allows anyone with the link to view the video, or you can designate specific people to have view-only access. This will require editing the list of people and adding each person one-by-one before copying the link.
- Share the link copied in Step 3 via email or Teams Chat message.