
Overview
You can add, drop, or withdraw from your courses using UVM’s Self Service System. These actions can be performed during the dates set by the Office of the Registrar: Academic Calendars | Office of the Registrar
Frequently Asked Add/Drop/Withdraw Questions
Access Self Service Add/Drop/Withdraw from myUVM
To access the Add/Drop/Withdraw Classes Page, which allows you to adjust your courses for a term, use the My Courses card in myUVM.
Find the Add/Drop/Withdraw Classes page
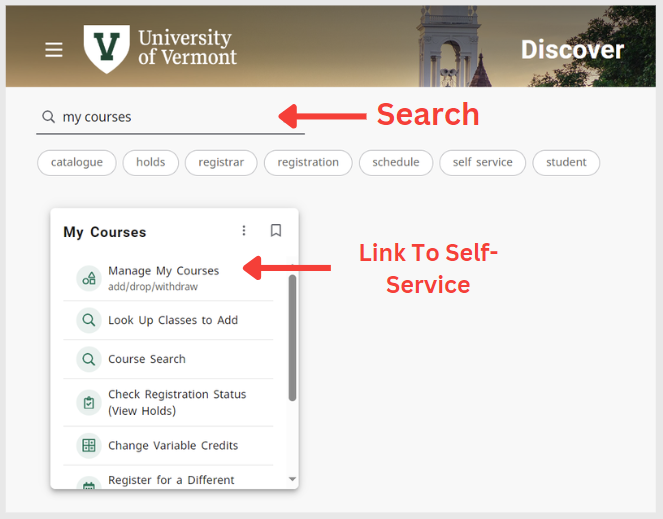
- Go to the myUVM Discover Page.
- Search for My Courses in the Search Bar, and then click the Manage My Courses link on the My Courses card.
- In the Self Service tab that opens, choose a term and click Submit.
- The Add/Drop/Withdraw Classes page will appear. You can use the Action
drop-down or Class Search tool as needed.

Add Classes
You can use the Add/Drop/Withdraw Classes page each semester to add classes for a future term, or to add classes near the beginning of a term. Please familiarize yourself with the Academic Calendar for each term’s important deadlines.
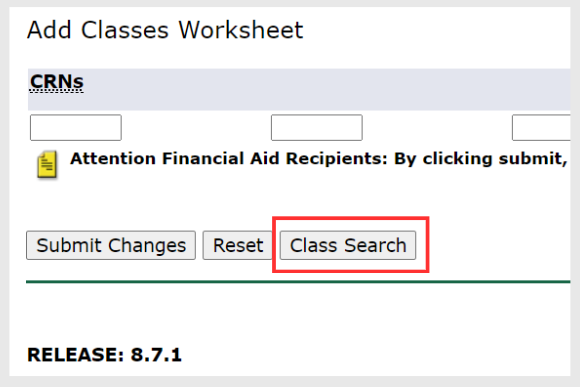
Courses can be added either by searching for a course section or directly entering a CRN under the Add Classes Worksheet section.
Add classes using Class Search
- To begin searching for a course section to add, click the Class Search button.
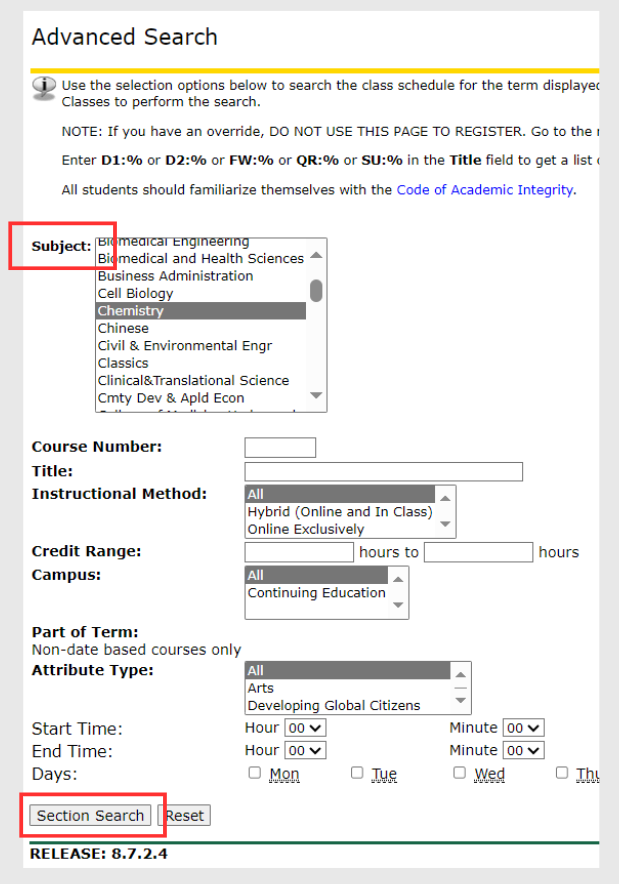
- The Advanced Search page will provide a list of fields that can be used to search through courses.
- After choosing your search terms, click Section Search.
- Results will be displayed in a table with course information such as meeting times, locations, and enrollment totals.
- Each CRN provides a link to additional course section information including add/drop/withdrawal dates, refunds, and expanded section descriptions for which topics a section covers.
- The letter C under the Select column indicates that the course section is closed.
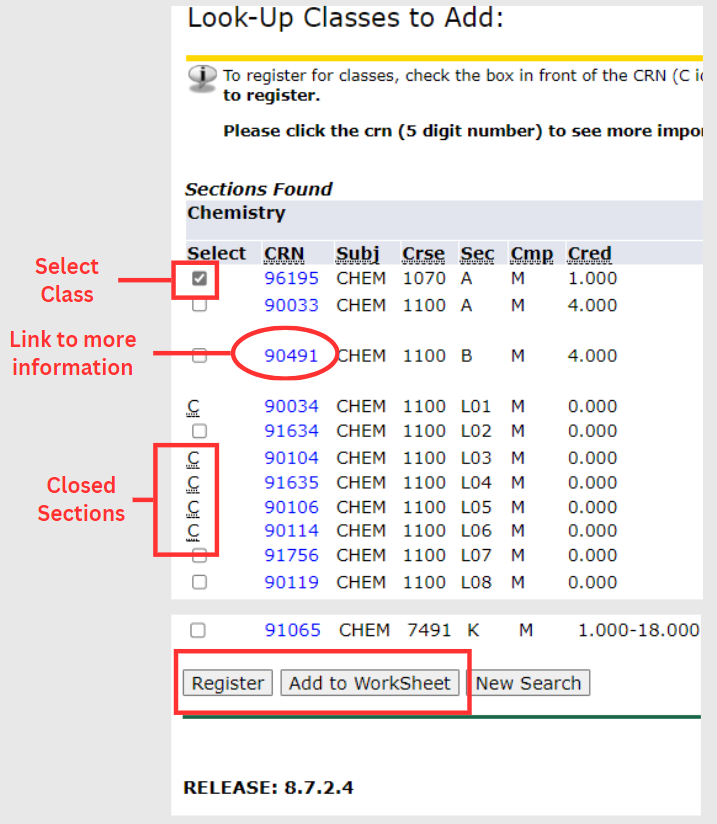
- After making a selection from the displayed results, you have two options:
- Register – Self Service will register you for the class(es) and return you to the Add/Drop/Withdraw page, where the class(es) should appear under the Current Schedule section.
- Add to Worksheet – Self Service will return you to the Add/Drop/Withdraw page, where the CRNs selected on the previous page will be added to the Add Classes Worksheet section. You can now either search for a different class or exit the page.
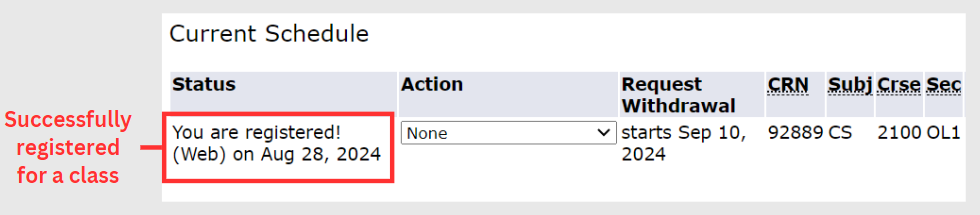
- If you used the Register button, the course will be added to your Current Schedule with a Status of “You are registered!”
Add classes using Classes Worksheet
- Enter the Course Registration Numbers (CRNs) of the classes you’d like to add in the boxes under CRNs, and then click Submit Changes.
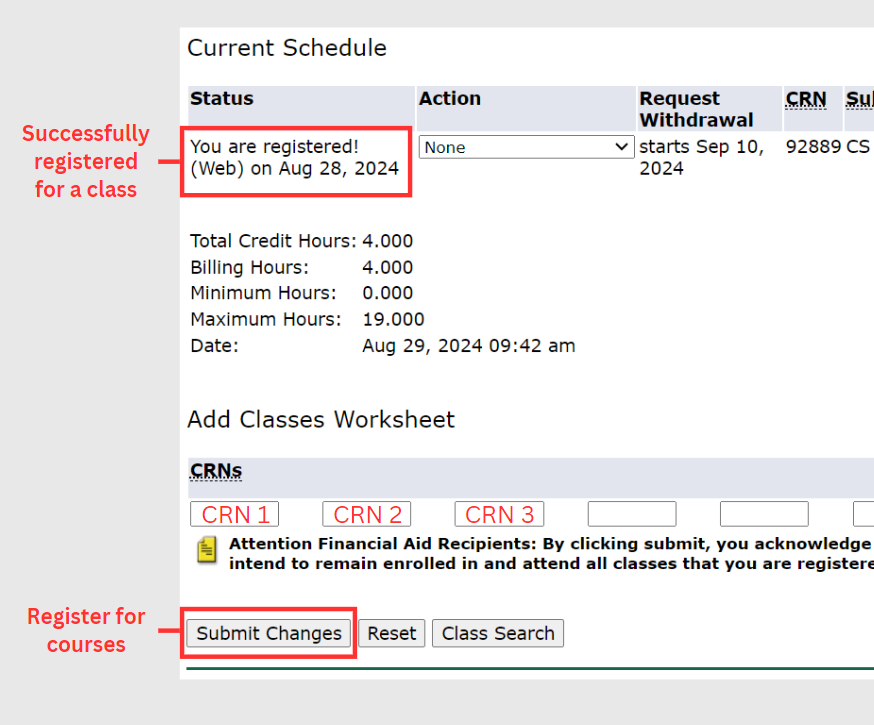
- If the information is correct and you meet the class requirements, the courses will be added under the Current Schedule section. A Status message will indicate if you are successfully registered.
Registration errors
When registering directly from a Class Search result page or using the Classes Worksheet, you may encounter errors. Self Service will provide information regarding the error. Please reach out to the Office of The Registrar for information on how to handle the received error.

Removing Classes
You can drop classes near the beginning of each semester. You can perform this action on your own within the first week, but it will require instructor permission after that. Please review the academic calendar for specific deadlines for dropping a course: Academic Calendars | Office of the Registrar.
Drop a class in Self Service
- Navigate to the Add/Drop/Withdraw Page in Self Service.
- Use the Action column drop-down menu to select the Drop this course (Web) option by the course you wish to drop, and then click Submit Changes to process the drop request.
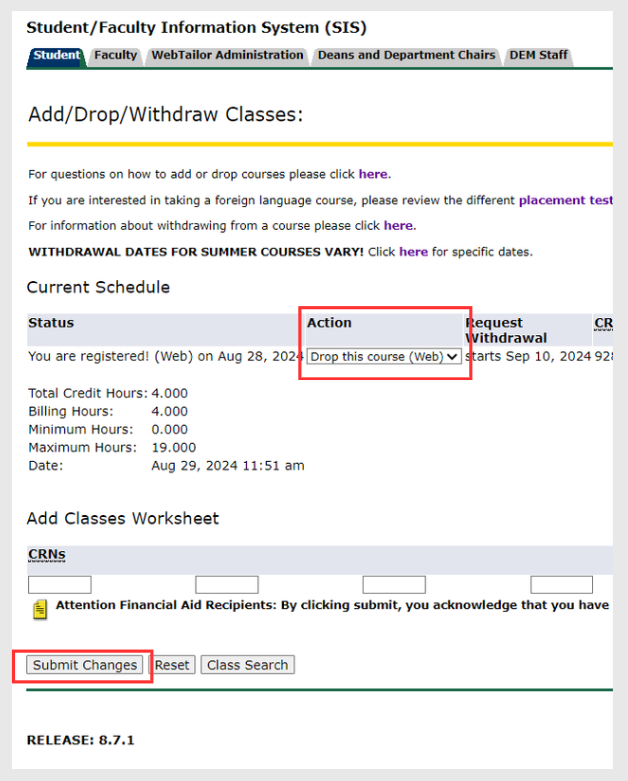
- The page will refresh and the class will be removed from the Current Schedule section.
Withdraw from a class in Self Service
- Navigate to the Add/Drop/Withdraw Page in Self Service.
- Check the box in the Request Withdraw field in the Current Schedule section, and then click Submit Changes to send your request.
- The request will be pending until the date displayed. You may cancel the withdrawal request as long as it is pending by unchecking the box and then clicking Submit Changes.