
![]()
Globus is a web-based data management tool that enables researchers to easily share and receive large data sets with collaborators from other institutions.
Globus has been configured to work with data stored on Netfiles shares, VACC accounts, and Microsoft OneDrive – allowing UVM researchers to easily share and receive enormous data transfers using existing research storage solutions.
The following Globus collections are available for use – these can be used to transfer data to and from other collections you have access to. The UVM Netfiles collection can also be used to create guest collections, allowing you to share data with external collaborators:
| UVM Globus Collections | |||
| Share w/ any collection you are a member of |
|||
| Guest Collections (share w/ external collaborators) |
Getting Started
Login to Globus
- Navigate to https://app.globus.org.
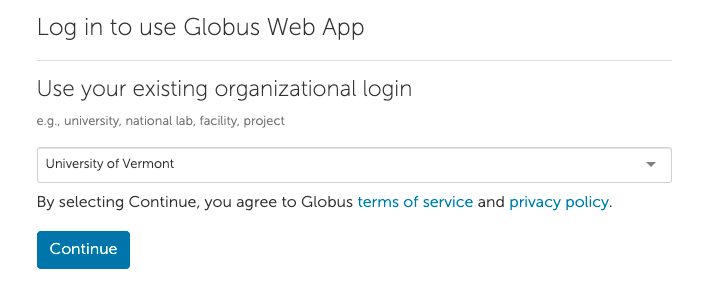
- Click the Look up your Organization drop down and type in “University of Vermont”. Select the “University of Vermont” option in the drop down menu and then click Continue.
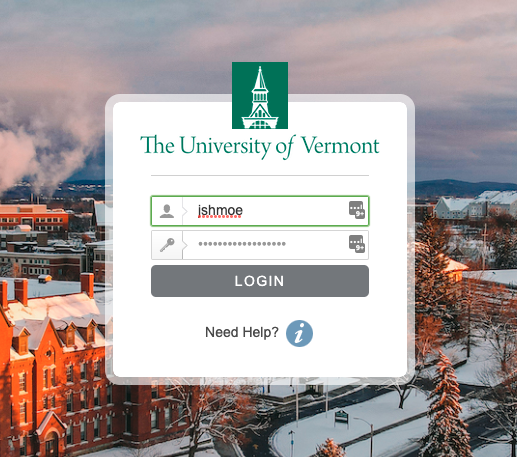
 If you’re not already logged in to any UVM services you will be brought to a familiar UVM SSO login page. Enter your NetID and password to sign in.

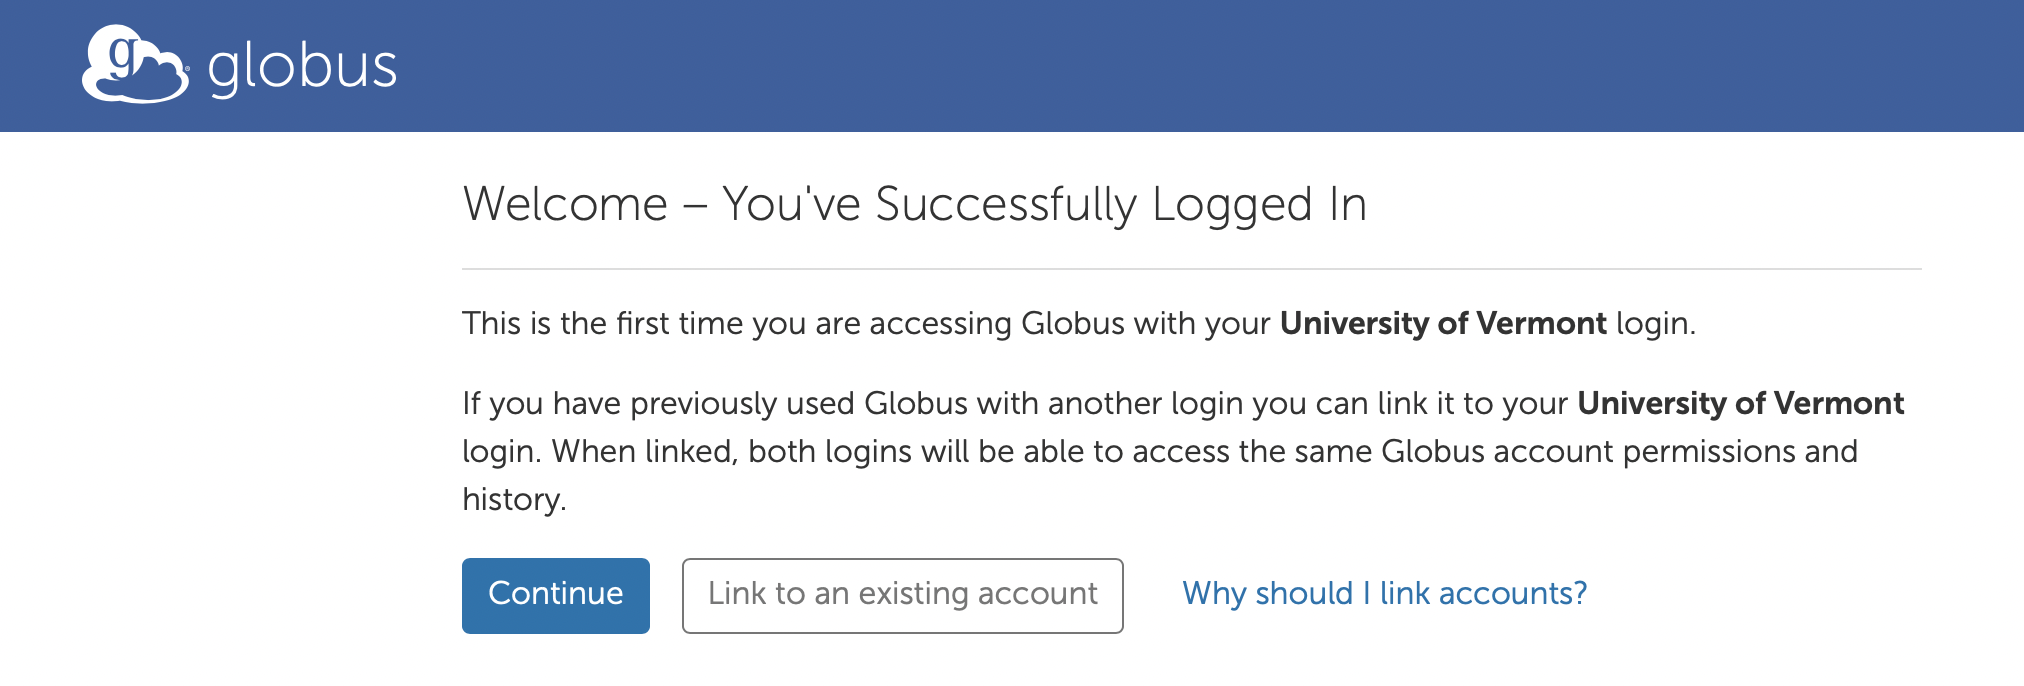
- The first time you log into Globus you will see a prompt like the one below. If you have used Globus previously with another institution, click the Link To An Existing Account button and follow the prompts given. If you have not used Globus previously, click Continue.
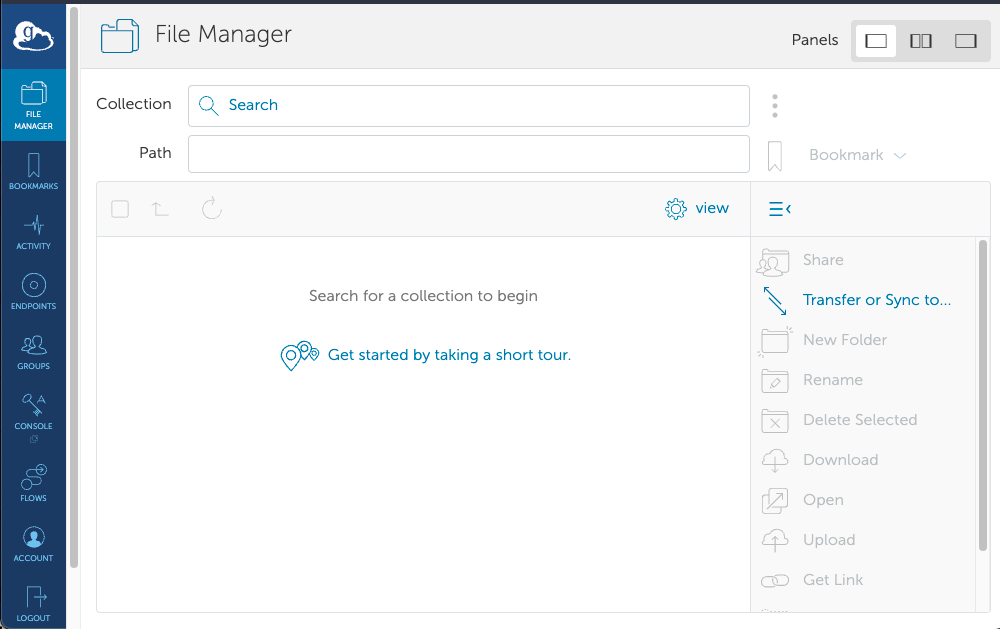
- After successfully logging into Globus you will be brought to the File Manager tab. If you’d like to learn more about Globus, please read through our detailed overview of the Globus interface, and steps for transferring data between UVM services and external collaborators.
Overview of the Interface
After logging into Globus, you will automatically be brought to the File Manager tab.
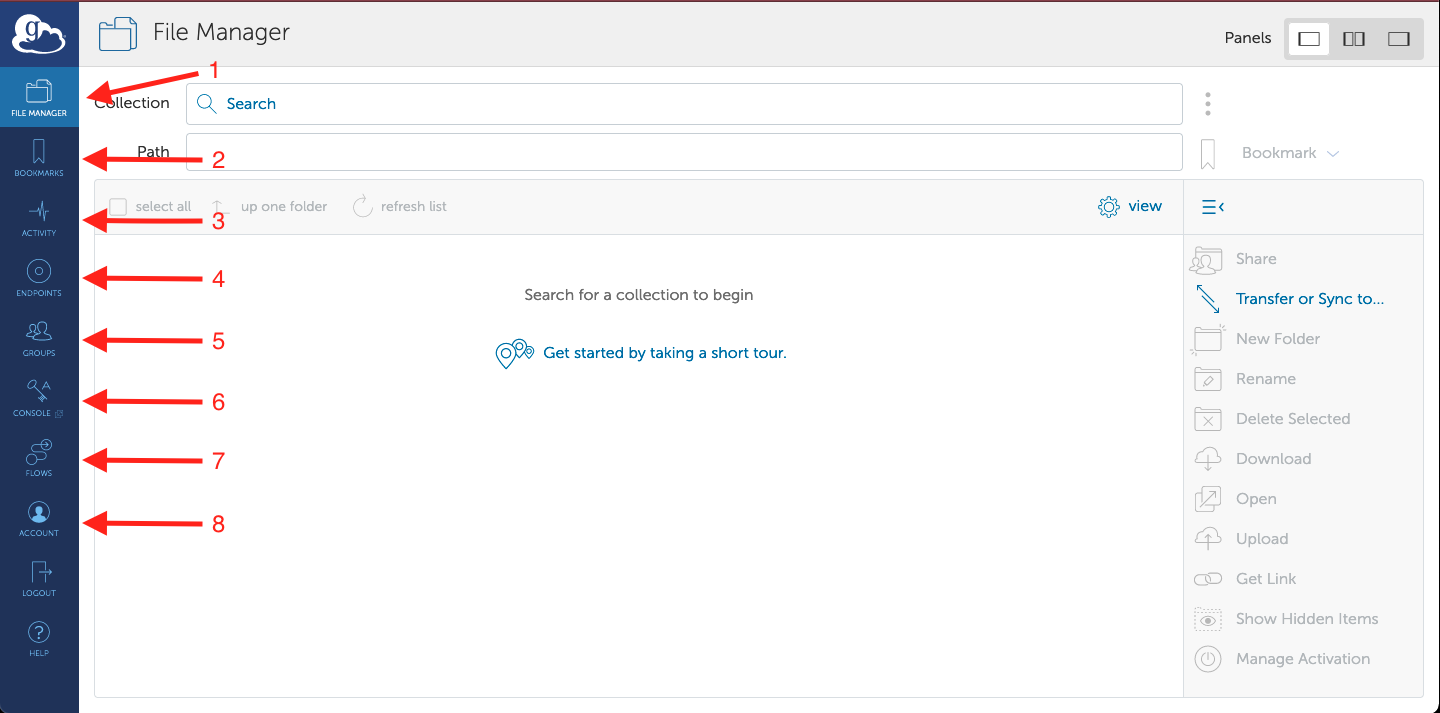
- File Manager – This tab is used for transferring and uploading files to endpoints. For more information on how to use this function, consult the Sharing and Data Transfers section in this article.
- Bookmarks – Globus allows you to bookmark commonly used endpoints. Instructions on how to bookmark an endpoint can be found in this tab.
- Activity – Monitor transfers or uploads that are currently in progress. Transfers can also be paused and continued in this menu.
- Endpoints – This tab is for managing endpoints (collections) that are owned by you. Edit endpoint attributes, add/edit metadata, or view active endpoints in this tab.
- Groups – This tab allows you to create and manage groups for endpoint access.
- Console – This is for administrators of endpoints to view endpoint activity.
- Flows – Flows allow users to automate a series of transfers. This feature is in beta and is not advised for use by UVM at this time.
- Account – This tab is for managing account identities and consents. For more information on adding an existing identity to your account, consult the Managing Globus Identities section of this article.
Sharing & Data Transfers
Transferring Data
Data is accessed via Globus “collections,” sometimes referred to as endpoints. UVM currently has manged collections for Netfiles, VACC, and OneDrive. This example will focus on transferring data between UVM collections, but the same process applies to external collections you may have access to.
The following UVM collections are searchable from the “File Manager” sidebar menu:
- UVM Netfiles
- UVM VACC
- UVM OneDrive
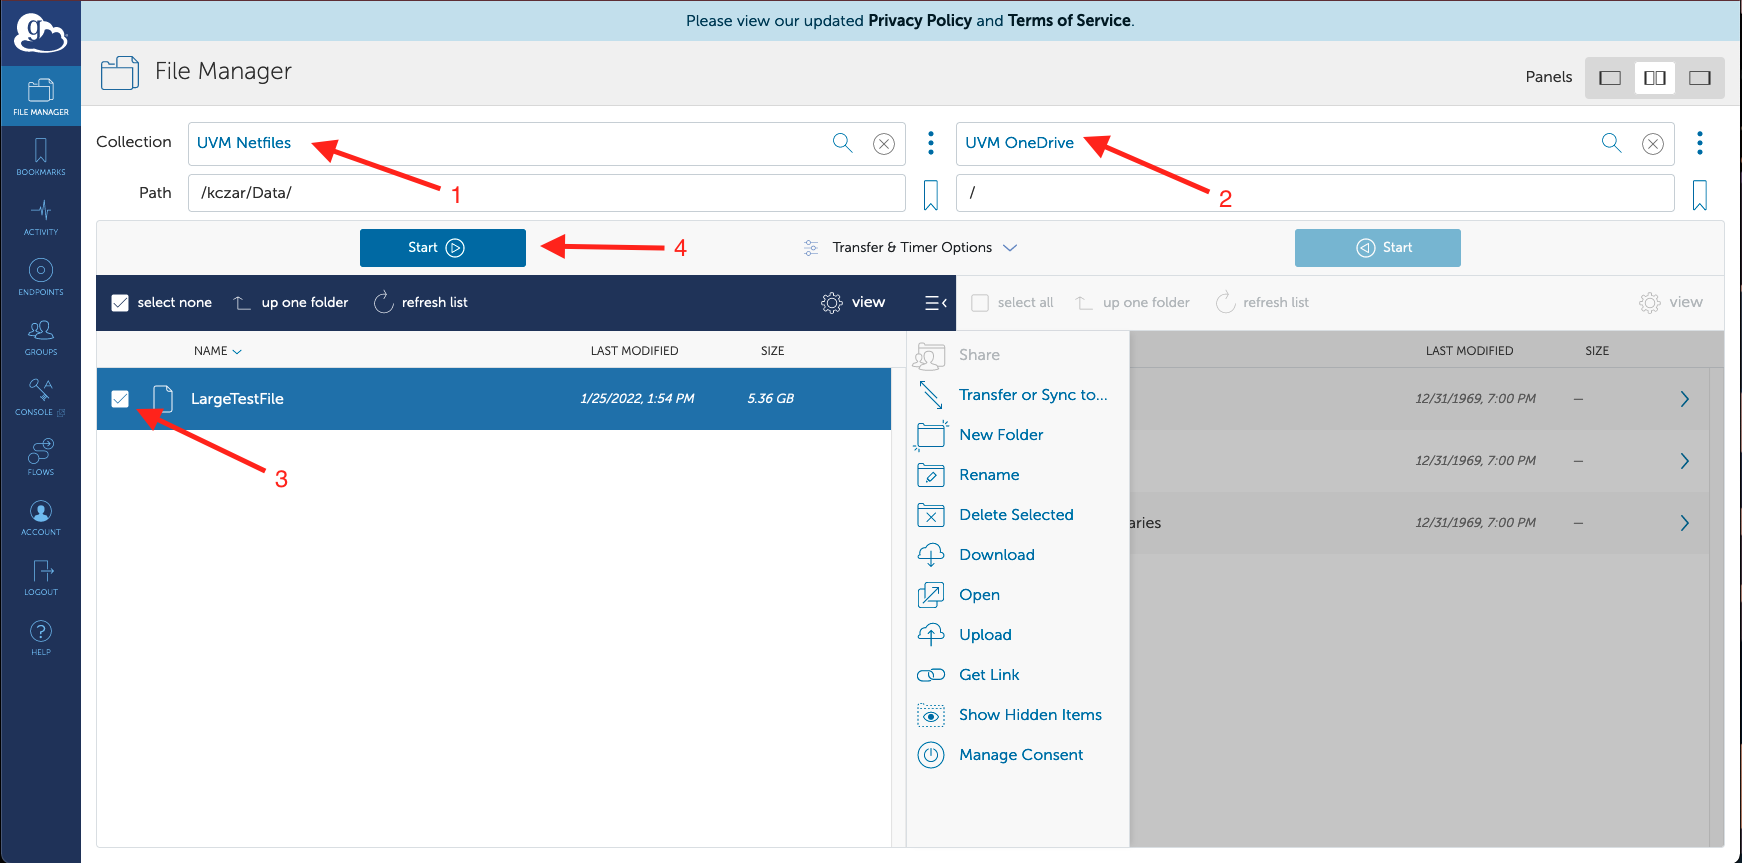
To transfer data between folders and shares that you have access to, use the following steps. This assumes you have logged into https://app.globus.org and are viewing the File Transfer tab.
- Select the collection that you wish to transfer files from. In this example, the file being transferred is located in the UVM Netfiles collection.
- Select the collection that you wish to transfer the file to. In this example the destination is the UVM OneDrive collection.
- Check the box next to the file(s) you wish to transfer.
- Click the Start button under your source. This will initiate a transfer. You can view the status of that transfer in the activity tab.
Sharing Data with Collaborators
Sharing data with collaborators requires granting access rights in the form of a “guest collection”. The creation of guest collections is currently only available on the UVM Netfiles & UVM VACC collections.
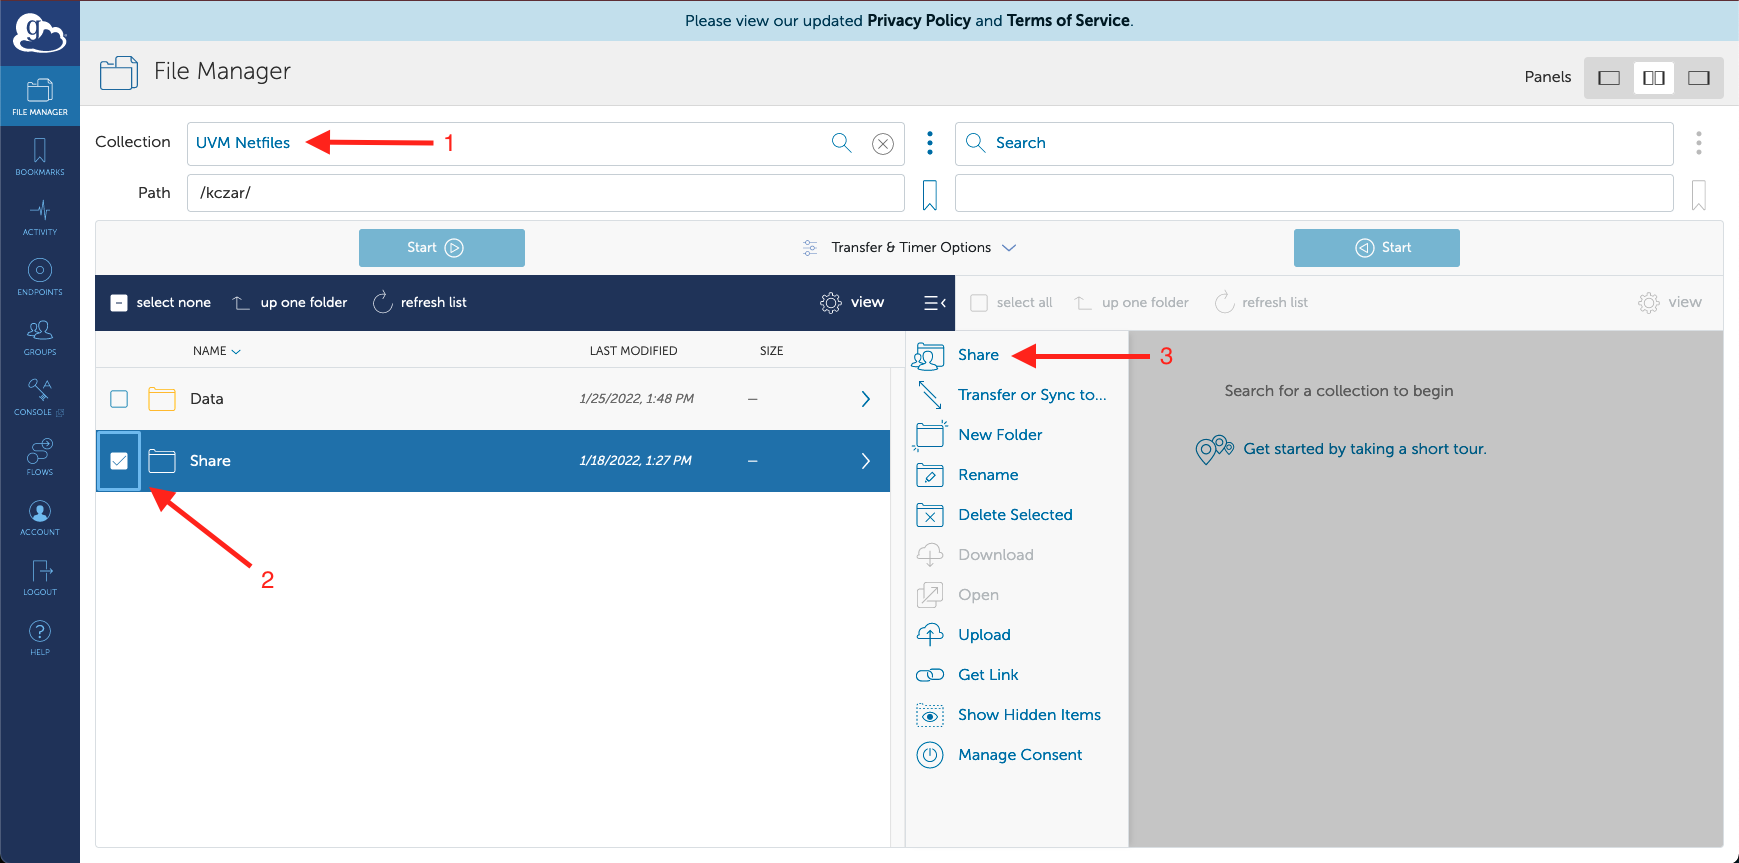
Select File Manager from the sidebar menu.
- Navigate to your share in the UVM Netfiles or UVM VACC collections.
- Check the box next to the folder you want to share.
- Click Share. This will open up the dialogue to create a new collection (endpoint) on the Netfiles collection.
- Click Add a Guest Collection.
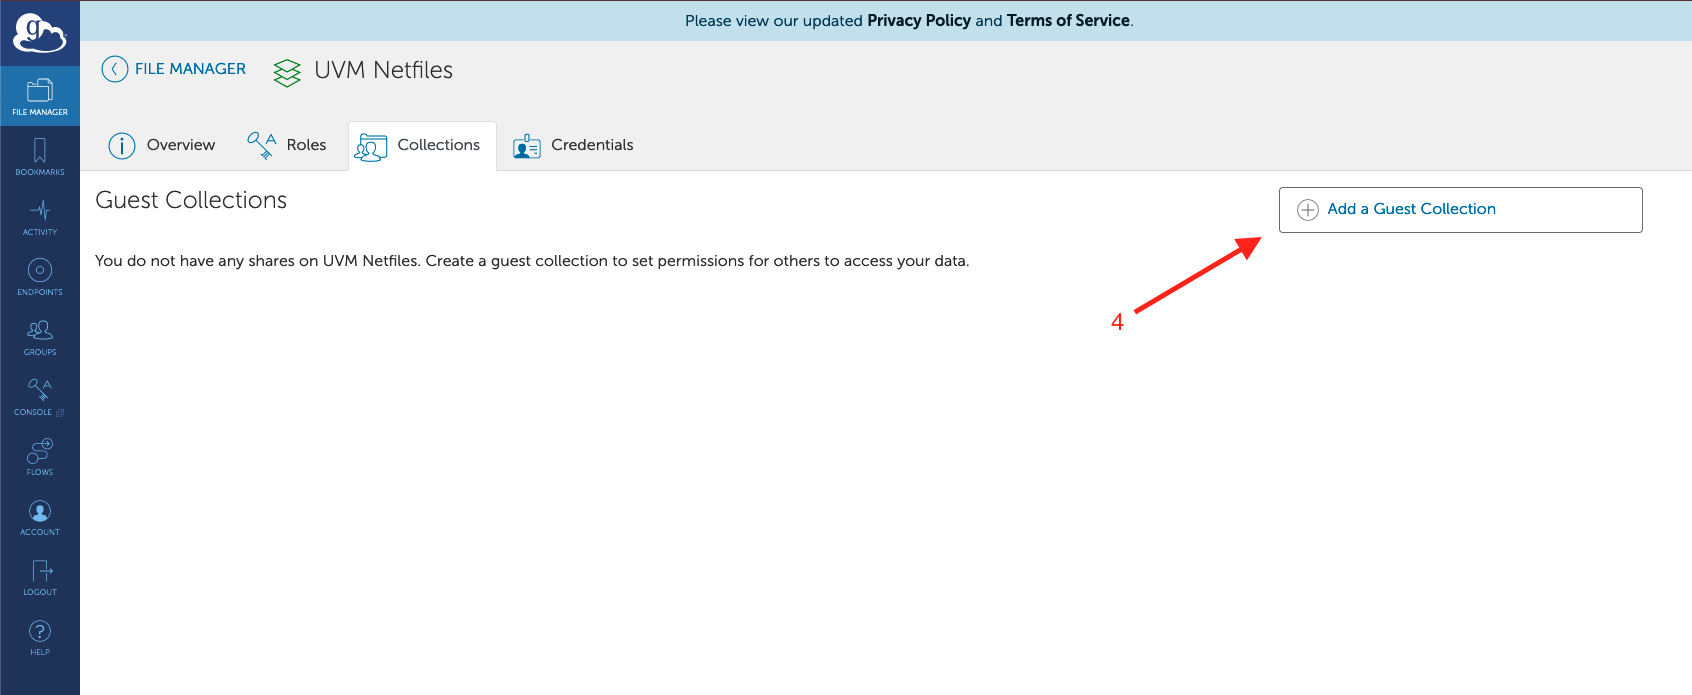
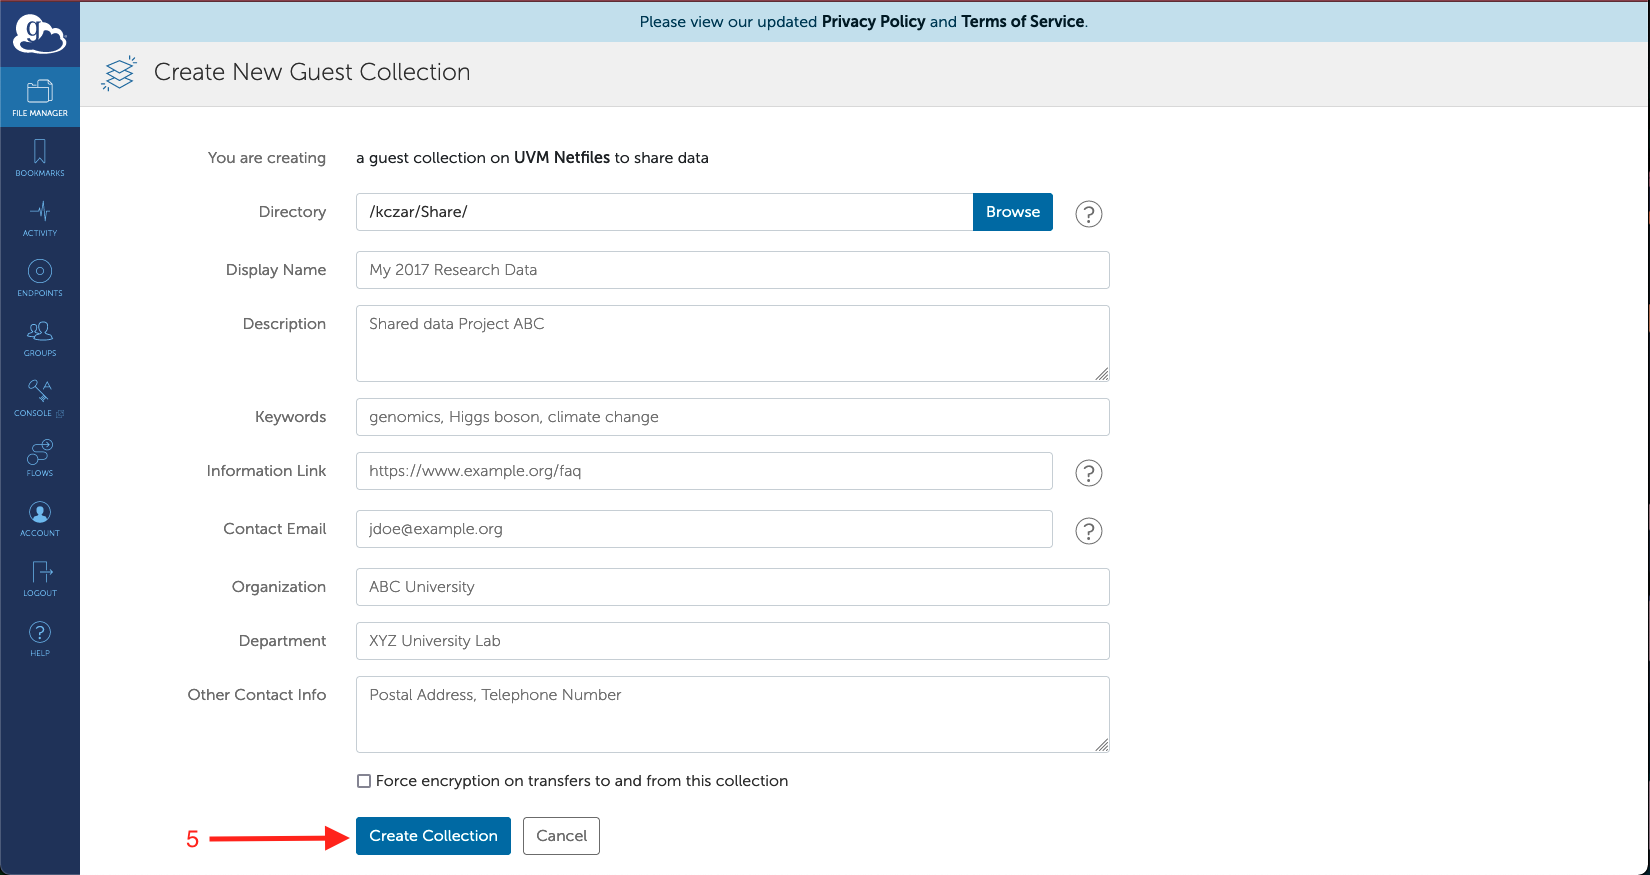
- Fill in the information about your share that will make it easier for users to find your collection. When you are done, click Create Collection.
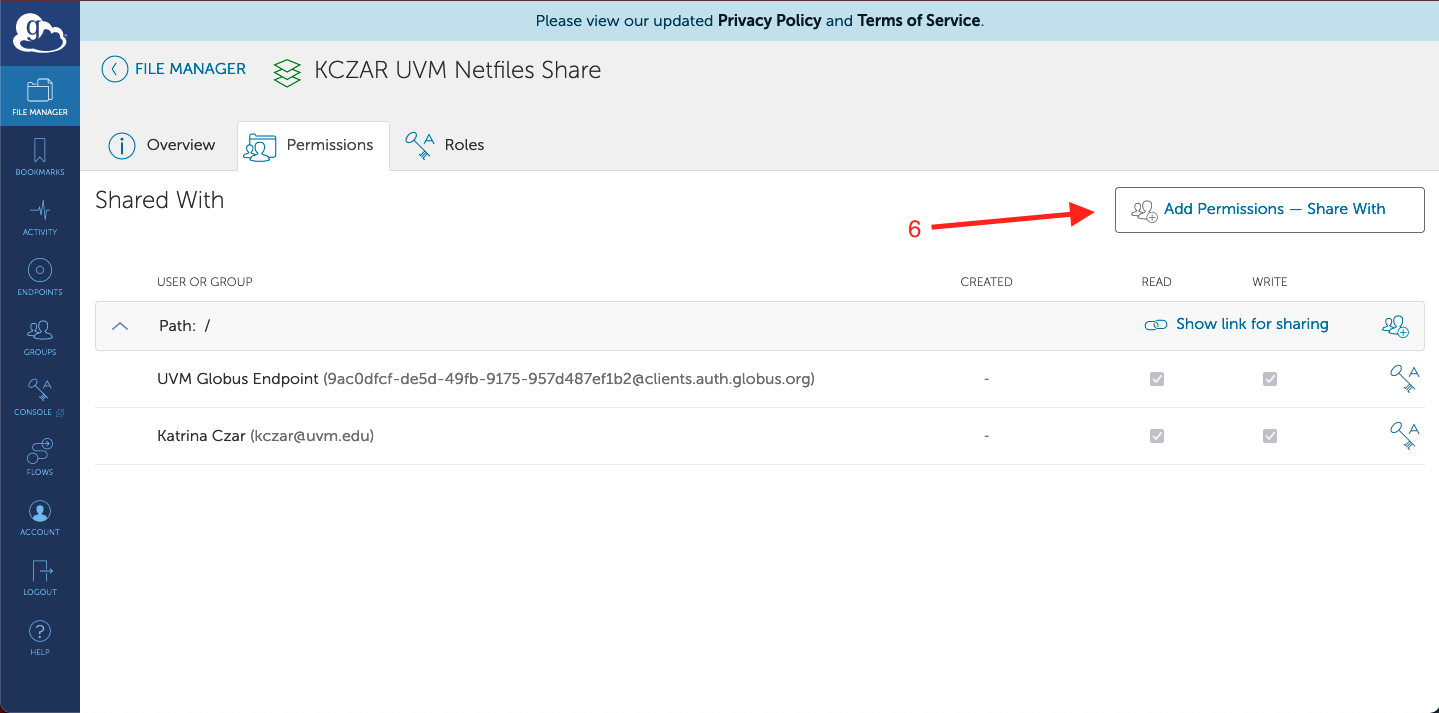
- Your collection has been created but only you have access to it. To grant access to other users, click Add Permissions – Share With.
- Permissions can be managed on a folder basis within your collection. For example, if you wanted a user to have access to only some of the data stored in your collection, you could put the data in a folder and give that user access only to that folder. The path is relative to the folder you shared, NOT to the UVM Netfiles collection.
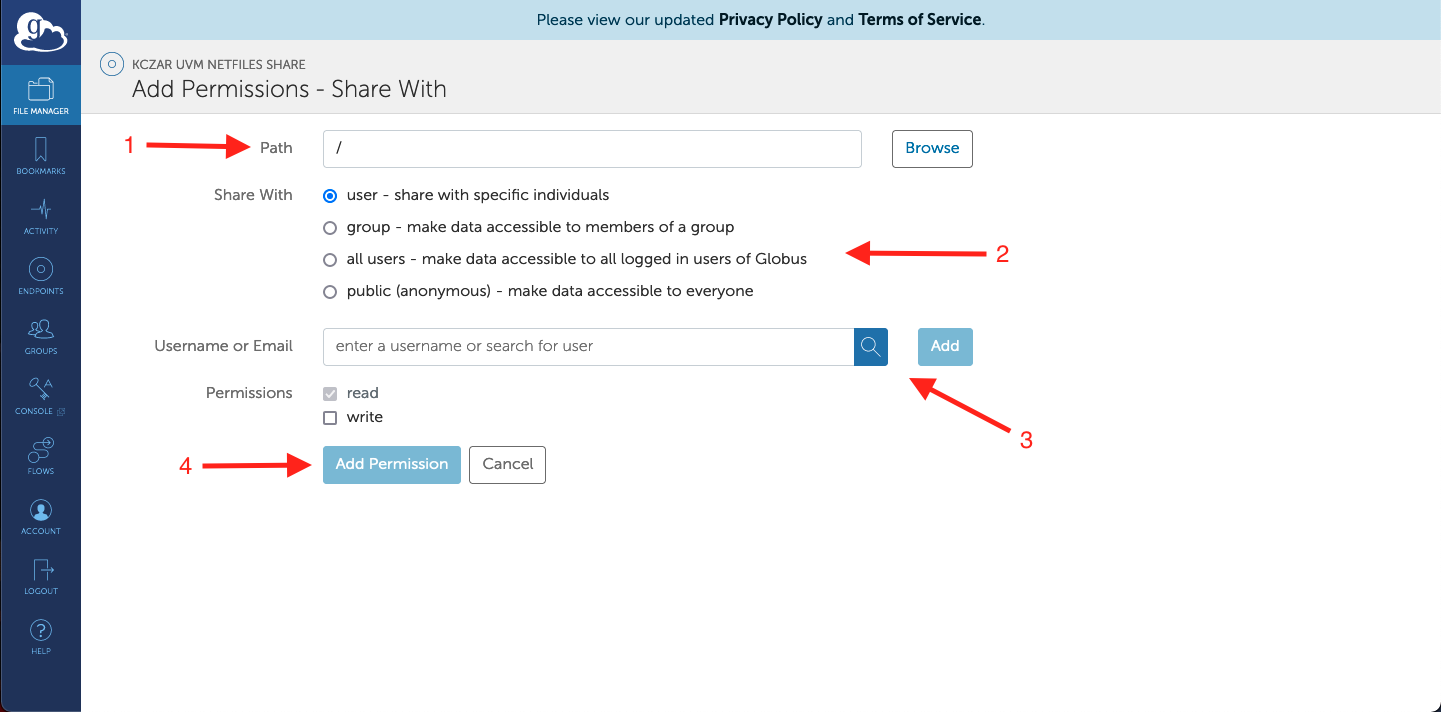
- Select the path of the folder you want to manage permissions for, or leave it as the default “/” if you want to manage permissions for the whole collection.
- Select how you want to grant access (single users, group, all users, public). Groups can be created and managed in the groups tab on the left hand bar.
- Enter usernames or select the group that you want to have access to the share. Users will be searchable if they’ve logged into app.globus.org before – if a user you’d like to give permission to is not appearing in search results, ask them to log in to Globus first.
- Click Add Permission. The selected users or groups will now have access to your share.
Accessing Data as a Collaborator – Globus Transfer
As an external collaborator with UVM, you can transfer data between guest collections shared by UVM affiliates and Globus collections of your own using the Globus web interface.
- Navigate to https://app.globus.org.
- Click the Look up your Organization drop down and type in the name of your organization. Select the option corresponding to your organization in the drop down menu and then click Continue.
- Log into Globus using whatever organization-specific login interface is provided.
- Select File Manager from the sidebar menu.
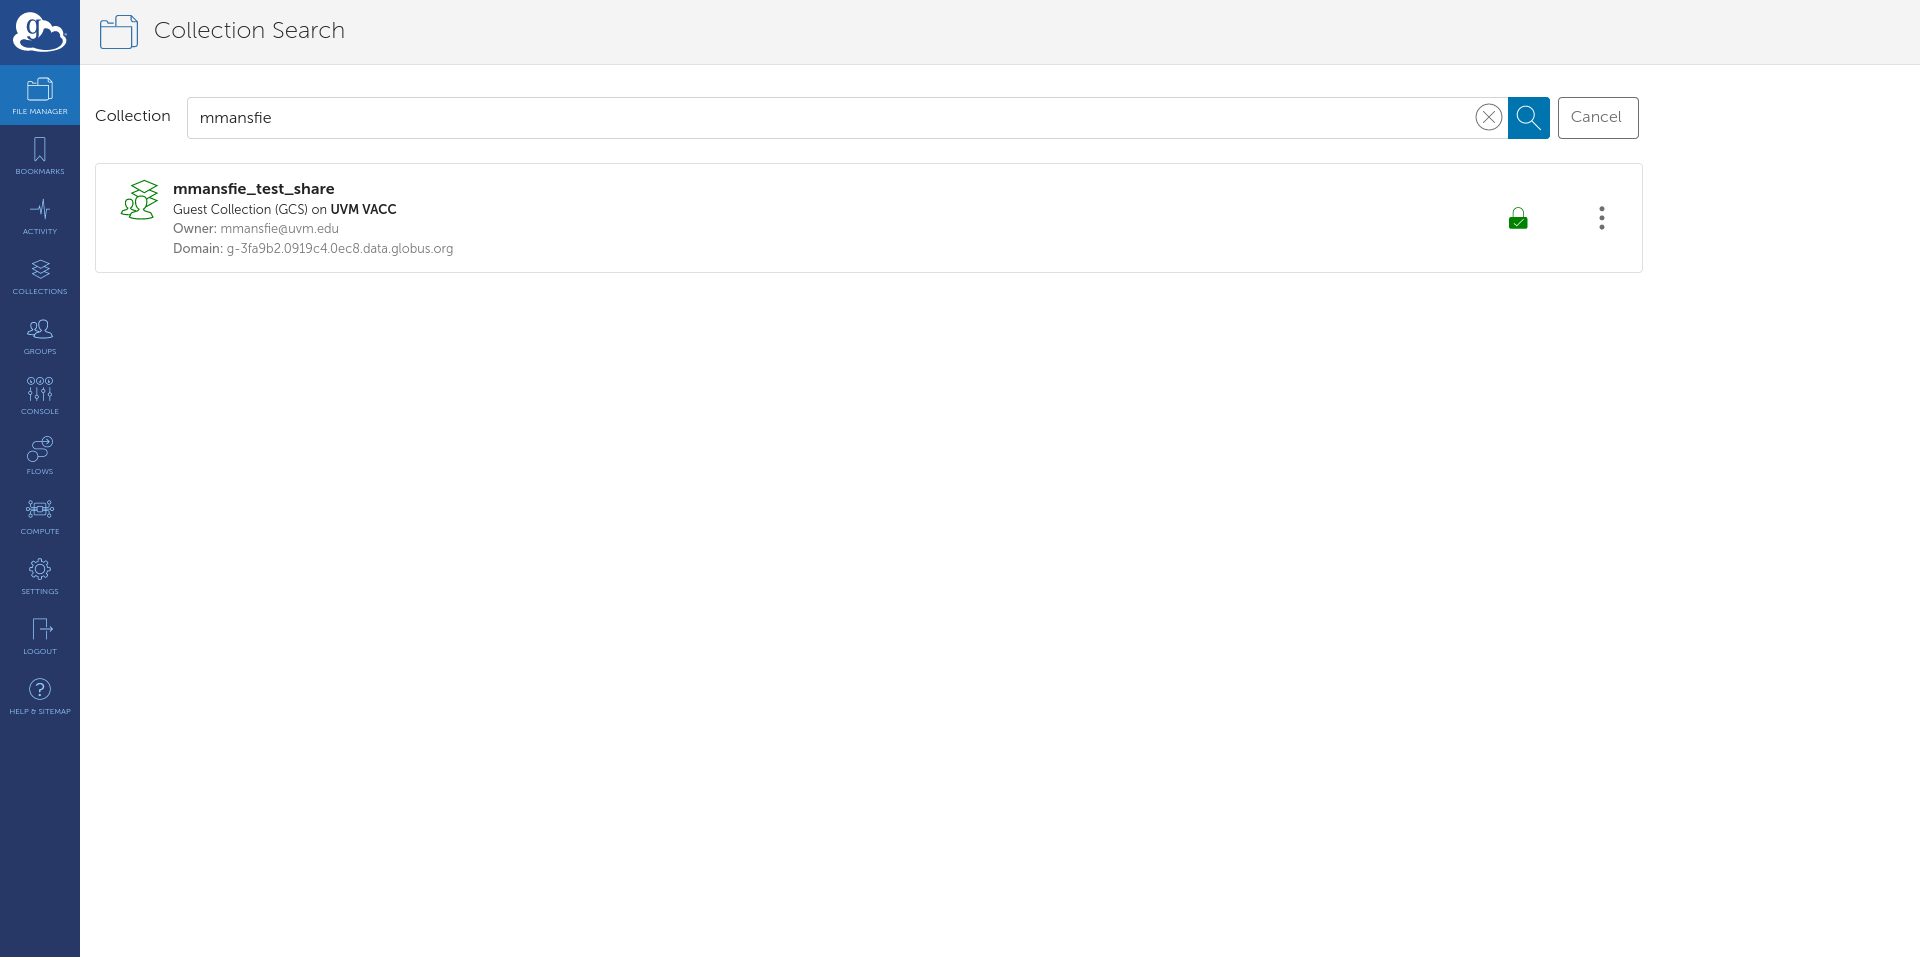
- Click the Search button and search the name of the guest collection that has been shared with you.
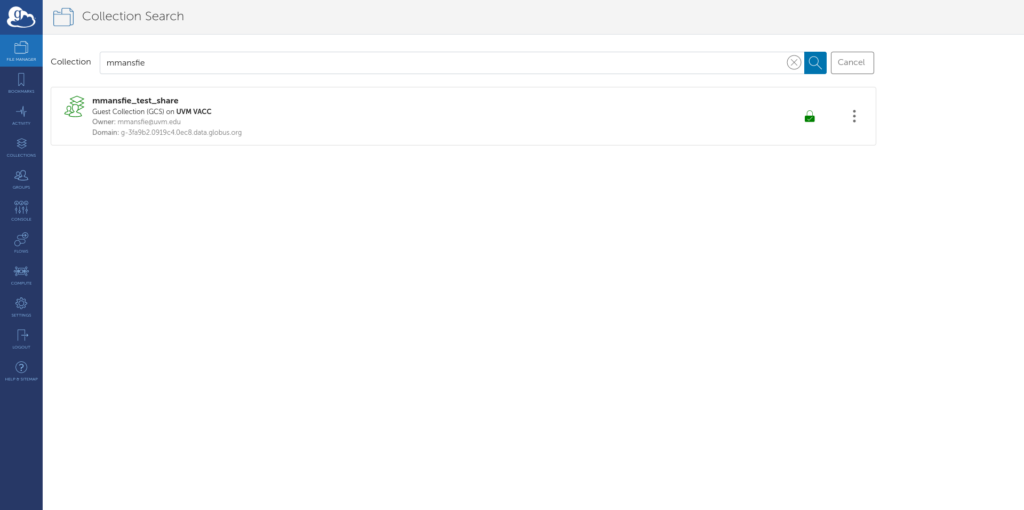
- Click on the name of the share to open it.
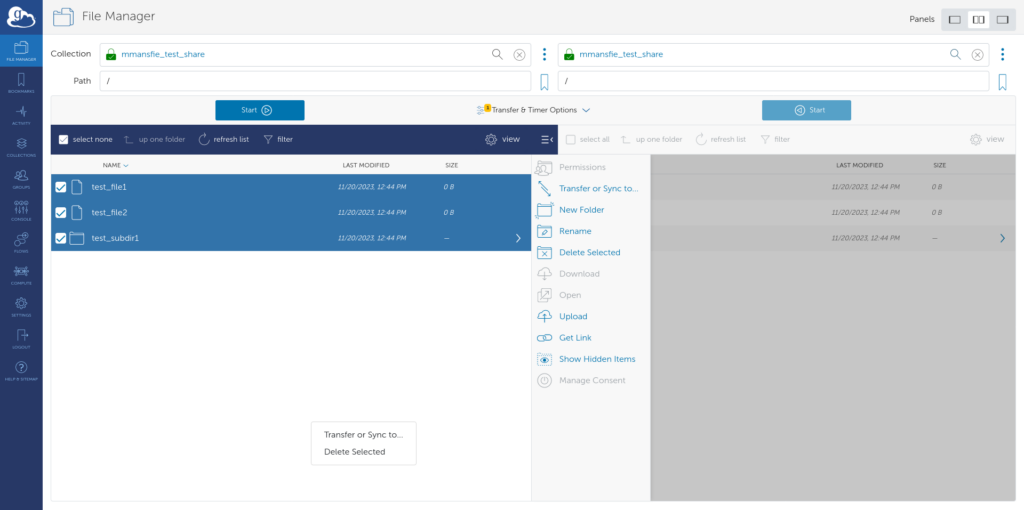
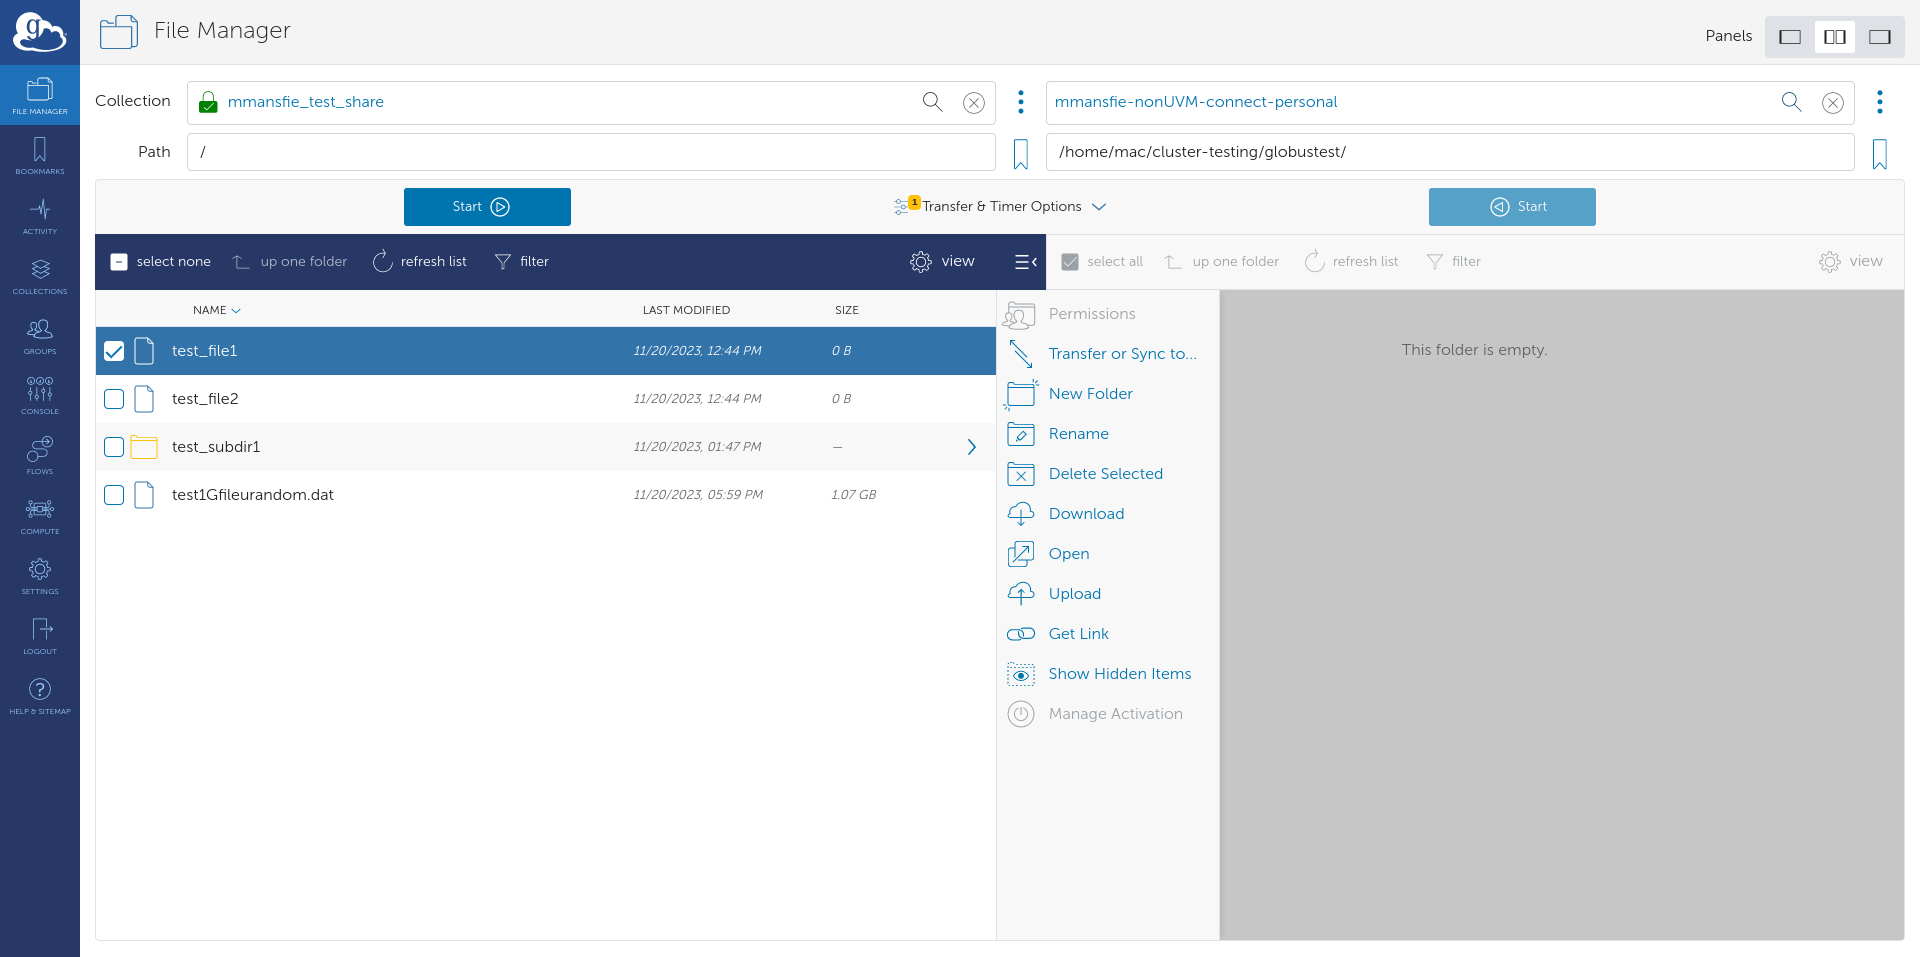
- Select Transfer or Sync to… from the right sidebar menu.
- Click the Search button on the newly-opened right panel collection view.
- Search for the collection that you’d like to sync data from the guest collection to, and click on the name of it to select it
- Check the box next to the file(s) you wish to transfer.
- Click the Start button under your source. This will initiate a transfer. You can view the status of that transfer in the activity tab.

Accessing Data as a Collaborator – Web Interface / Globus Connect
As an external collaborator with UVM, you can transfer data between guest collections shared by UVM affiliates and your computer using either the Globus web interface (for relatively small transfers) or the Globus Connect Personal application (for larger transfers or larger amounts of files).
For either accessing files using the web interface or through Globus Connect Personal, you’ll need to first open the Globus web interface and access the UVM guest collection you’re trying to transfer files to or from.
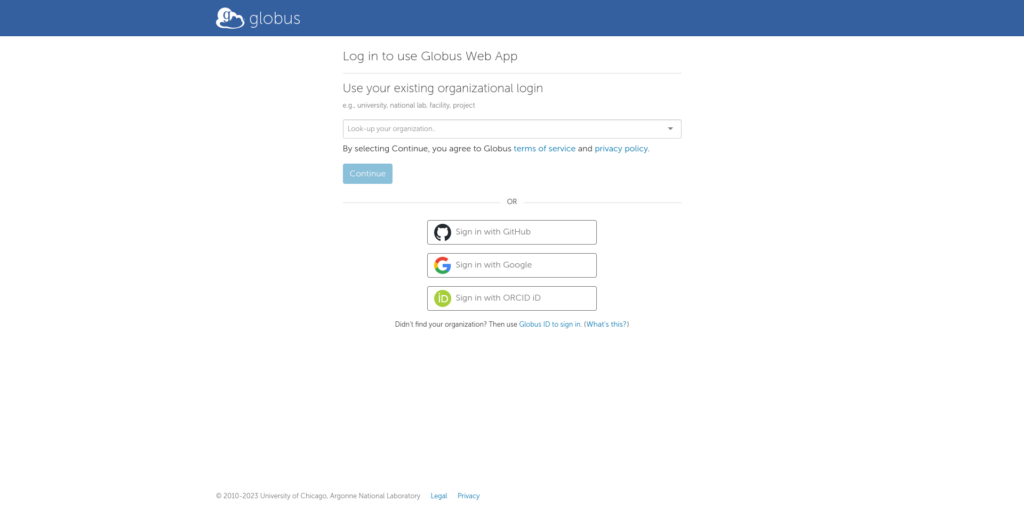
- Navigate to https://app.globus.org.
- If you have an account with Globus already, sign into it, and skip to Step 4
- If you don’t have an account with Globus, you can create one by linking a Google, Github, or ORCID account, or by creating a new account with Globus ID. Select any of the options below –OR–, then follow the prompts to create a new account.
- Select File Manager from the sidebar menu.
- Click the Search button and search the name of the guest collection that has been shared with you, and click on the name of it to select it

Web Interface
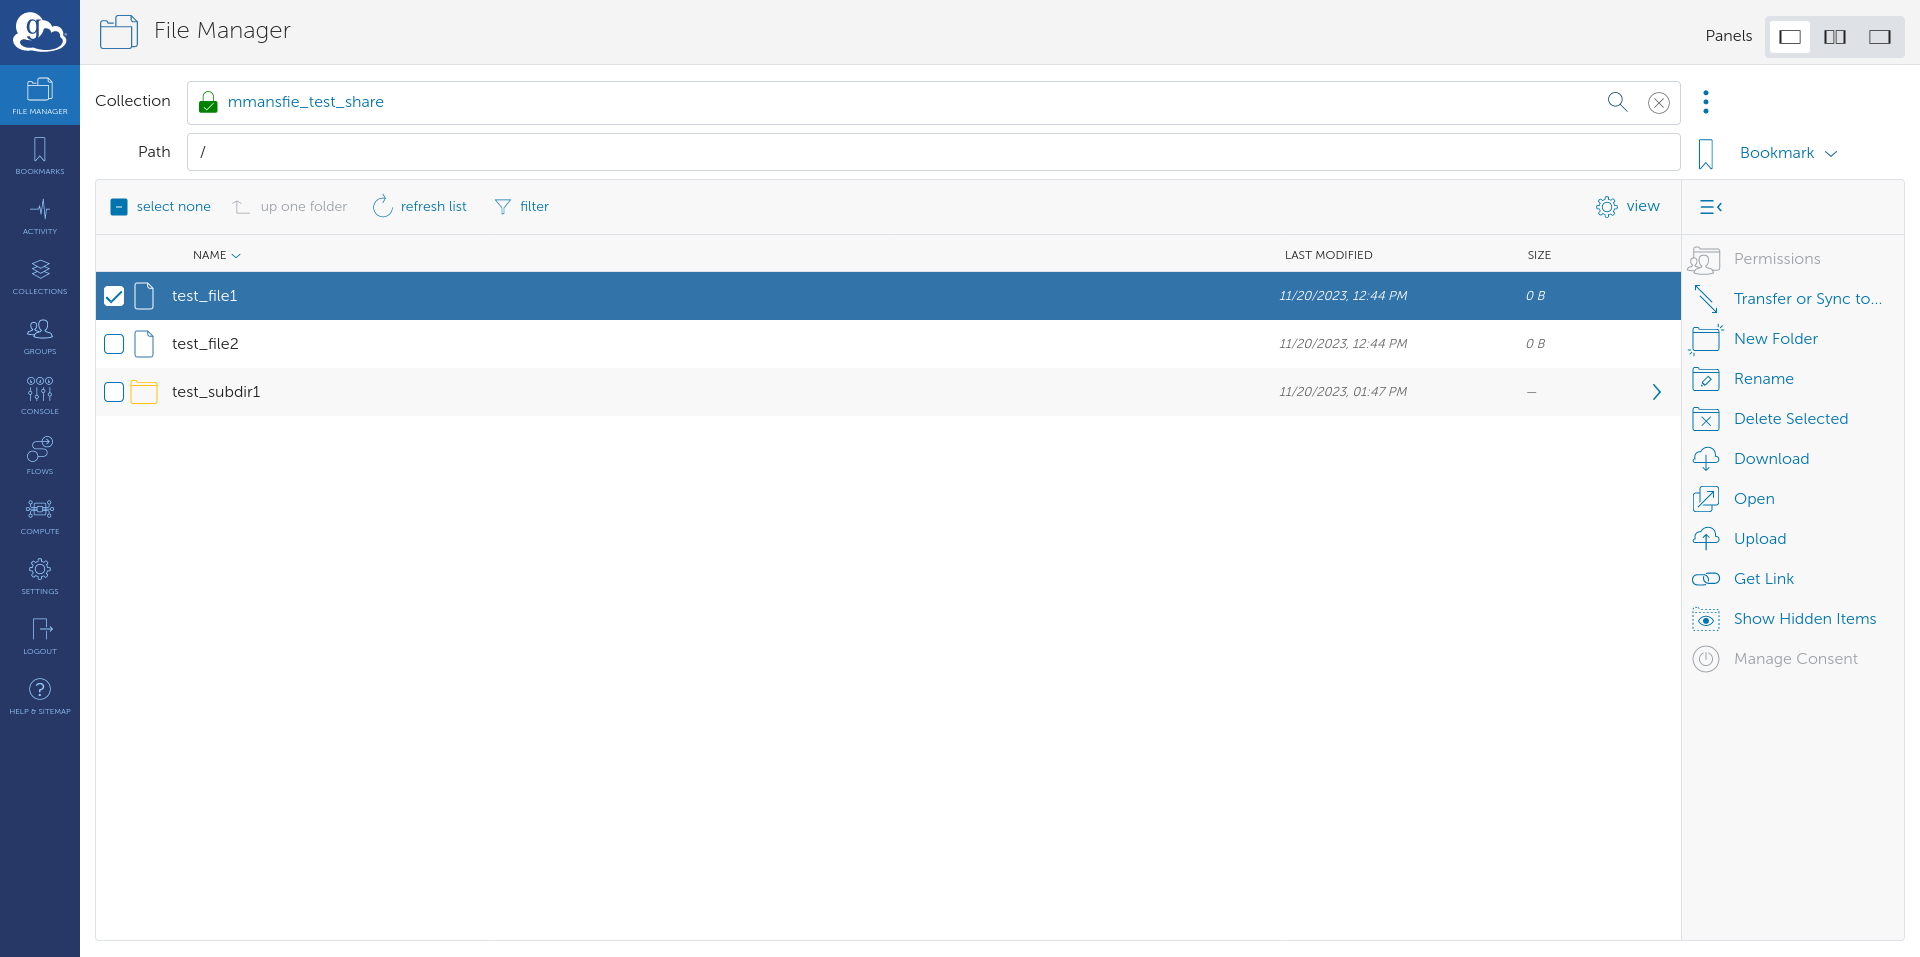
- To download a file from a collection, select the file you’d like to download and click the Download button on the right sidebar.
- To upload a file or folder to the collection, click the Upload button on the right sidebar and follow the prompts to start the file upload. If doing this for the first time, you will likely be prompted to log into Globus a second time – follow the instructions and you should be put back into the collection file manager view.

Globus Connect Personal
Globus Connect Personal is an application developed by Globus that can be used to make your computer or server’s filesystem (or part of the filesystem), available as a collection in the Globus web application. Transfers between it and other Globus collections (such as from guest collections shared by UVM users) can then be performed from the web app.
To download and configure Globus Connect Personal:
- Go to https://www.globus.org/globus-connect-personal and select Install Now for the operating system that you’re installing Globus Connect Personal on.
- Follow the directions for downloading and installing Globus Connect Personal
- Follow the directions to start Globus Connect Personal
Once Globus Connect Personal is installed and running (and assuming the web interface has been navigated to access the UVM guest collection as shown above):
- Select Transfer or Sync to… from the right sidebar menu.
- Click the Search button on the newly-opened right panel collection view.
- Search for the collection that you created during the setup of Globus Connect Personal, and click on the name of it to select it.
- Check the box next to the file(s) you wish to transfer.
- Click the Start button under your source. This will initiate a transfer. You can view the status of that transfer in the activity tab.

Managing Globus Identities
Linking identities from other institutions
Globus allows users to link identities from multiple institutions in the event that users have multiple accounts.
Steps to link another identity.
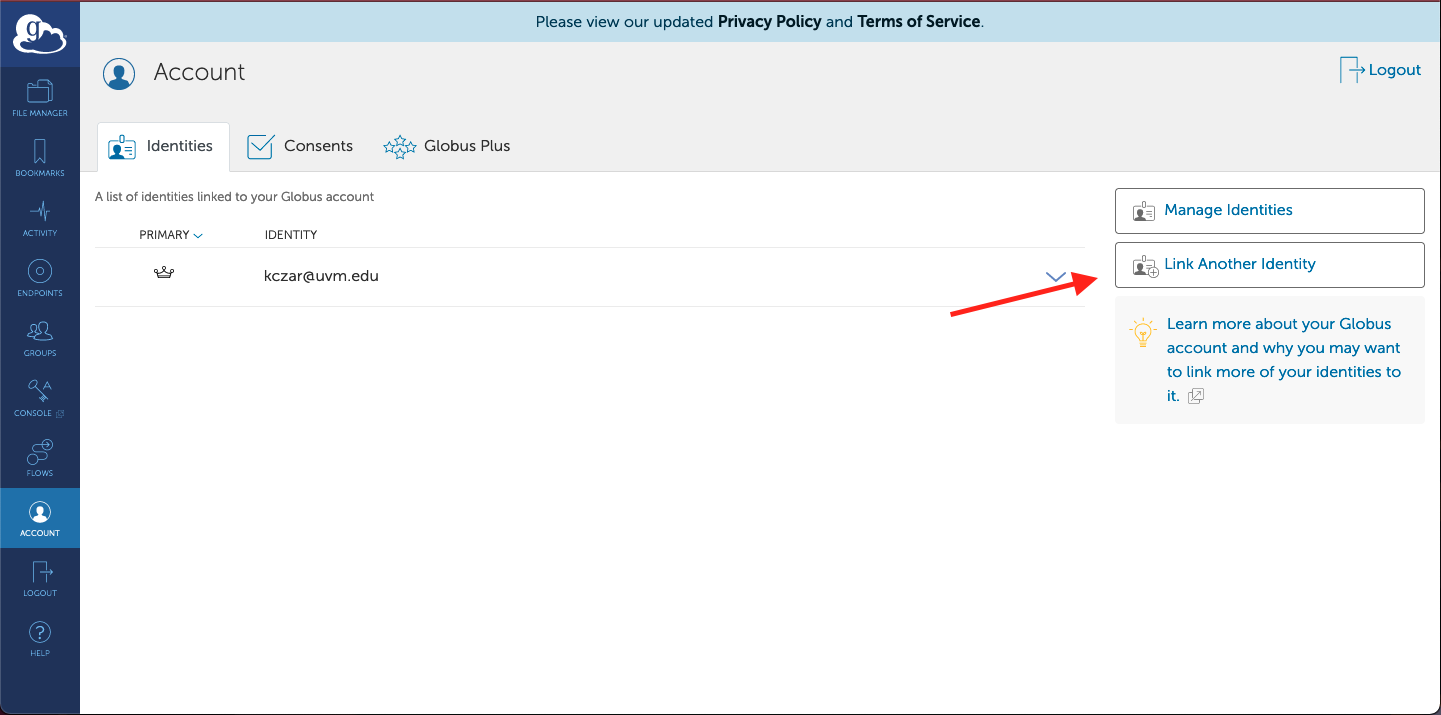
- Start in the Account tab (app.globus.org/account/identities). On the right side of the screen, click the button that says Link Another Identity.
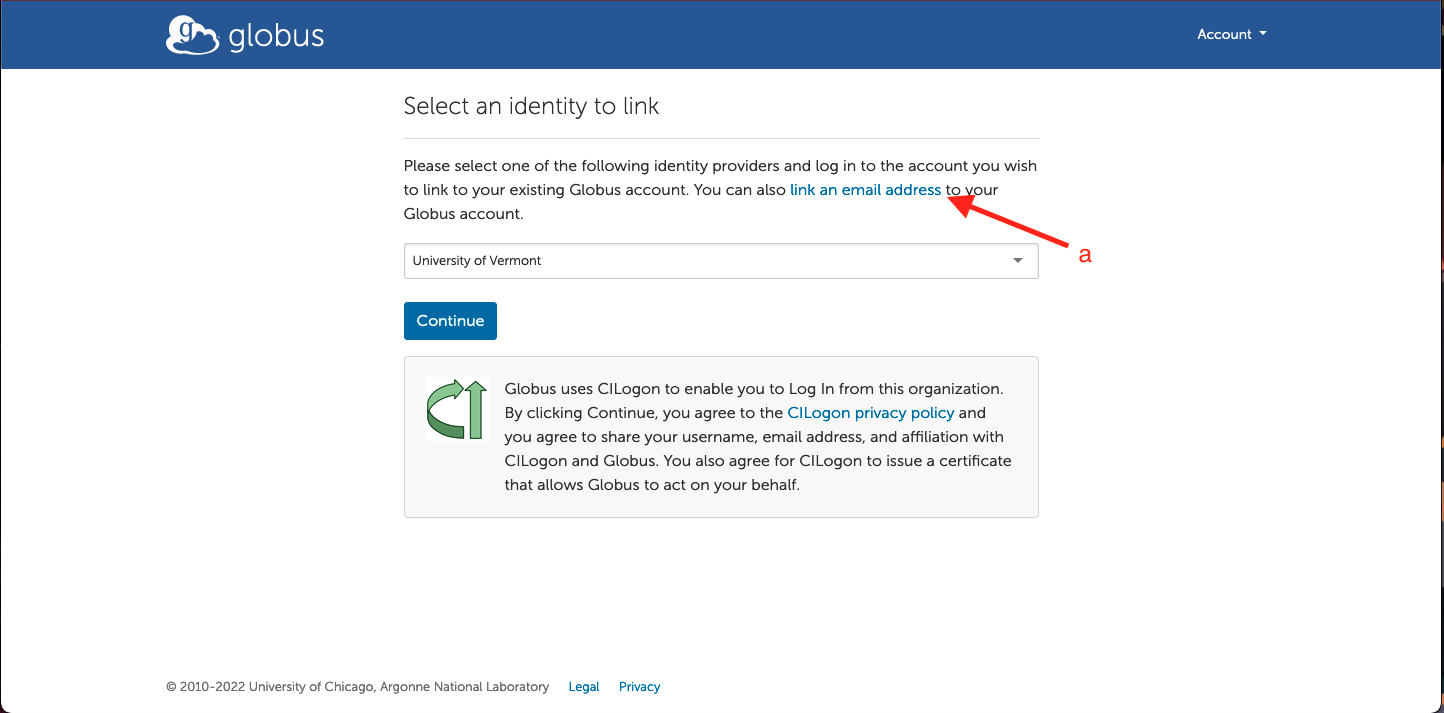
- Select the institution you want to link and click Continue. If you want to link an identity that is not associated with an institution (email) click the Link an email address (a) link.
- Your account is now linked and you will be able access collections from linked institutions with one login.