
This article covers how to set up the Brightspace Grade Book so that it works best for your course. For information on how to give grades in Brightspace, see this article on grading.
On the Navigation bar menu click on Grades & Feedback and Select Grades. 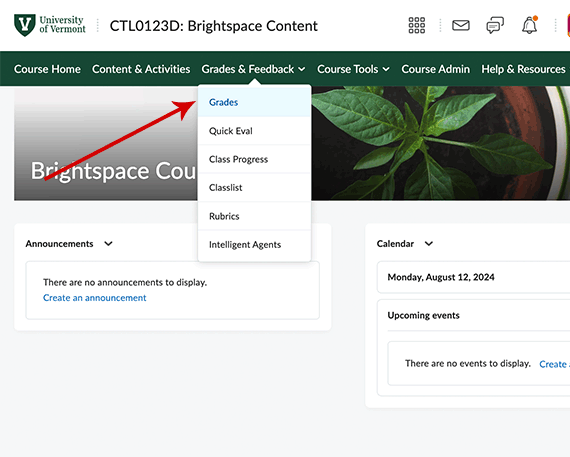
The first time you open the Grade Book, you will land on the Setup Wizard.
This tool guides you through the fundamental choices for your Grade Book settings, such as how grades are calculated and displayed. You can change your settings in the Setup wizard any time by clicking on its tab on the Grades page.
Open Setup Wizard and Choose Settings
Begin by clicking “Start”
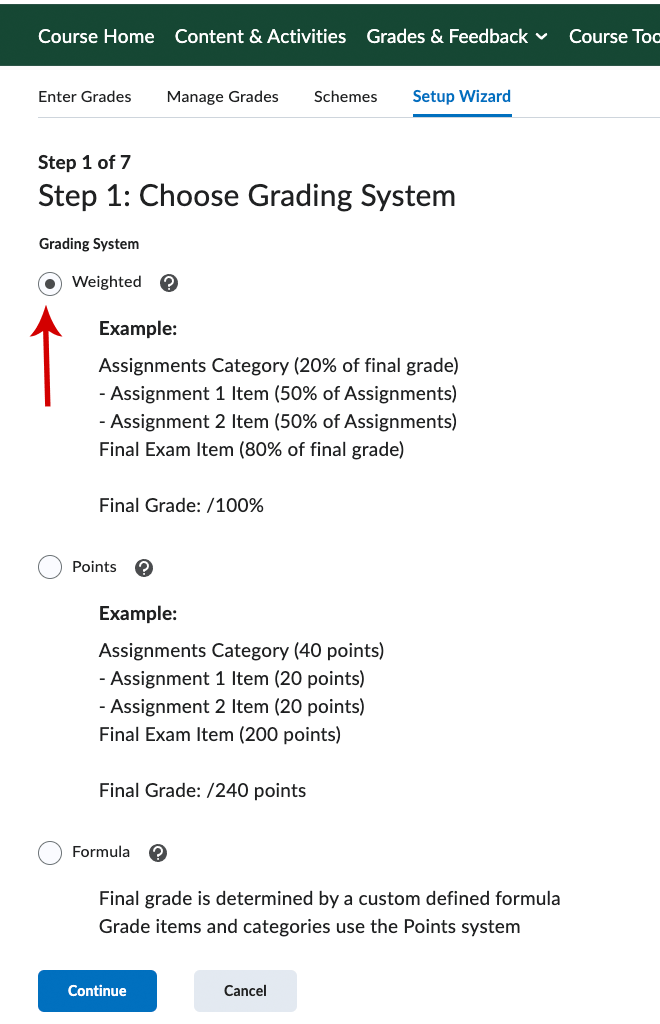
Wizard Step 1: Choose Grading System
- Weighted: The weighted system allows you to assign percentage values to single items (e.g. final exam) and to groups of assessments (e.g. homework or weekly quizzes). Once you set it up, Brightspace does all the calculations for you. With the right settings, students can see their overall grade as they work through the semester.
- Points: This option aggregates students’ grades as they are entered. With the right settings, students can see their overall percentage grade total as they work through the semester.
- Formula: This method is the most complicated and not commonly chosen. In most cases, either Weighted or Points should be selected.
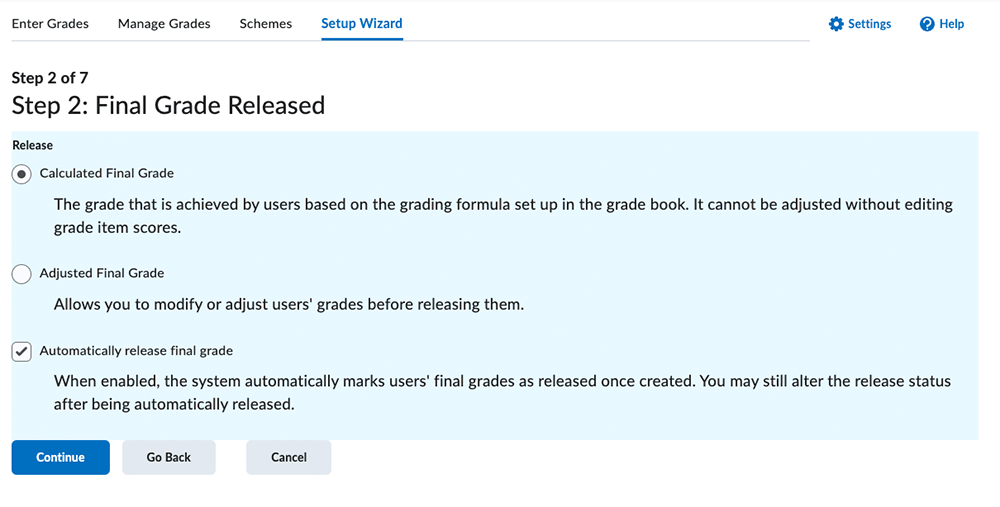
Wizard Step 2: Choose which column to release
Selecting “Calculated Final grade” means that Brightspace’s calculations will be the final grade. But, if you intend to modify some students’ overall grades at the end of the semester, you can change this selection to “Adjusted final grade at that point.”
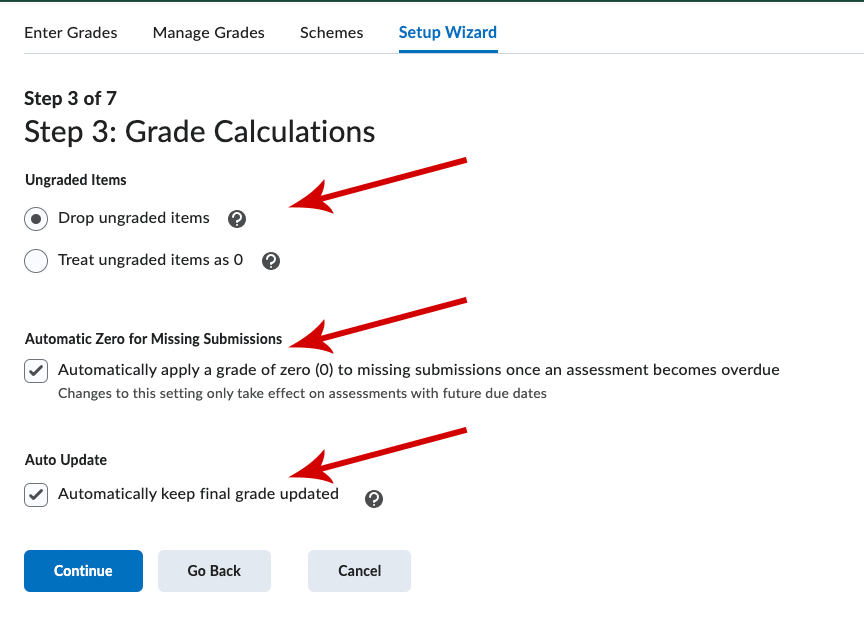
Wizard Step 3: Grade Calculations
If you have chosen “Weighted” grading system, in Step 1, pay careful attention to selecting the following options.
- Choose “Drop ungraded items.”
- Optional: “Automatic Zero for Missing Submissions” means that students will get 0s if the due date has passed. This is effective only if you’ve entered due dates on your assessments. It means that students will have no grade before the assessment is due, but after the due date, if they haven’t submitted it, they’ll receive a zero. You can modify their grades individually, as you see fit, for late submissions. Important: If you do not choose Automatic Zero, then you will need to manually enter zeros for work that wasn’t submitted. Only when zeros are entered (for un-submitted work), will students see an accurate Final Calculated Grade.
- Check “Auto Update.”
Wizard Steps 4 and 5: Schemes and Managing View
4. Choose Default Grade Schemes:
Make no changes. Click continue.
5. Managing View Display Option:
Make no changes. Click continue.
Wizard Steps 6 and 7: Students' Display and Summary
6. Student View Display Options:
Click “Display final grade calculation to students.”
7: Grades Setup Summary
Review your settings and click “Finish.”
Manage Grades
Click on the Manage Grades tab to create, organize, and edit grade items and categories, reorder your Grade Book, and more. Also refer to D2L Brightspace Community Documentation
Create grade categories and items
Categories
In a weighted grading system, you can assign percentages as defined in your syllabus to either categories of assessments or individual columns. For example:
- Homework 20% (category)
- Weekly quizzes 25% (category)
- Mid-term exam 25% (single column/item)
- Final exam 30% (single column/item
In a points grading system, categories are helpful for organization.
In both systems, you can use categories to drop the lowest scores in a grouping of assessments, if you choose to distribute points evenly.
To create a category:
- Click on the Manage Grades tab
- Click the “New” button and select “Category”
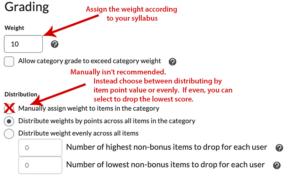
- Name the category and decide whether and how to distribute points.
- For the Points system: If each column has a different point value, you may wish to leave “Distribution” unchecked. If you do check it to distribute points, you can enter a value, but be aware that it will override all your columns’ assigned points.
- For the Weighted system: it’s best to choose either distribute evenly or by points. It’s not advisable to manually assign weights to a category with many items. (This is because every column weight would need to be updated each time a new column is created in the category in order not to exceed 100% for that category). See image:
 Click to enlarge ↑

For more info, see D2L Brightspace Community Documentation Create and delete grade categories and items
Delete grade categories and items
To delete a category, in Manage Grades, click More Options > Delete and choose the category.
To delete a single grade item that’s associated (linked) with another course tool, such as an assignment or a quiz, there are a couple extra steps. You have to delete the quiz or assignment in their respective tool pages first. (And bear in mind that even though you delete them on the tool pages, you have to return to Grade Book > Manage Grades > More Actions > Delete to finish removing them.) See video.
For more info, see D2L Brightspace Community Documentation Create and delete grade categories and items
Allow extra credit or Work for bonus points
Let’s differentiate between the two terms:
Bonus assessments are entirely optional. Students are not penalized for not completing a bonus assessment, but their course grade may be improved if they do. These items will be indicated by a star in Manage Grades.Extra credit is where a student might answer an extra question on a quiz, or provide additional effort on a regular assignment to improve their grade on that assessment.
Below are three different options:
- Create a New Bonus Grade Item
- Give Extra Points on a Required Assignment
- Add an Extra Credit Question to a Quiz
First, create your assignment or quiz in the normal way and be sure to connect it to the Grade Book. (You might name your assignment “Bonus assignment – not required but may boost your grade.”)
Next, modify it in the Grades area to designate it as Bonus:
- Go to Grades > Manage Grades
- Locate and edit that grade item
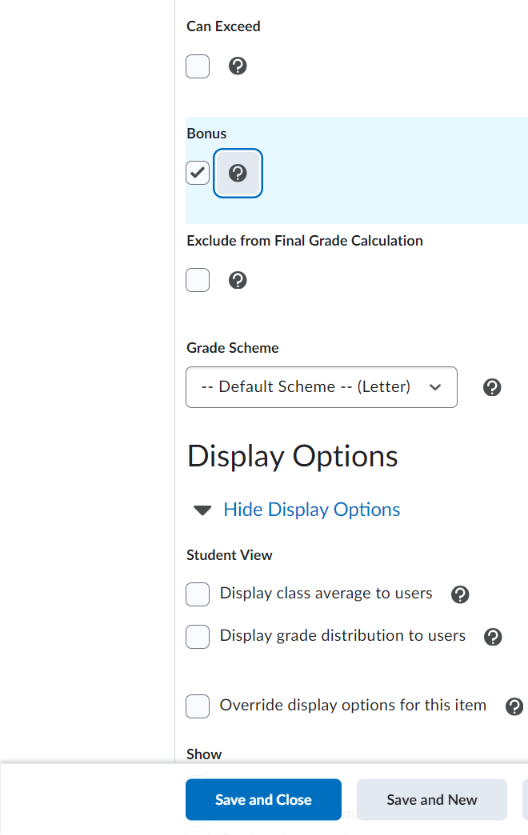
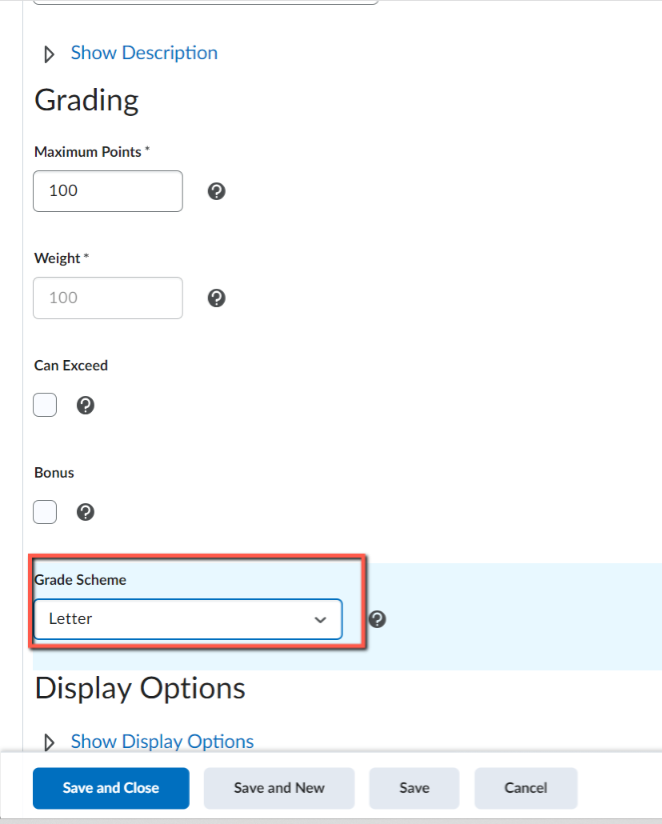
- Check the Bonus box (see image)
- Click Save and Close
This item is now optional, and if students don’t receive a grade for it, it will not hurt their overall grade.
This means that the assignment is required, and students are given the option to do extra work. If they don’t do it, it won’t hurt their grade, but it may improve their grade if they do.
To set this up:
- In Grades > Manage Grades, edit the item and check Can exceed. For example if the assignment is worth 20 points, but students have the option to earn an extra 5 points on it, you would NOT check Bonus, but instead check the box Can Exceed . In this example, you’d leave the possible points as 20 – in this way if someone earns the full 20pts without doing the extra credit, they’ll still get 100%. But it allows you to enter a grade above the maximum points value if they’ve done that extra work.
- Additionally, if the assignment is part of a category in the Grade Book, you’ll need to edit BOTH the category and the Final Grade item by choosing “Can exceed.”
- Add the question to the quiz, normally
- Check the box next to the question
- Click “More Actions” and choose “Toggle Bonus.” You’ll now see the total possible points for the whole quiz does not include that question. That means
- There’s no penalty for not answering it.
- If they answer it incorrectly, it will not hurt their overall grade.
- If they answer it correctly it will boost their grade.
- Save quiz and go to Grades > Manage Grades
- Edit this quiz item and choose “Can Exceed.” So, even if the student got 100% on all required questions they could still exceed that grade if they answered the bonus question.
- If your quizzes are in a category, you need to also set both that category AND the Final Calculated Grade to “Can Exceed”
This video by Lakeland College describes these differences steps clearly.
Display cumulative course grades to students
To let students track their course grades throughout the semester, a few things must be set in place.
- If you’re using a Weighted system, before anything else, the Grade Book items (columns) and categories must be accurately set up (See Setup Wizard section above).
- For either the Weighted or Points-based system, the Final Calculated Grade column must be set to “release grades” to all students.
Adjustments can be made to their final grade at the end of the semester. (See Switching from “Final Calculated” to “Final Adjusted” at the end of the semester in the next block below.)
The Final Calculated Grade column automatically exists in every course, and it displays the students’ cumulative scores to YOU. However, you can also allow each student to see their own cumulative grade. This can be beneficial to students and motivating for them to see their progress.
To allow students to see their final grade as it changes through the semester, follow these steps:
Step 1: Choose the correct display settings
This is also described above in choosing the settings. You can access your Grade Book settings by using the “Set up wizard” or by following these steps:
- Go to Grades & Feedback > Grades
- Click on Settings (gear icon) in the top right corner
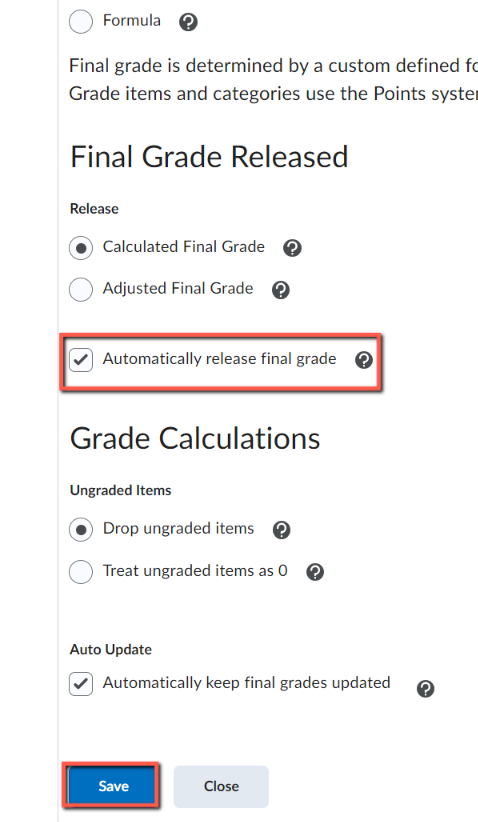
- Click on the tab, Calculation Options
- Scroll down to the bottom and select Calculated Final Grade, and then check the box for Automatically Release Final Grade just below it
- Click Save
Step 2: Release final grade to students
This is the last step in making sure students see their overall grade:
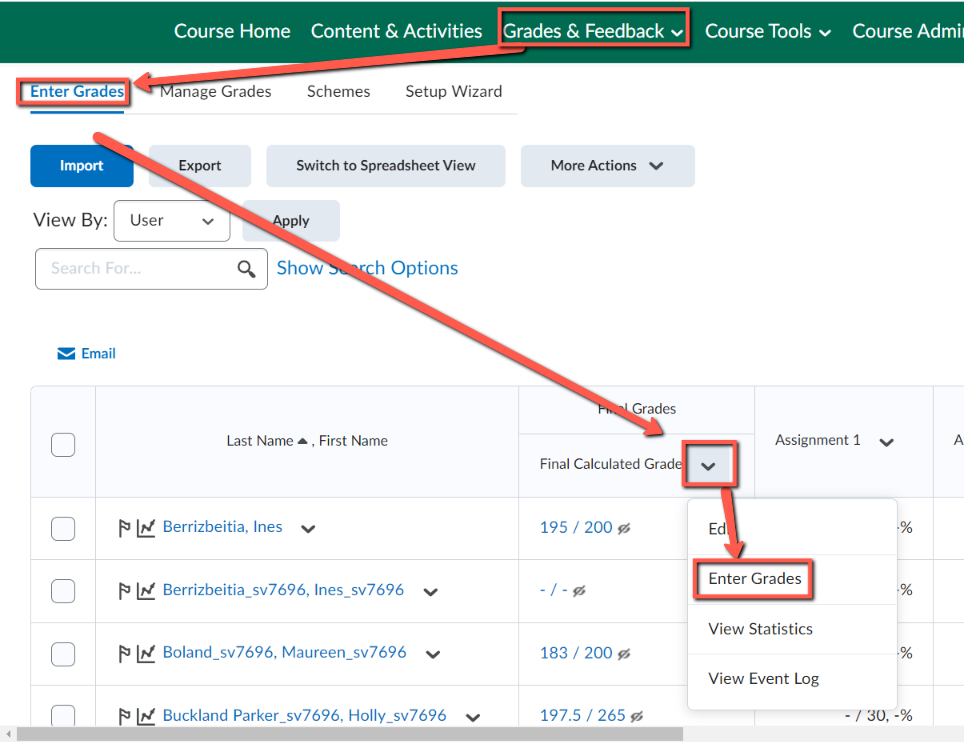
- Go to Grades & Feedback > Grades
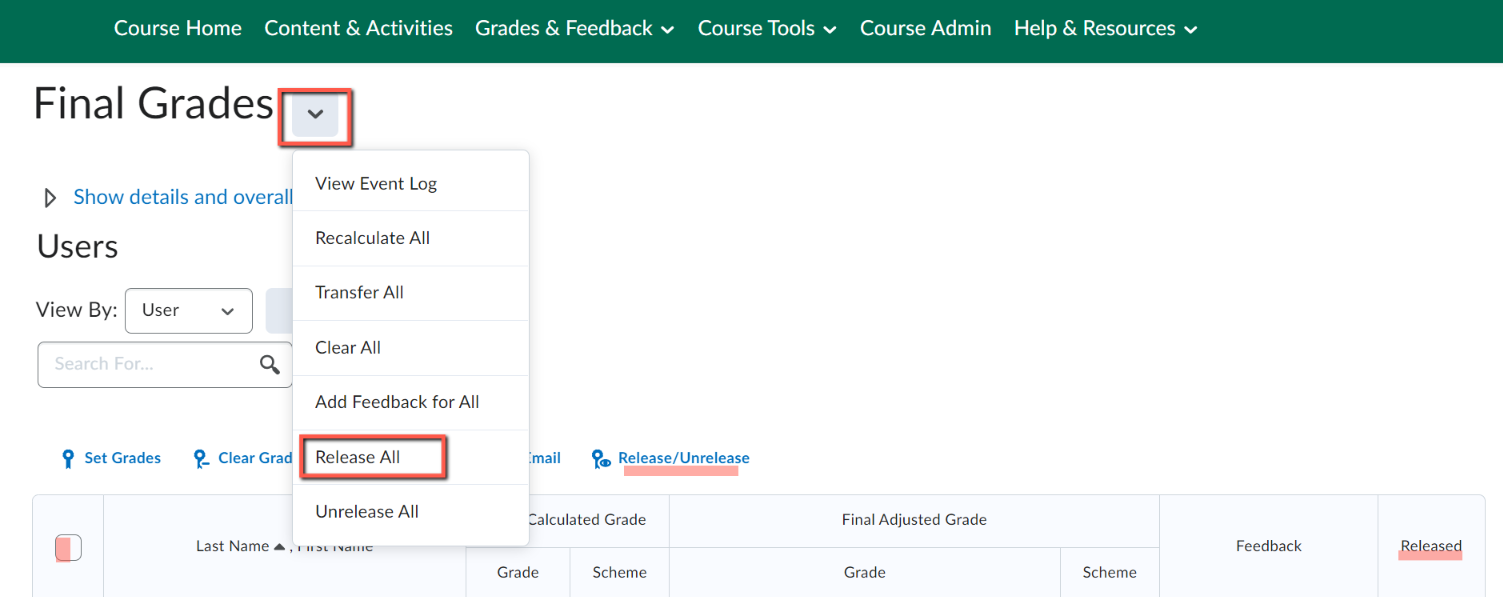
- Click the dropdown arrow at the top of the Final Calculated Grade column
- Choose Enter Grades
- At the top of this page, next to the main title, click the drop down arrow and choose “Release All” (See images below)

Switching from “Final Calculated” to “Final Adjusted” at the end of the semester
Why might you want to do this?
If you want to manually adjust some, or all, of your students’ final grades at the end of the semester, utilize the Final Adjusted Grade column. Note that the only time to make this switch is at the end of the semester when all of your grading is completed. That’s because, while the default Final Calculated Grade column continues to recalculate and display changing grades as student work is scored, the Final Adjusted Grade column is static, and the total isn’t recalculated even when new grade data is posted.
When you’ve completed grading, you will transfer all grade data from the Final Calculated Grade over to the Final Adjusted Grade column, then you can edit all or some students’ grade totals as you wish. (Even if you’re only editing a few grades, you’ll need to move all grade data to this column.) Here’s how:
- At the top of the Final Adjusted Grade column, click the down arrow and choose “Enter Grades.”
- Next to the title at the top of the page, click the down arrow and select “Transfer All.”
- NOTE: If more data is added to the Grade Book after you’ve done this, there will be a discrepancy between the Final Calculated Grade and the Final Adjusted Grade. In this case follow steps 1 and 2 but instead of “Transfer” choose “Recalculate all.” However, your modifications will be overwritten, so this is why we wait until the end of the semester to switch to the Final Adjusted Grade view.
Set up alternate grading scheme
Schemes are used in grades to build custom views and grade experiences. They translate grade item points into symbols (such as letter grades) in the Grades display.
You can build a letter grade scheme if you want to grade students on A-F scale. You are able to apply the scheme to an item or the whole gradebook. Instead of 95% displaying to student, an A would display.
Build a Scheme
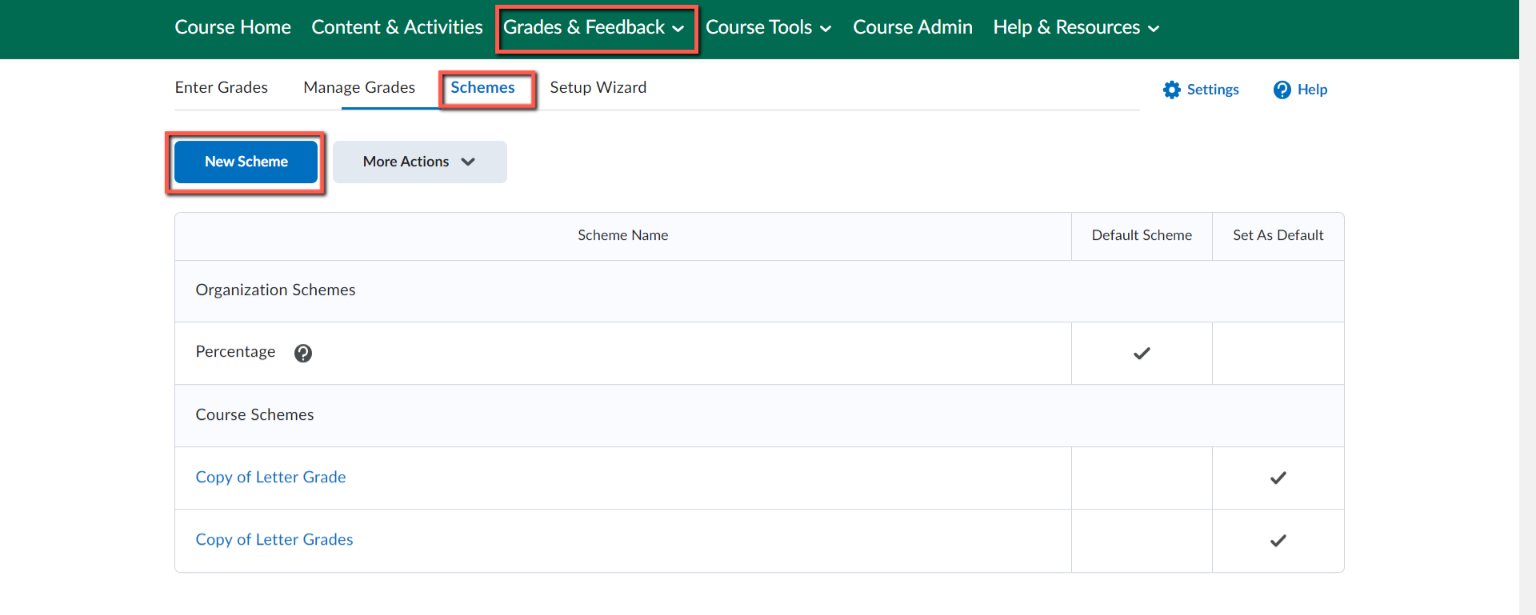
Go to Grades & Feedback > Grades: Schemes >New Scheme
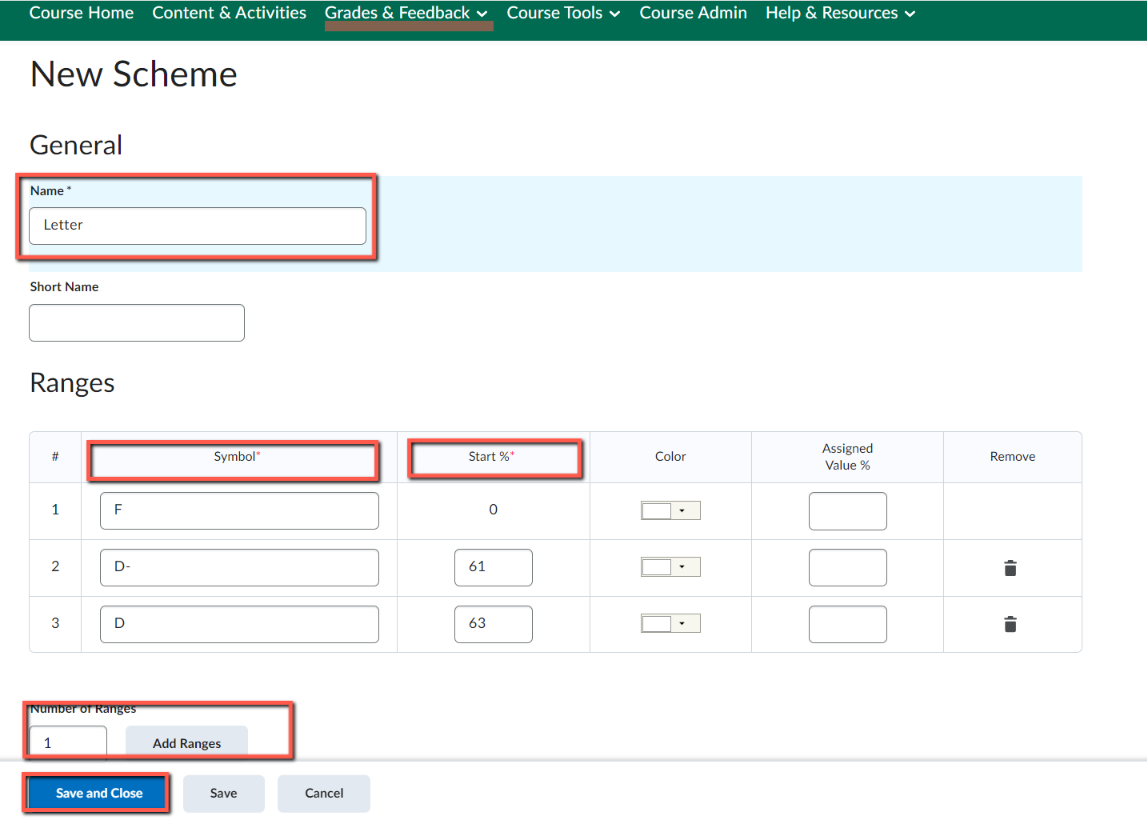
Customize a new Scheme
When creating a customized scheme, you are required to
- Name it through Symbol
- Specify the beginning of range values through Start %
Ranges are where you will enter the values associated with your Scheme.
For example, when creating a Letter Grade Scheme:
- The required Symbol is what is displayed when the scheme is applied ( F, D, C, B, A).
- The required Start % defines the starting threshold for the proficiency range of each symbol. (F starts at 0, D starts at 60, C starts at 70, etc…).
- The optional Color allows you to choose colors as a visual cue to identify grade trends.
- The optional Assigned Value % defines the numeric grade you want learners to achieve when you evaluate them using this grade scheme.
- The Recycle Bin icon within the “Remove” column allows you to remove any extra ranges.
- Save
Implement a Scheme
After you have made your scheme, there are two ways to implement it. The first is to apply it to your whole gradebook; the second is to apply it to select items of your gradebook. Applying a scheme to the whole gradebook will make every column in your gradebook use that scheme. If you choose to only apply the scheme to select items instead, only those items will display that scheme.
Apply to the Whole Gradebook
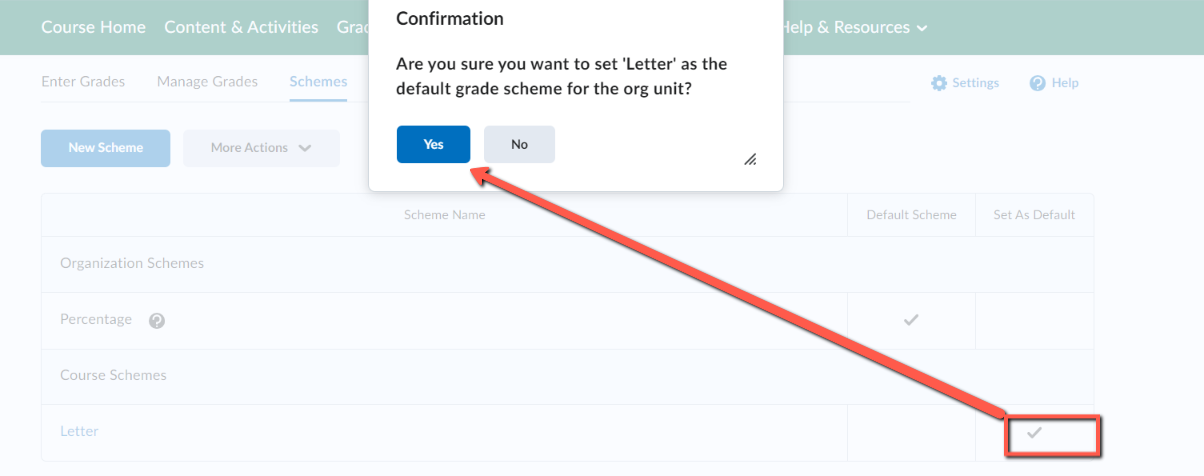
Go to Grades & Feedback > Grades: Schemes> Select Scheme
Click the Check Mark for the scheme you want to set as your default scheme. This will apply the selected scheme to all items in your gradebook unless you specify otherwise.
Apply a Scheme to a Single Grade Item
Go to Grades & Feedback > Grades: Manage GradesSelect a Grade Item > Edit > scroll almost to the bottom of page) Select Grade Scheme > Save and Close.
Use a Scheme
Once the scheme is implemented, you don’t need to do anything special to use it. As you enter in the points earned for each assessment, the scheme automatically displays the appropriate scheme symbol.
If I’m using the letter grade scheme, when the range for B is 8-9 and I give a student an 8 out of 10 points, a B will be displayed in the gradebook.
Please follow the link below for more information:
Link to D2L Brightspace Community Documentation-Create Grading Schemes using the Grades tool
Export the Grade Book
Exporting the Grade Book from Brightspace is recommended for making back-ups for your records and before making any major grading changes or editing Grade Book settings. This is a safety net for you; if you make mistakes that impact student grade data, you can restore grades with your backup.
To do this, follow these steps.
-
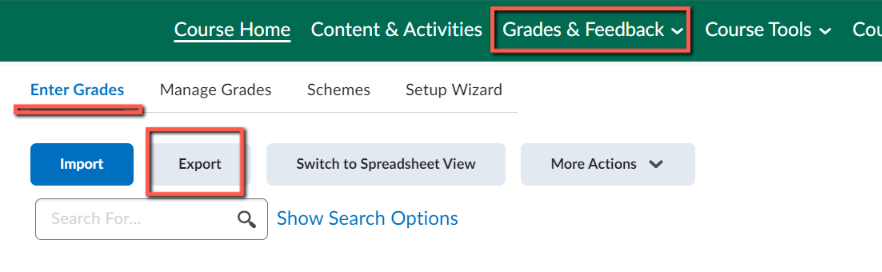
- Go to Grades & Feedback > Grades and click the Export button
- Customize Your Download or Use the Defaults
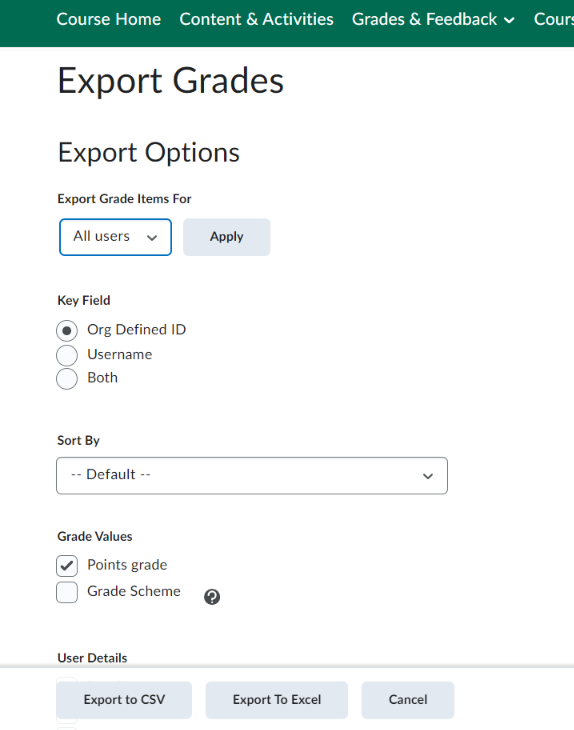
In the Export Options area, you may customize your grade download.
- Select All Users/Groups/Sections and Apply. (all are selected by default)
- Select the Key Field you want to use to identify users. (Org Defined ID is selected by default)
- Select the Grade Values to export. (Points are selected by default)
- Select the User Details you want to export. (nothing is selected by default) Select fields for easy identification.
- Select the checkbox next to any grade item or grade category you want to export. If you want to export the whole grade book, select the top checkbox which should make all of the boxes checked for export.
![]()