
The Cisco Personal Communications Assistant (PCA) is a web portal that grants users the ability to configure and check their voicemail box from the web.
Log Into the Cisco Personal Communications Assistant
- Connect to the Cisco AnyConnect VPN as detailed in our guide: https://www.uvm.edu/it/kb/article/mfa-vpn/
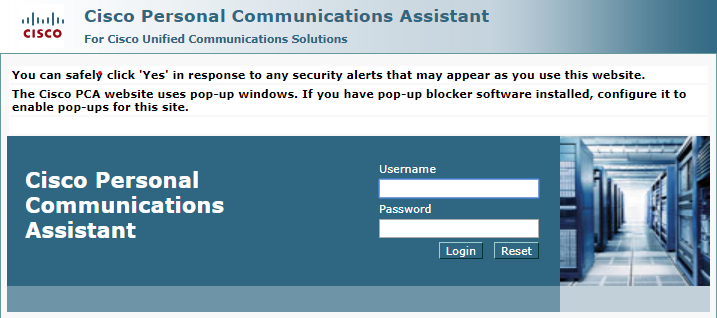
- Visit go.uvm.edu/ciscopca in your chosen web browser, and log in with your UVM NetID and password.
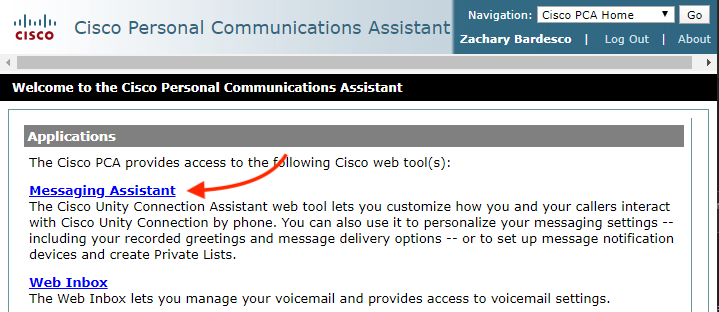
Messaging Assistant
The Messaging Assistant can be used to edit messaging settings – including your recorded greetings and message delivery options – or to set up message notification devices.
To access these options, click Messaging Assistant from the Cisco PCA Home page.
Personal Options - Preferences
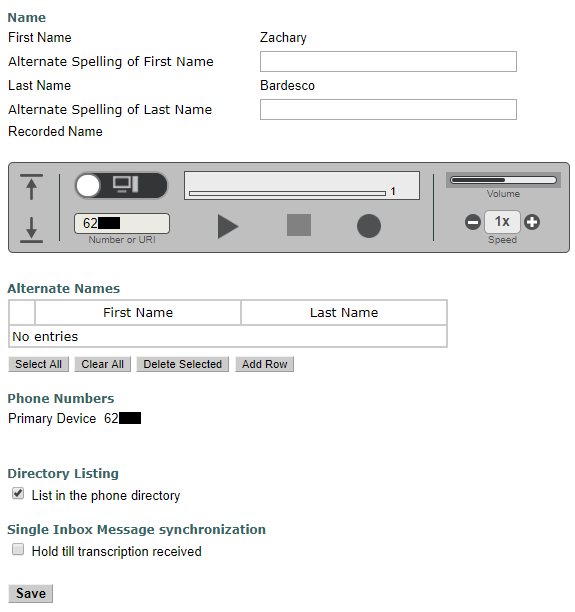
- Name: Your first and last name are noted in this section, as well as your recorded name. You can play your recorded name or change it using the box below.
- Alternate Names: An alternate first name and last name, should you need them
- Phone Numbers: This section lists your primary extension, alongside any alternate contact numbers.
- Directory Listing: When users call into the PCA, they can search for people by name. To disable this function, uncheck the box.
Press the Save button to save any changes you make to your Personal Options.
Phone Menu - Preferences
Phone Menu preferences are used to determine how you want the PCA to act when you call the system over the phone.
Message Playback - Preferences
You can change the order messages are played back to you when accessing your voicemail from the telephone.
Transfer and Screening - Preferences
 You can have the PCA reroute your calls to a different phone number. These options can also be configured directly using the CFwdAll or Forward All buttons on your Cisco telephone.
You can allow users to list and re-record their messages, or to mark their message as urgent.
Passwords
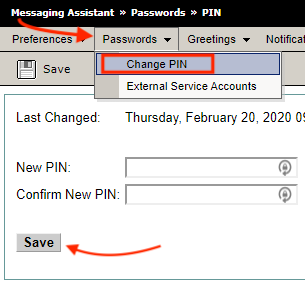 The PCA system allows you to change your voicemail password (PIN) from the Web Interface. You do not need to know your previous pin to create a new pin.
- Select Change Pin from the Passwords drop down.
- Fill out the New Pin and Confirm New Pin fields appropriately, then click Save.
Greetings
You can view and edit your greetings by selecting View Greetings from the Greetings drop down.

- Alternate – A temporary greeting that is different from your standard greeting. Enabling this greeting overrides all other greetings.
- Busy – This greeting is played when you are on the phone
- Internal – This greeting will be heard by calls placed within UVM
- Closed – This greeting is played during off-hours
- Standard – This is the default greeting
- Holiday – This greeting will be played when the campus is closed for a Holiday
Greeting Configuration
Clicking a greeting will open the configuration options for that greeting. 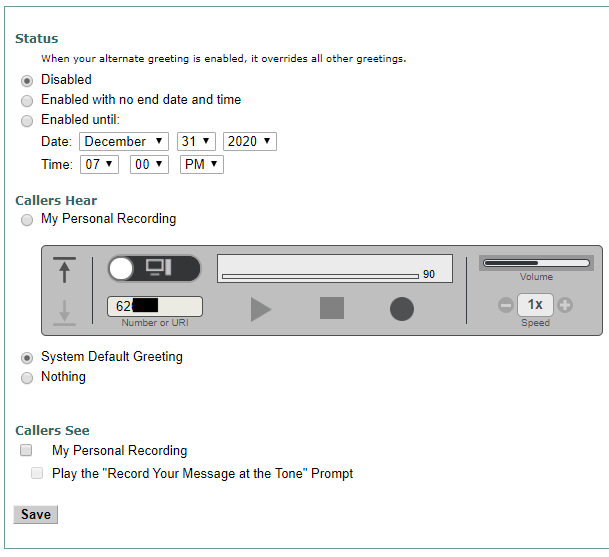
- In the Status section, you can enable or disable a greeting, or you can enable until a specified end date, at which time the greeting disable automatically.
- In the Callers Hear section, you can configure the recording that callers hear when they call your number. You can also opt to use the System Default Greeting, or nothing at all.
- In the Callers See section, you can turn on or off you Personal Recording, and optionally, remove the prompt that instructs callers on when to start leaving their message.
Click Save to confirm any changes you made to these settings.
Notification Devices
The PCA system can notify you of new voicemail messages to devices other than your desk phone. To view and configure these devices, click View Notification Devices under the Notification Devices option.
 These devices are disabled and not configured by default. Clicking a device will open the configuration options for that device. This section details how to configure a home phone for notifications, but the steps will be similar for other devices.
Example: Configure your Home Phone to Receive Voicemail Notifications
- Enter your phone number in the Phone Number or URI field
- Remember that you need to add a 9 for a local number, or an 80 for a long distance number, just as if you were calling the phone number from your UVM phone
- Leave the Dialing Options field empty unless they are applicable to this device
- In the Notify Me Of section, you can specify the type of messages that will be affected by this configuration, and opt to only be notified in the message is marked as urgent by the caller.
- In the Where Call Is From section, you can specify specific callers or phone numbers who’s messages will be forwarded to you.
- Use the Notification Schedule section to select the day and times of the week when PCA may notify this device.
- In the Contact Options, If Home Phone Does Not Answer, and If Home Phone Is Busy fields, you can configure how persistent the PCA is in attempting to notify you of a new voicemail message.
- In the If Notification Fails field, you can set what other Notification Device the PCA tries if you are not reached.
When you have completed configuration of this Notification Device, click Save to save the settings.
Private Lists
Private Lists are like e-mail distribution lists for your voicemail. This is typically useful for those are are interested in sending an audio message to several people. A private list can only be used by you – callers leaving you a voicemail cannot use your private list.
Web Inbox
The Cisco Web Inbox allows you to manage voice messages and voice message receipts without the need of your Desk Phone. You can also compose new voice messages, and play, reply to, forward, or delete voice messages you have received.
Use your NetID and password to log into the Cisco Web Inbox at go.uvm.edu/ciscoinbox. You may also access the Web Inbox through the Cisco PCA home page.
When someone leaves you a voicemail, a message waiting indicator light will be lit on your desk phone, and, by default, you will receive a copy of that voicemail in your UVM email inbox. The e-mail message will be addressed from the Cisco Unity Connection Messaging System, the caller ID (if available), or, for UVM senders, from that senders’ email address.
The message waiting indicator light will torn off when you check your voicemail using your desk phone or through the Cisco Web Inbox.
Web Inbox Controls

- Settings: opens the Messaging Assist in a new browser window or tab
- Routing Rules: Opens the Cisco Unity connection Personal Call Transfer Rules web tool in a new browser window or tab
- This option is not used at UVM, and may not appear.
- Account Name: Display only – displays the account name of the currently signed-in user
- Sign-Out: Sign out of Web Inbox, returning to the sign-in page.
- About: View information about the Web Inbox
- Refresh: refresh the information on the current page
- New Message: Compose a new voice message
- Sent: View or manage messages in your Sent folder
- Deleted: View or manage messages in your Deleted items folder
- Inbox: View or manage messages in your Inbox folder
Audio Controls

- Volume Slider: Change the audio playback Volume (only available when Computer is selected as the playback and recording device)
- Message Scroller: View the number of messages in the selected folder, and scroll through pages of messages if there are more than 25 messages in the folder
- Phone and Extension: When Phone is selected, Cisco Unity Connection calls you at the extension you enter in the text box, enabling you to make a recording or play audio using your desk phone.
- Computer: When Computer is selected, Cisco Unity Connection uses the microphone and speakers or other default audio device to make a recording or play audio
Listening to a Message
To listen to a message, click the message, then click the play button. Options for dealing with the message will appear below the selected message.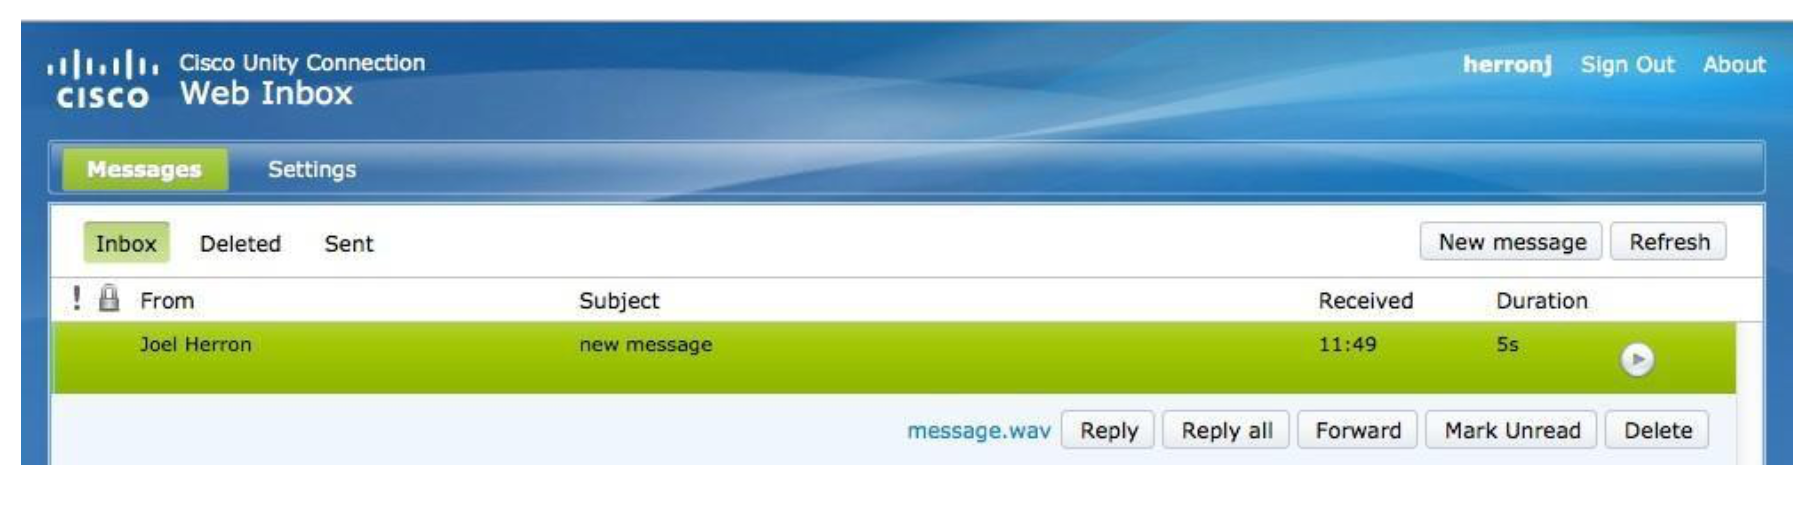
Composing and Sending a New Message
These steps detail creating and sending a message through the Web Inbox.
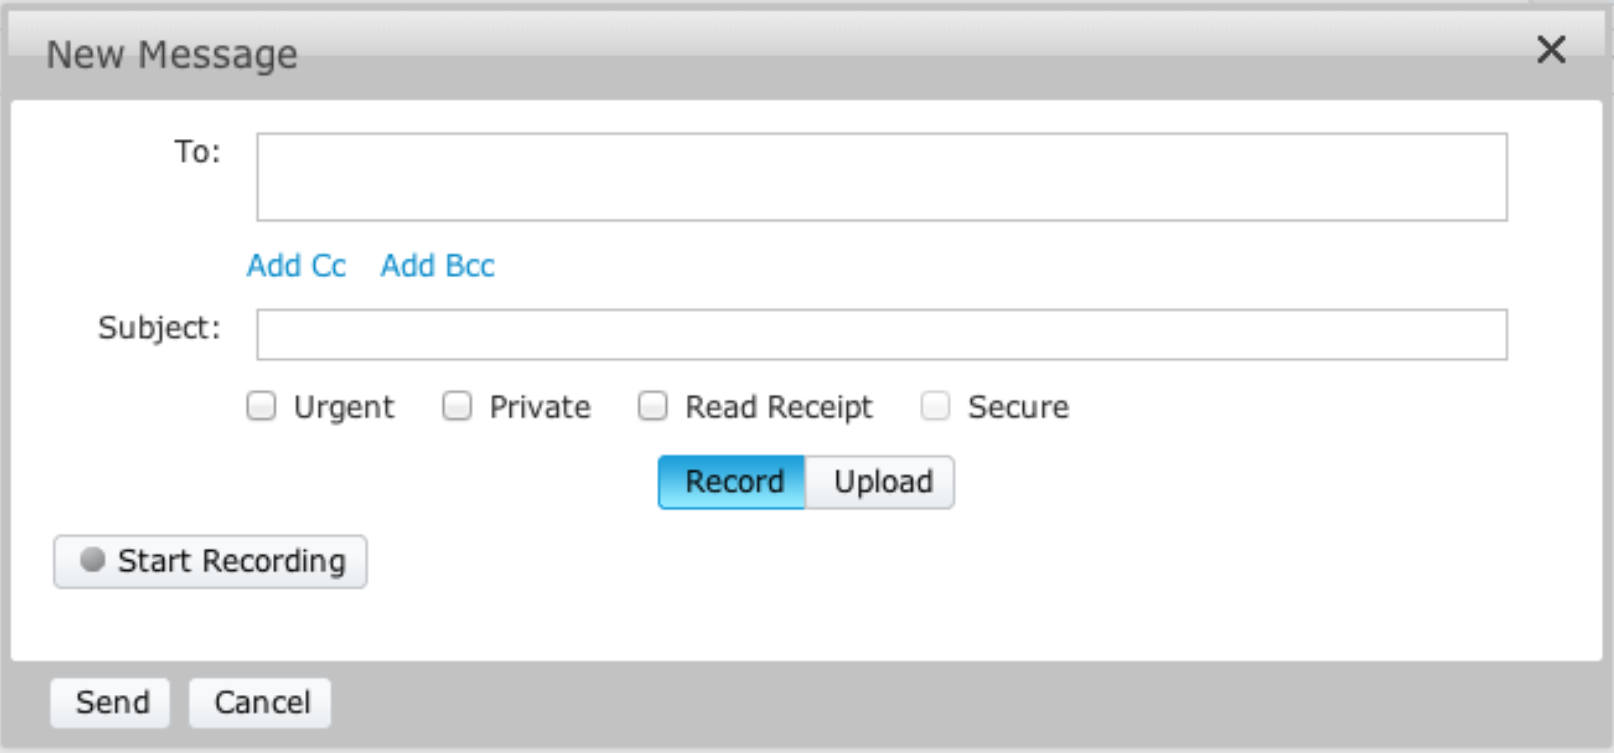
- Click New Message in the top right corner to bring up the New Message Dialog box.
- Fill out the message

- Enter the recipient(s) UVM email address(es) in the To.
- Enter a subject, and select any of the options that you’d like the message to include.
- Record or Upload your message:
- To record, click “Start Recording”
- If your browser shows a message, requesting access to use your microphone, click accept
- As soon as you click record, the system will begin recording your message.
- Click Stop Recording when you are done
- You will have the option to listen to your recording and re-record it.
- When you are satisfied with your message, click Send in the bottom left corner, and your message will be sent.
Deleted Folder
- Empty deleted items: Permanently delete all items in your Deleted folder
- Undelete: Move the selected message back to the Inbox folder
- Right-click to download the message audio and save the file on your computer (this option is not available for secure messages)
Sent Folder

- message.wav: Right-click to download the message audio and save the file on your computer (this option is not available for secure messages)
- Reply: Reply to the sender
- Reply all: Reply to the sender and all recipients
- Forward: Forward the message
- Delete: Delete the message permanently (sent messages are not moved to the Deleted folder)
- Mark unread: Mark the message unread