
The following guide provides printing instructions for CEMS Faculty and Staff.
Windows 10
Adding a Printer to Your Computer
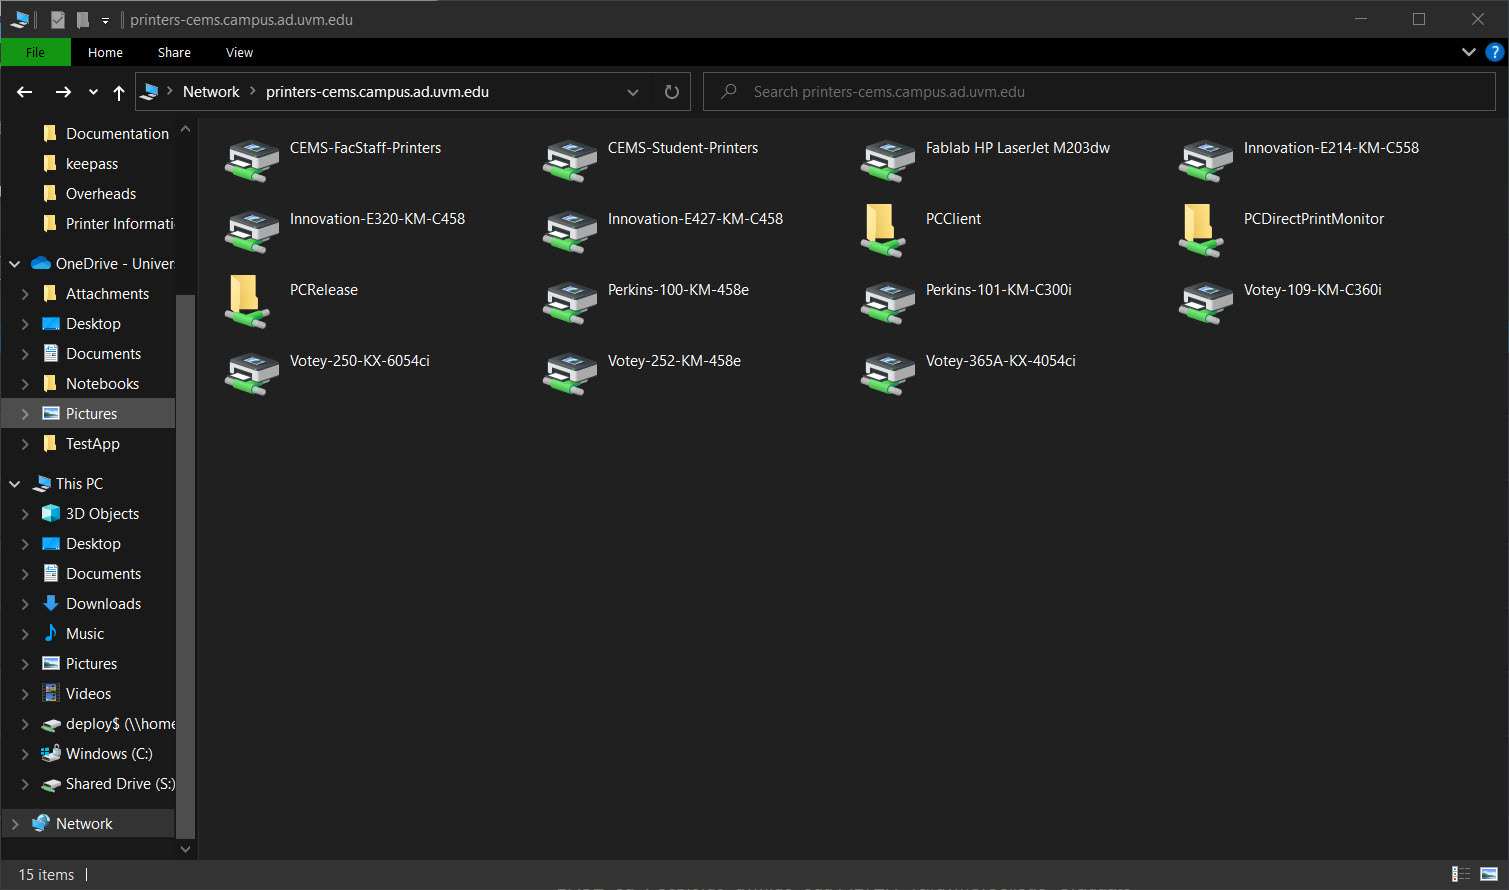
- Open Windows File Explorer (the folder icon on the Windows 10 taskbar) and type \\printers-cems.campus.ad.uvm.edu into the address bar, and hit enter
\\printers-cems.campus.ad.uvm.edu
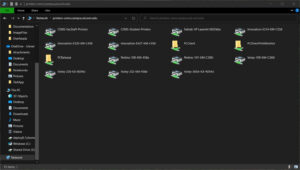
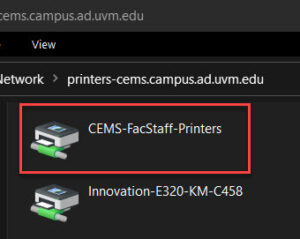
- Machines on the Domain should automatically authenticate and present the following list of printers:
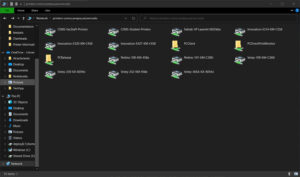
- Double-click on CEMS-FacStaff-Printers or your desired printer to print directly.
- The printer will now be installed. Once the printer is installed, try printing a test page to it.


macOS
Adding a Printer to Your Computer
- Open System Preferences > Printers & Scanners
- Click the (+) button within Printers & Scanners
- Click on the Advanced tab
- If you don’t see the Advanced tab, right-click anywhere on the blank space at the top and select Customize toolbar then drag the Advanced icon up to the top bar
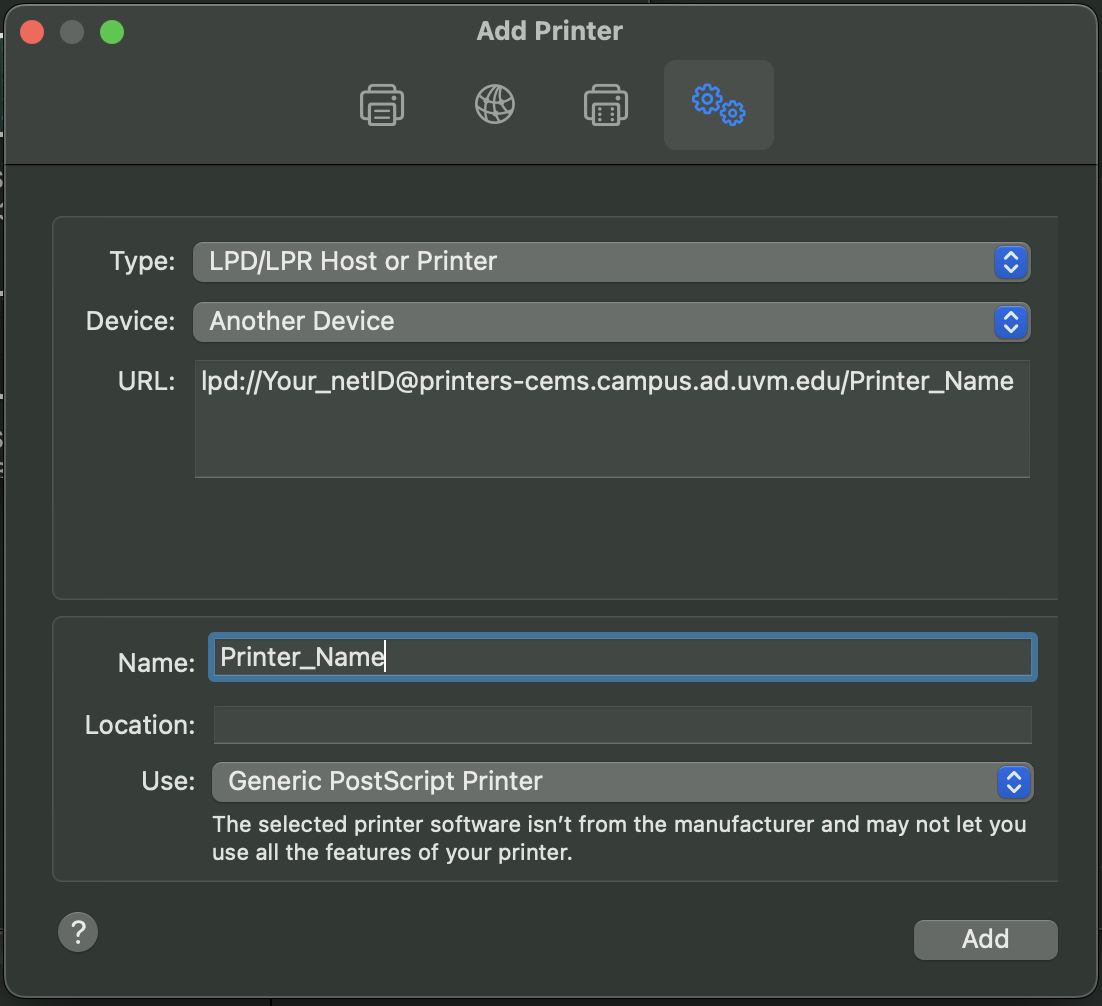
- Printer Settings:
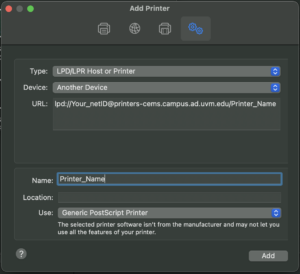 Type: Select LPD/LPR Host or Printer
- Device: Select Another Device
- URL: Enter lpd://Your_netID@printers-cems.campus.ad.uvm.edu/Printer_Name_OR_URL
- Example: lpd://jshmoe@printers-cems.campus.ad.uvm.edu/Innovation-E214-KM-C558)
- Example: lpd://jshmoe@printers-cems.campus.ad.uvm.edu/Innovation-E214-KM-C558)
- Name: Can be anything (Ex. Votey 250)
- Use: Set to the correct driver as directed in the macOS – List of Printers, Drivers, and Settings section below
- Device: Select Another Device
- Click Add
- If you are adding a printer other than the CEMS-FacStaff-Printers FollowMe Queue printer, please see macOS – List of Printers, Drivers, and Settings below for configuration
macOS – List of Printers, Drivers, and Settings
CEMS FacStaff FollowMe Queue (recommended)
- URL: CEMS-FacStaff-Printers
- Driver: Generic PostScript Printer
- Settings:
- Duplex Printing Unit: Checked
Innovation E214
- URL: Innovation-E214-KX-6054i
- Driver: Kyocera TASKalfa 6054ci
Innovation E320
- URL: Innovation-E320-KX-5054ci
- Driver: Kyocera TASKalfa 5054ci
Innovation E427
- URL: Innovation-E427B-KX-5054ci
- Driver: Kyocera TASKalfa 5054ci
Perkins 100
- URL: Perkins-100-KX-5004i
- Driver: Kyocera TASKalfa 5004i
Perkins 101
- URL: Perkins-101-KX-3554ci
- Driver: Kyocera CS 3554ci
Votey 109
- URL: Votey-109-Kyocera-CS-3554ci
- Driver: Kyocera Taskalfa 3554ci
- Settings:
- Document Finisher: 4000-sheet finisher
- Paper Feeders: Not Installed
- Mailbox: Unchecked
- Punch Unit: Checked
- Folding Unit: Unchecked
- Z-Fold Unit: Unchecked
- Inserter (1,2): Unchecked
Votey 250
- URL: Votey-250-KX-6054ci
- Driver: Kyocera Taskalfa 6054ci
- Settings:
- Document Finisher: 4000-sheet finisher
- Paper Feeders: Not Installed
- Mailbox: Unchecked
- Punch Unit: Checked
- Folding Unit: Unchecked
- Z-Fold Unit: Unchecked
- Inserter (1,2): Unchecked
Votey 365A
- URL: Votey-365A-KX-4054ci
- Driver: Kyocera Taskalfa 4054ci
- Settings:
- Document Finisher: 4000-sheet finisher
- Paper Feeders: Not Installed
- Mailbox: Unchecked
- Punch Unit: Checked
- Folding Unit: Unchecked
- Z-Fold Unit: Unchecked
- Inserter (1,2): Unchecked
Mansfield House
- URL: Mansfield-Basement-KX-CS-3554ci
- Driver: Kyocera Taskalfa 3554ci
- Settings:
- Document Finisher: 4000-sheet finisher
- Paper Feeders: Not Installed
- Mailbox: Unchecked
- Punch Unit: Checked
- Folding Unit: Unchecked
- Z-Fold Unit: Unchecked
- Inserter (1,2): Unchecked
Release a Print Job – FollowMe Queue
CatCard Release
- Swipe your card at the copier’s scanner
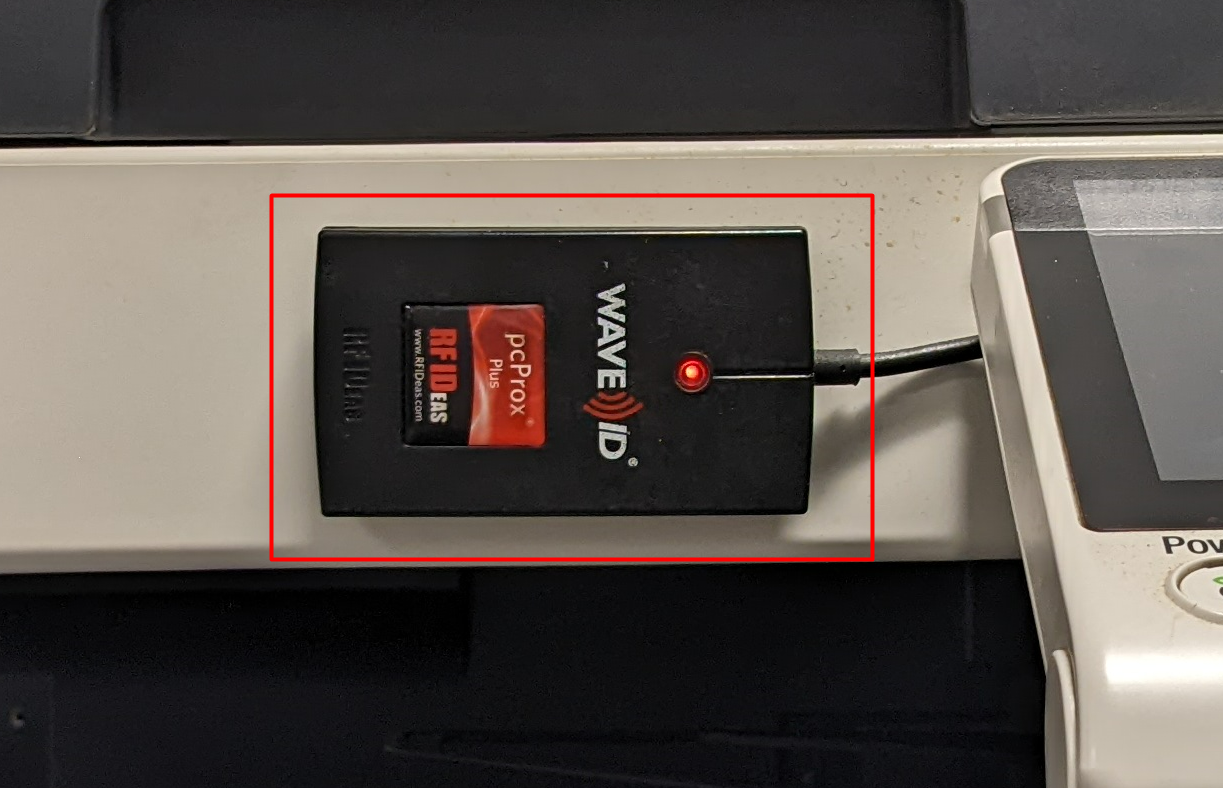
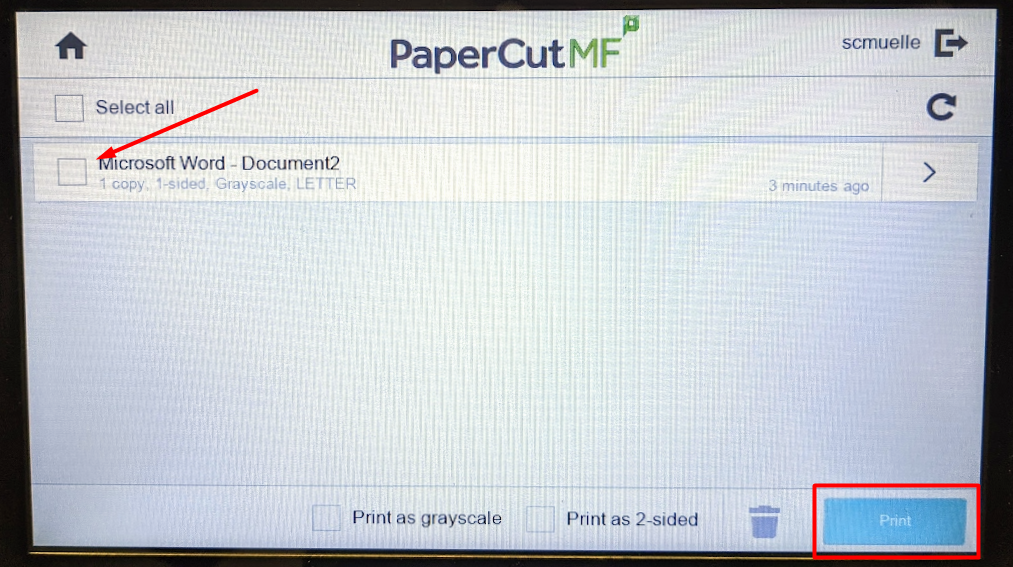
- At the printer’s display, select Print Release

- Select the jobs you’d like to release and press the Print button
Mobile Release
Each of the CEMS copiers has a QR code attached to it. Scan this QR code with your phone’s camera to begin Mobile Release.
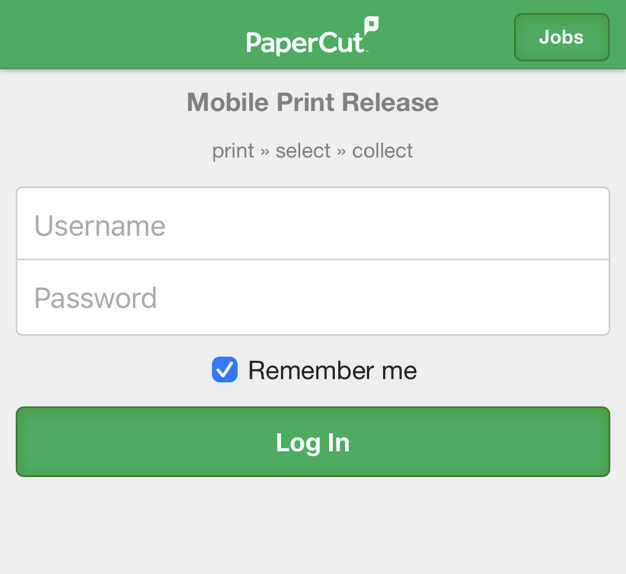
- Scan the QR code located at your printer. You’ll be presented with the following login screen
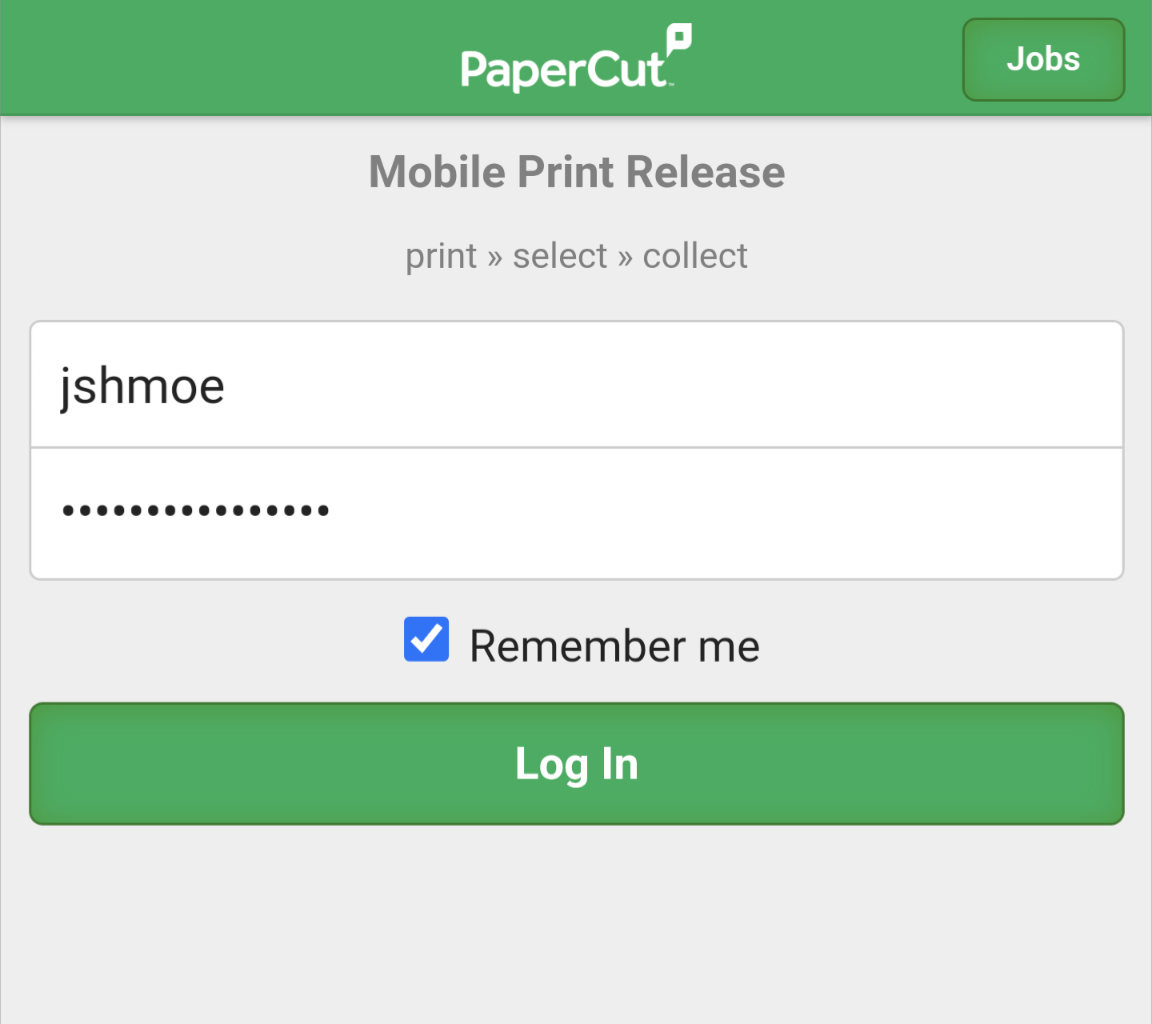
- Authenticate using your netID and netID Password
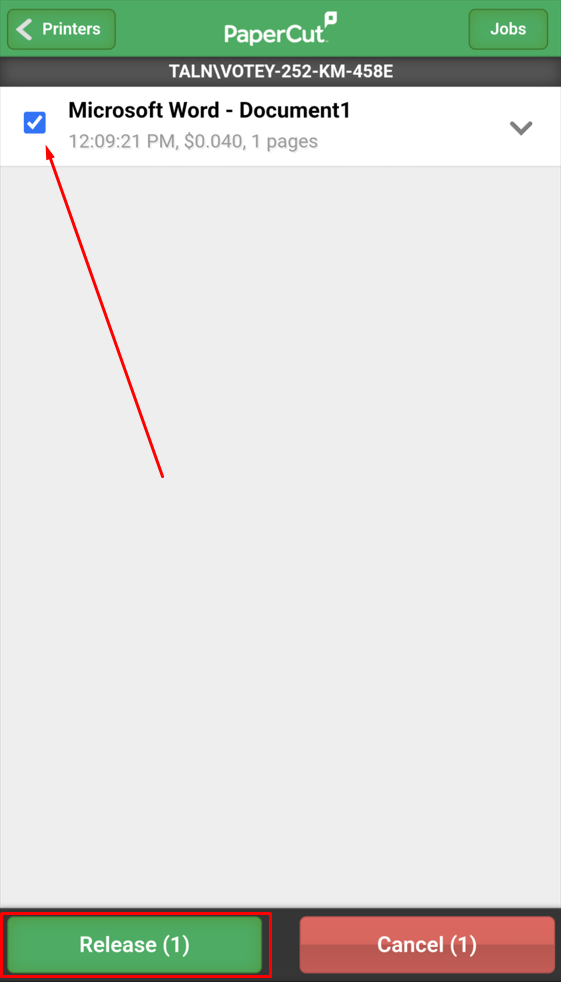
- Release your print job by selecting the document you’re trying to print and pressing the Release button
- Select your copier from the list below
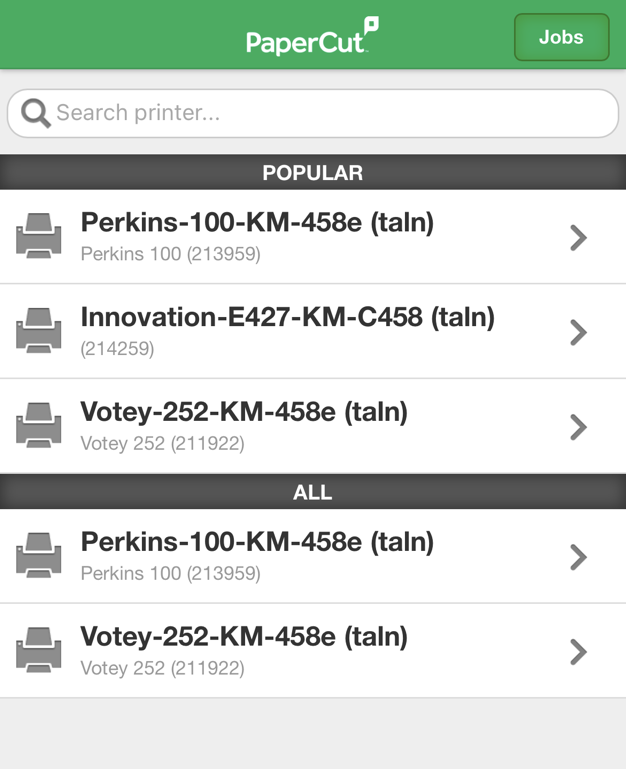
- Release your print job by selecting the document you’re trying to print and pressing the Release button