What are Intelligent Agents (IAs)?
Intelligent Agents automatically scan Brightspace according to the criteria you set. When you run an Intelligent Agent, it will identify the students who have met its criteria. IAs can automatically send emails to predefined email addresses (your own or your students’) if certain criteria have been met. Intelligent Agents have unique criteria that you can choose from, but you can also use them with Release Conditions.
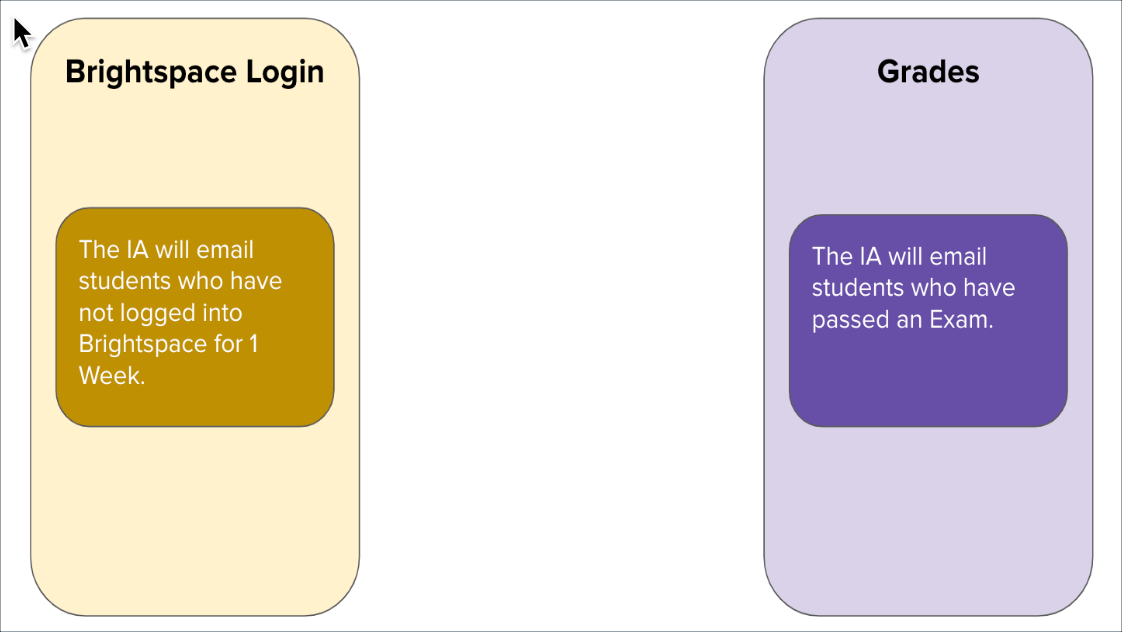
Examples
Using Replace Strings in Intelligent Agents
Replace Strings automatically replace the string found within curly brackets with either the name or term. You can include Replace Strings in the email that the Intelligent Agent will send to the students to make it more personal. NOTE: An Org Unit is your course.
Example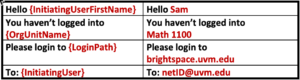

Read more in this article, Brightspace – Replace Strings.
What tools work with Intelligent Agents?
- Content
- Discussions
- Quizzes
- Assignments
Create an Intelligent Agent to Monitor Course Access
Create an Intelligent Agent to Monitor Course Access
To create an Intelligent Agent that will monitor student course access:
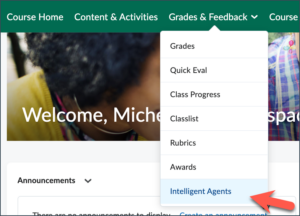
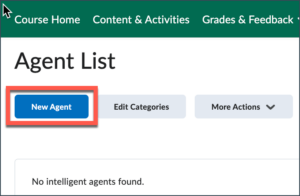
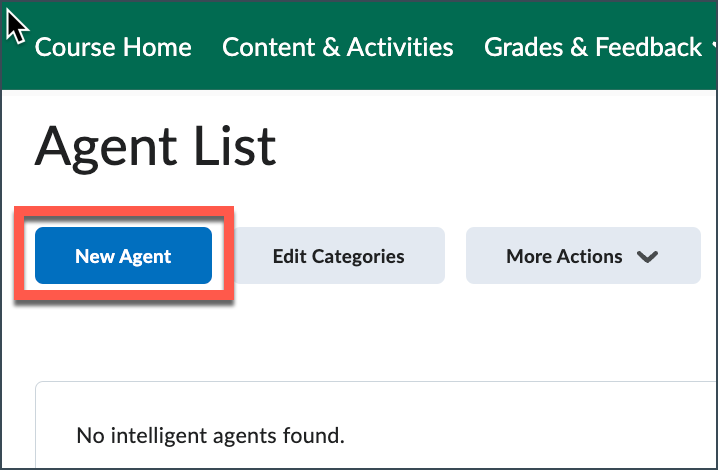
- From the course Navbar, click Grades & Feedback and select Intelligent Agents.
- Click New Agent to create a new agent.
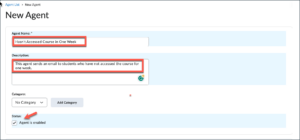
- Enter the Agent’s name (e.g., “Hasn’t Accessed Course in One Week”), then add a description if desired. Note that you have the option to add the agent to a category. Enable the agent if you want to be able to run by checking the Agent is enabled box.
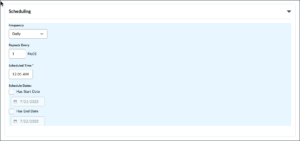
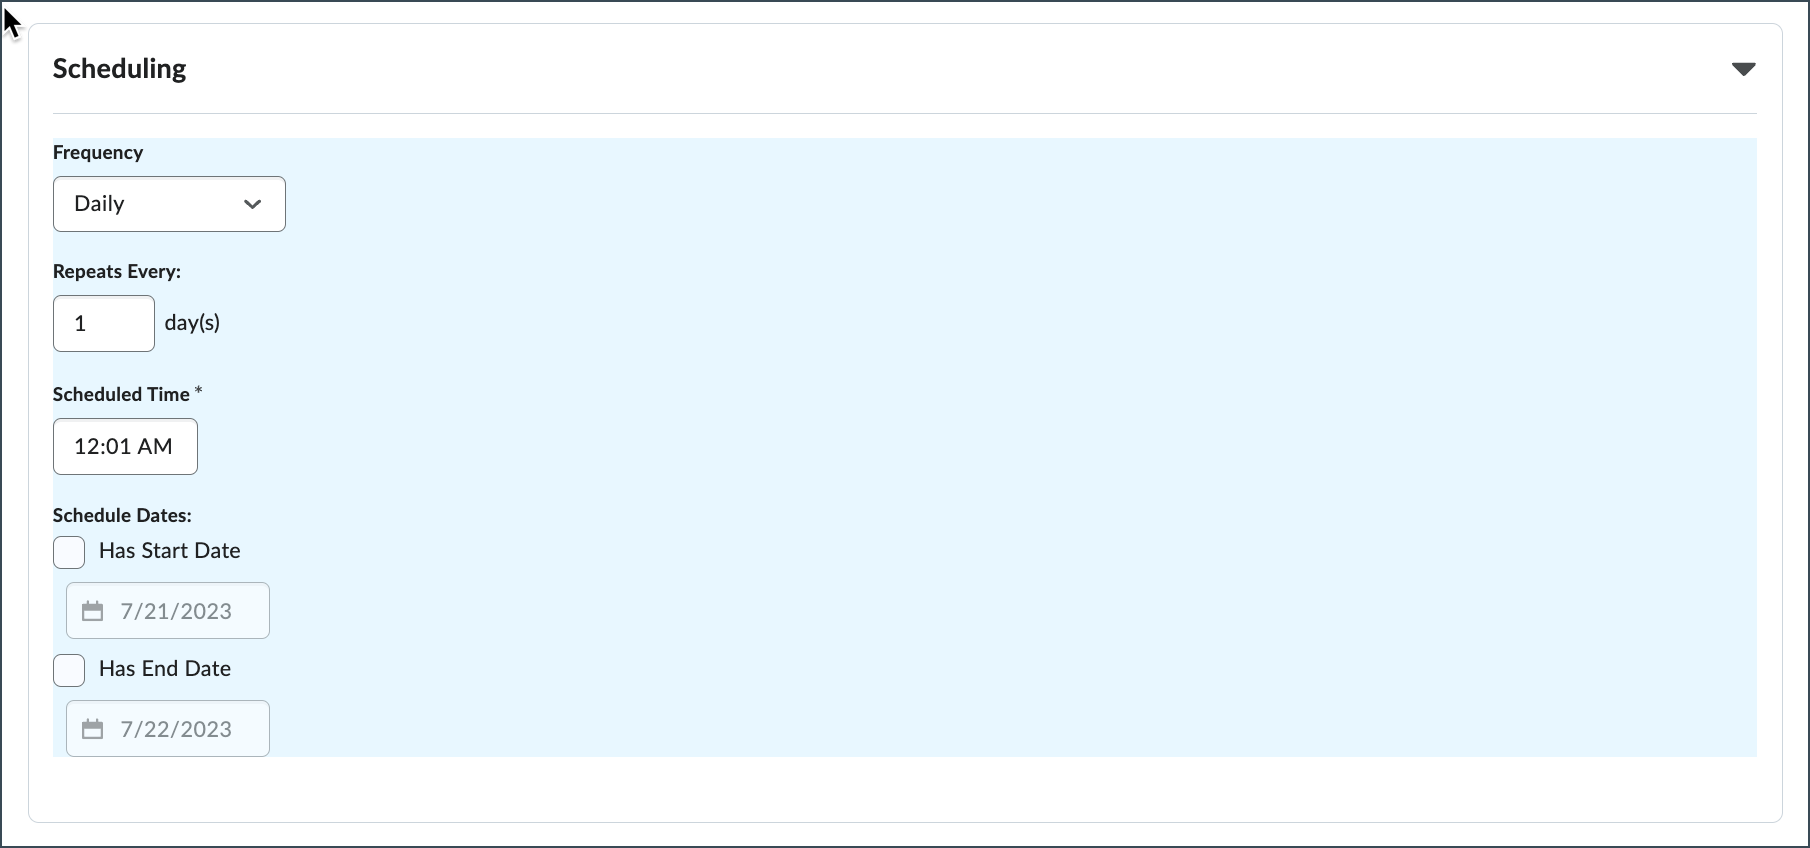
- Set Scheduling: Use this option if you want the agent to run on a set schedue. Click the arrow next to Set Scheduling to expand the options, then click the dropdown arrow next to Frequency and select your preferences. The example below shows an agent that will run daily at 12:01 am. Tip: You can also schedule a date for a One-Time Run only.
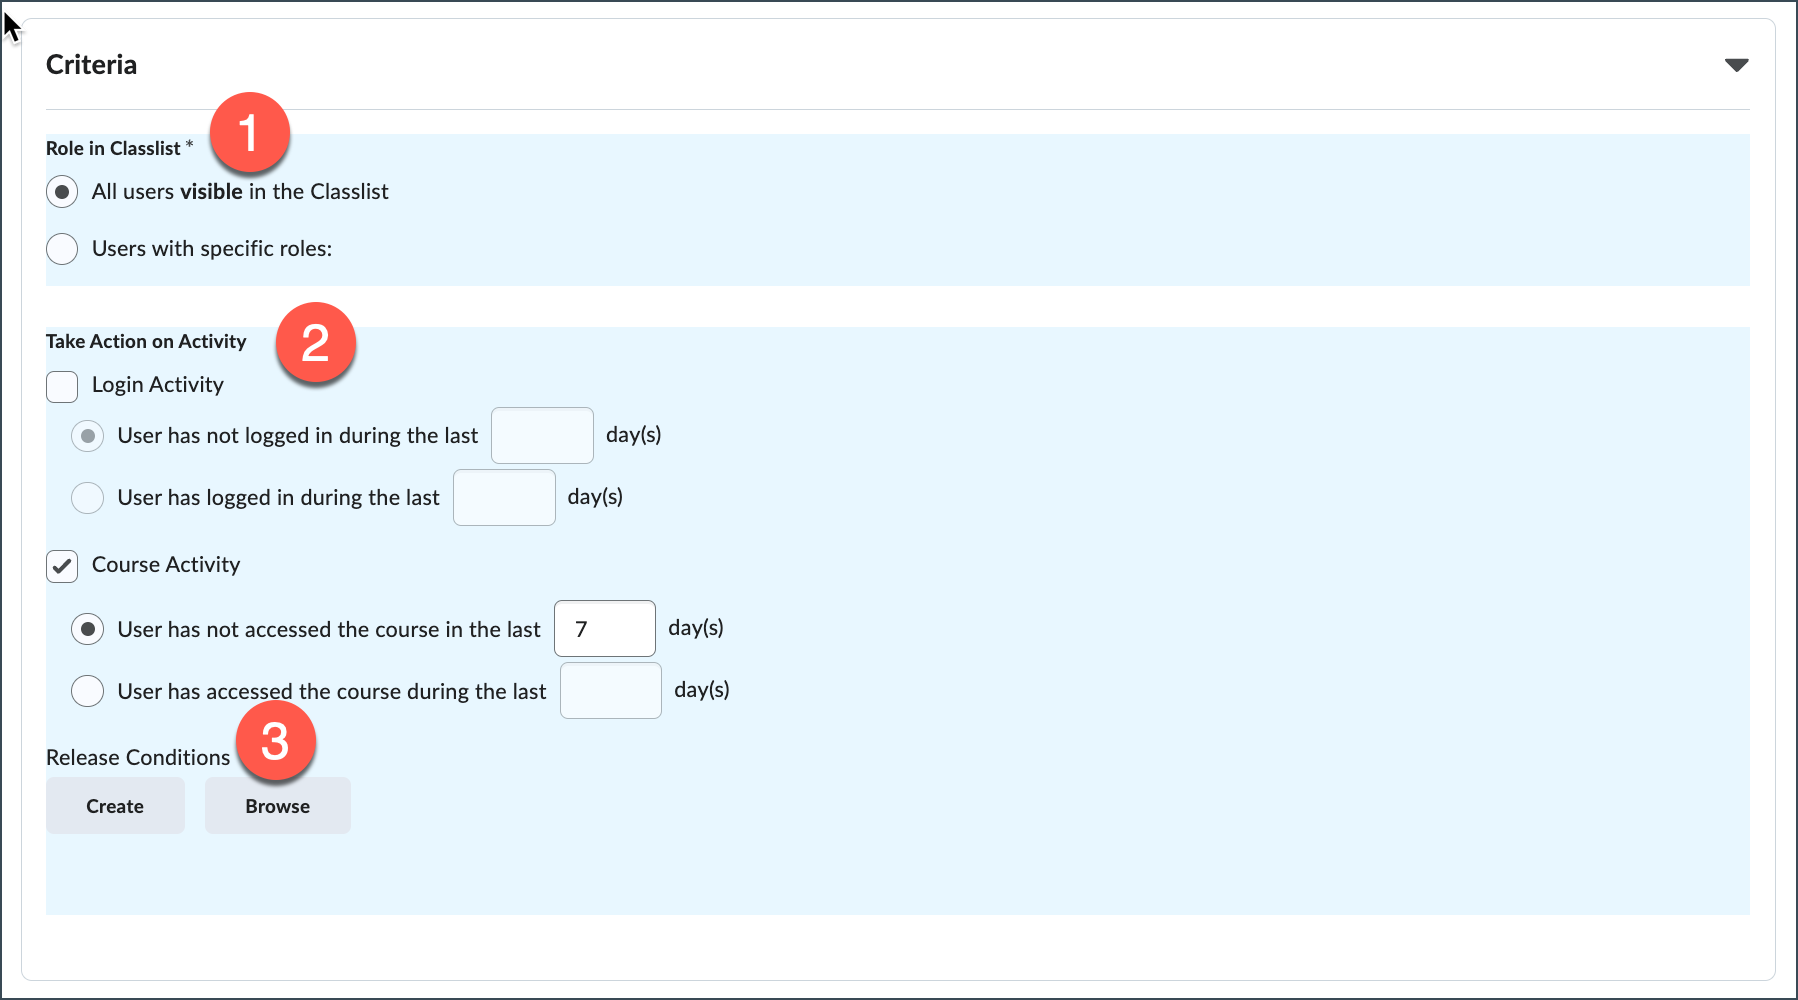
- Edit Criteria: Click the arrow next to Criteria to expand the options, then:
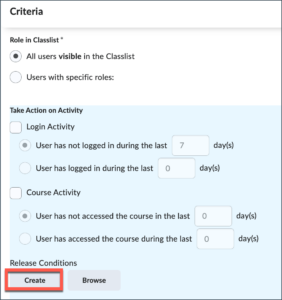
- You can choose to have the agent email users with all roles in the course by clicking the All users visible in the Classlist button. To have the email sent to students only, choose the Users with specific roles: button and select Learners.
- In the Take Action on Activity section, you can choose Login Activity and/or Course Activity. For this example, choose Course Activity and select the option, User has not logged in during the last 7 day(s).
- Optional: Attach a Release Condition.

- Set Repetition Settings: Click the arrow next to Actions to expand the options and go to Repitition settings. You can choose to only have the agent run once when the criteria are met or have it run every time the criteria are met.

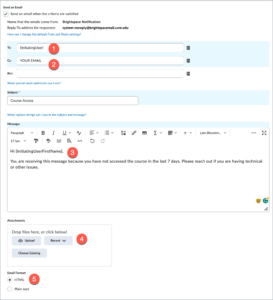
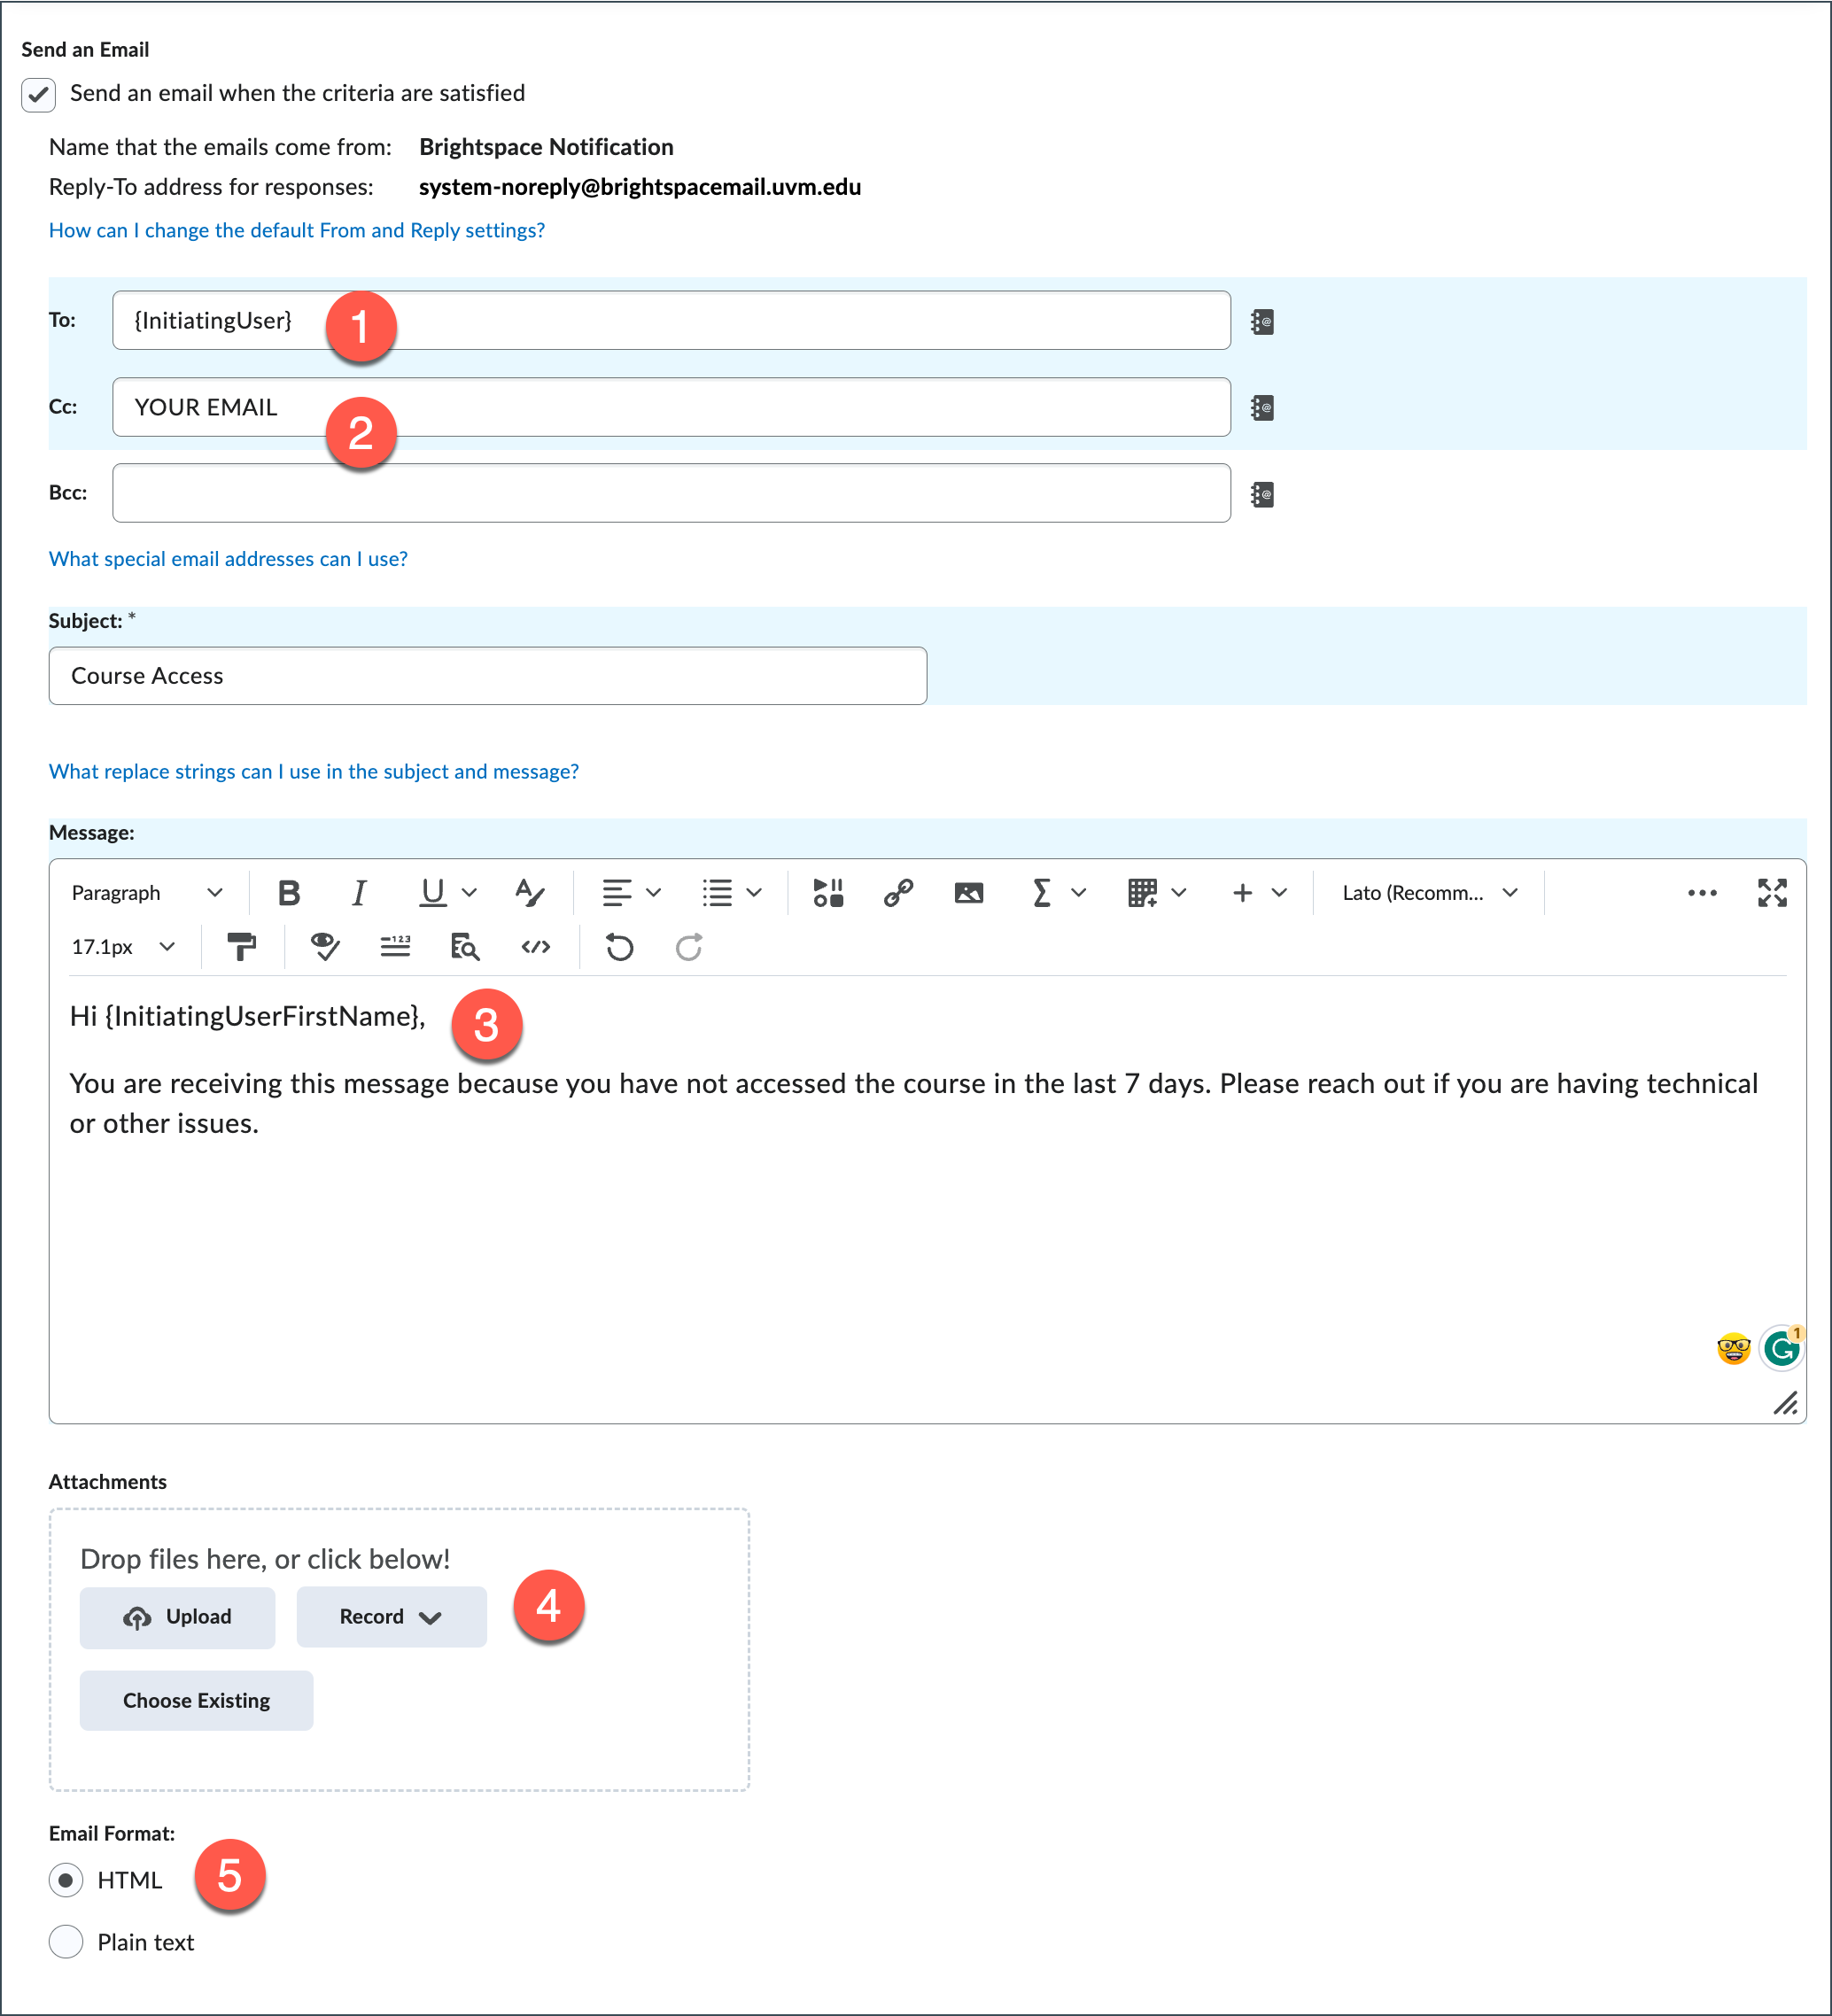
- Send Email Settings


NOTE: You don’t have to direct the agent to send an email if you just want to run it for your own information!
-
- Use the Replace String {InitiatingUser} to email the student(s) who triggered the IA.
- CC yourself on the email if you want to be notified about which students haven’t accessed the course in 1 week.
- Use other Replace Strings in the body of the email to make it more personal, such as using {InitiatingUserFirstName}.
- You can add attachments if you like.
- Make sure to select HTML as the Email Format to keep your links and formatting for the email.
- When you are done with all settings, click Save and Close.
Send a Congratulatory IA
Send a Congratulatory IA
This example demonstrates how to create an Intelligent Agent to send a congratulatory email to students who have passed an exam.
NOTE: Alternatively, you could use a similar IA to send an email to students who did not pass the exam, pointing them to additional resources that might be helpful.
To create the congratulatory IA:
- From the course Navbar, click Grades & Feedback and select Intelligent Agents.
- Click New Agent to create a new agent.
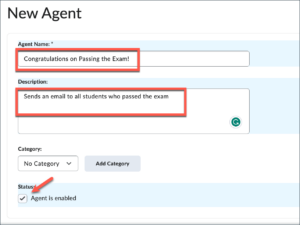
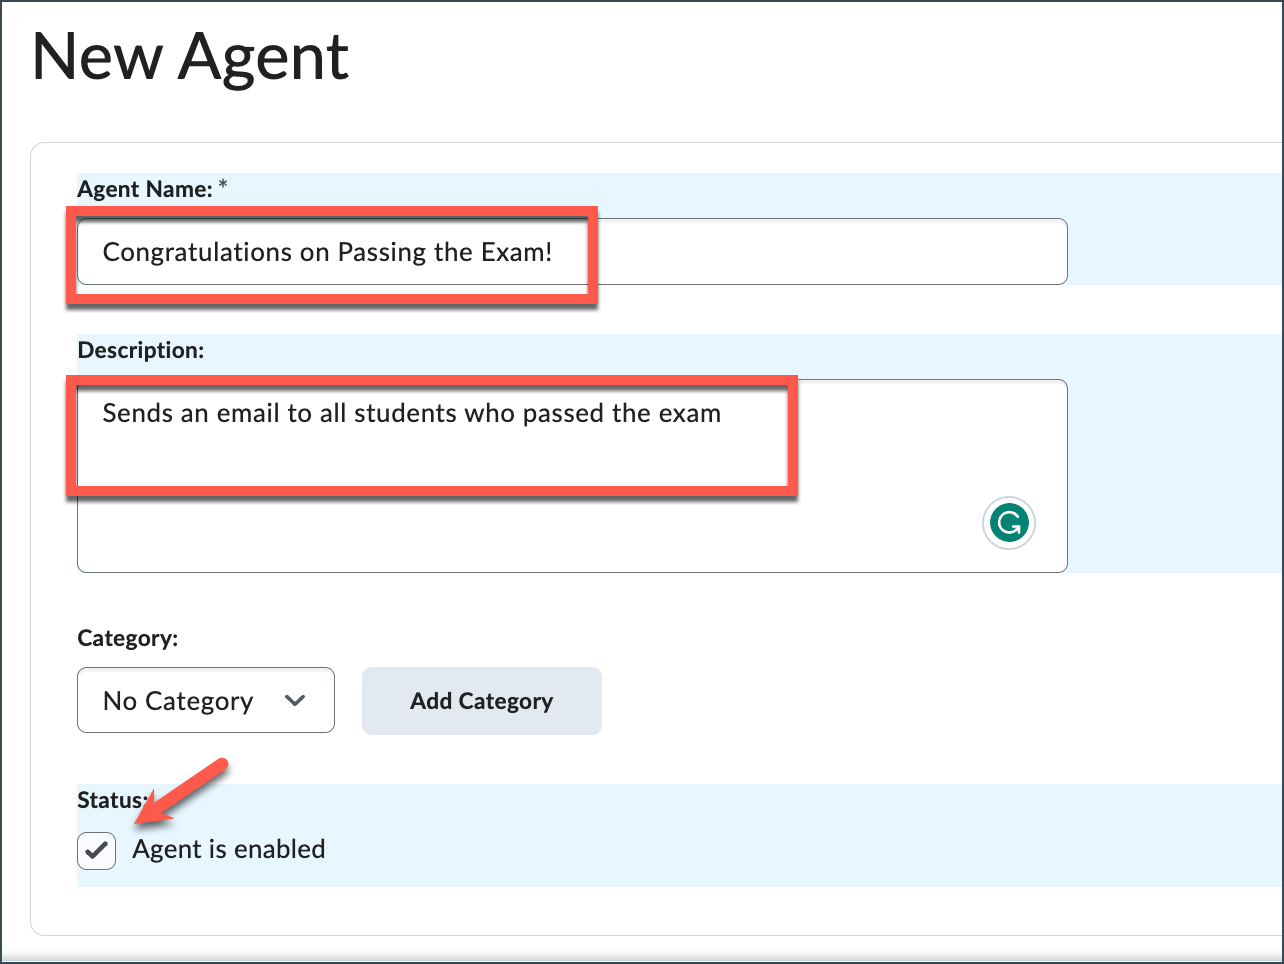
- Enter the agent’s name, e.g., “Congratulations on Passing the Exam!”, then add a description if desired. Note that you have the option to add the agent to a category. Enable the agent if you want to be able to run by checking the Agent is enabled box.
- Add a Release Condition: Within the Criteria options area, locate Release Conditions and click Create.
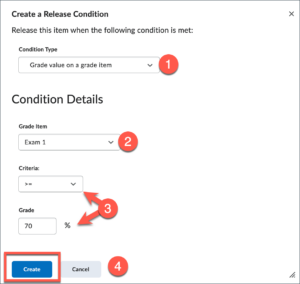
- Enter release condition details:
- Under Condition Type, select “Grade value on a grade item.”
- Select the Grade Item to associate. In this example, it’s “Exam 1.”
- Specify the grade criteria, such as: >=70.
- Click Create.
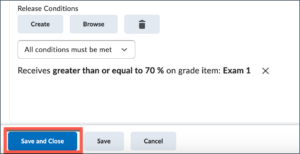
- You will see a confirmation of your selected criteria. Click Save and Close.


Running Intelligent Agents
Running Intelligent Agents
Enable
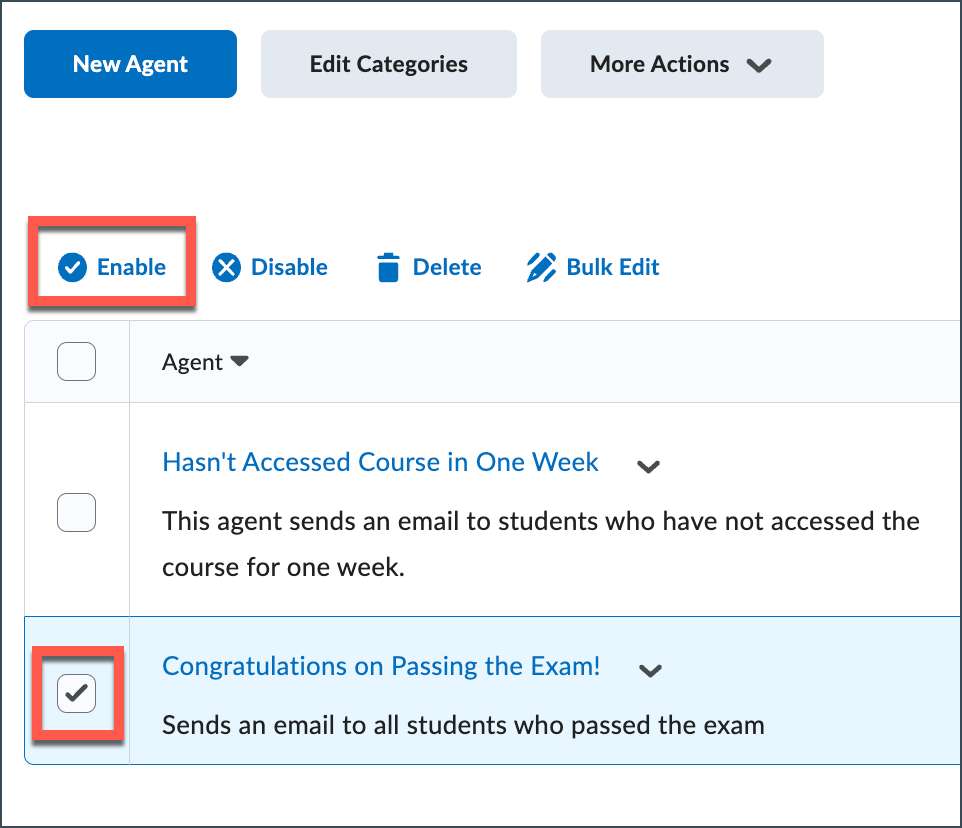
If you have an existing Intelligent Agent or one that you have copied over, you need to enable it. Select the checkbox next to the title and select Enable.
Schedule
If you have set up a schedule, the IA will run on that schedule.
Manually
To manually run an IA, select the down arrow next to the IA that you want to run and select Run Now.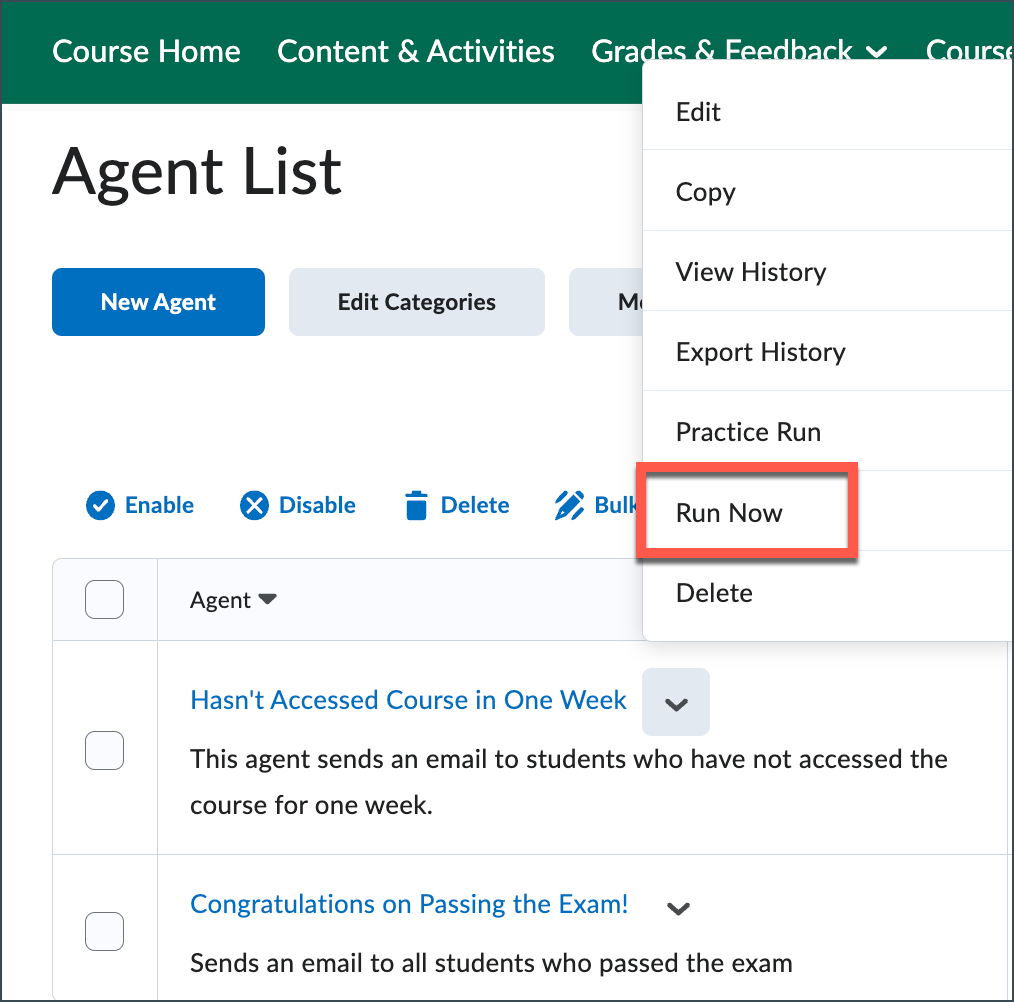
Existing
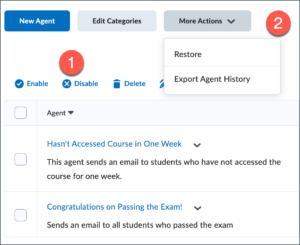
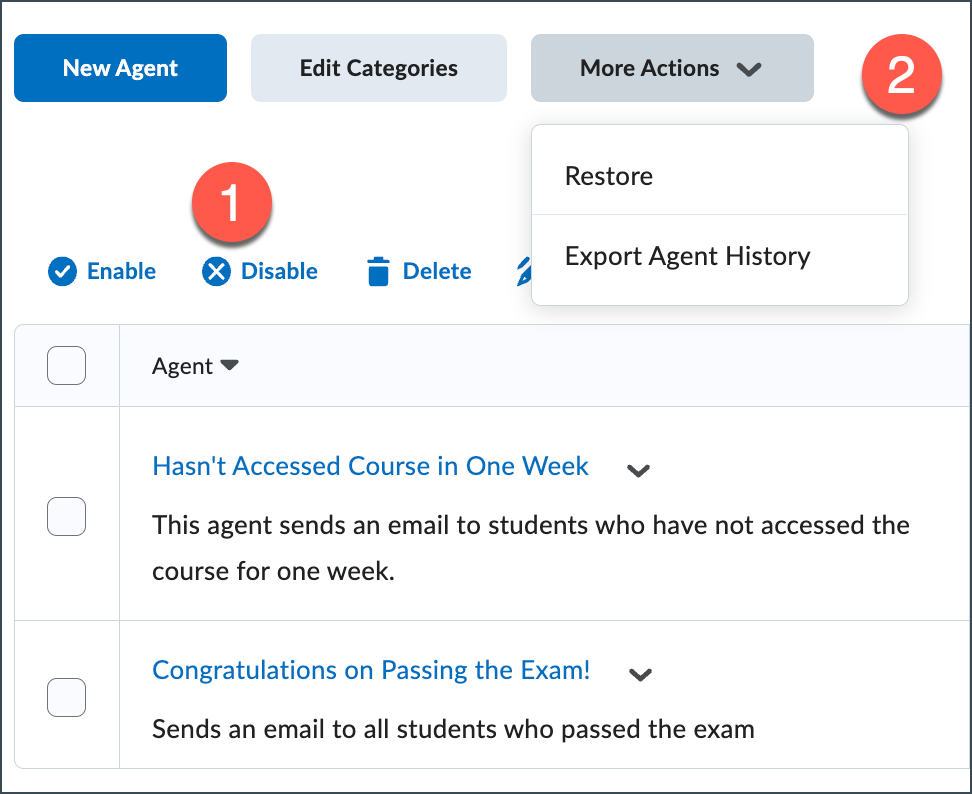
- From the Intelligent Agents page, you will see a list of already created IAs, which you can enable, disable, or delete.
- Under More Actions, you can restore previously deleted IAs and Export agent history.
After Running Intelligent Agents
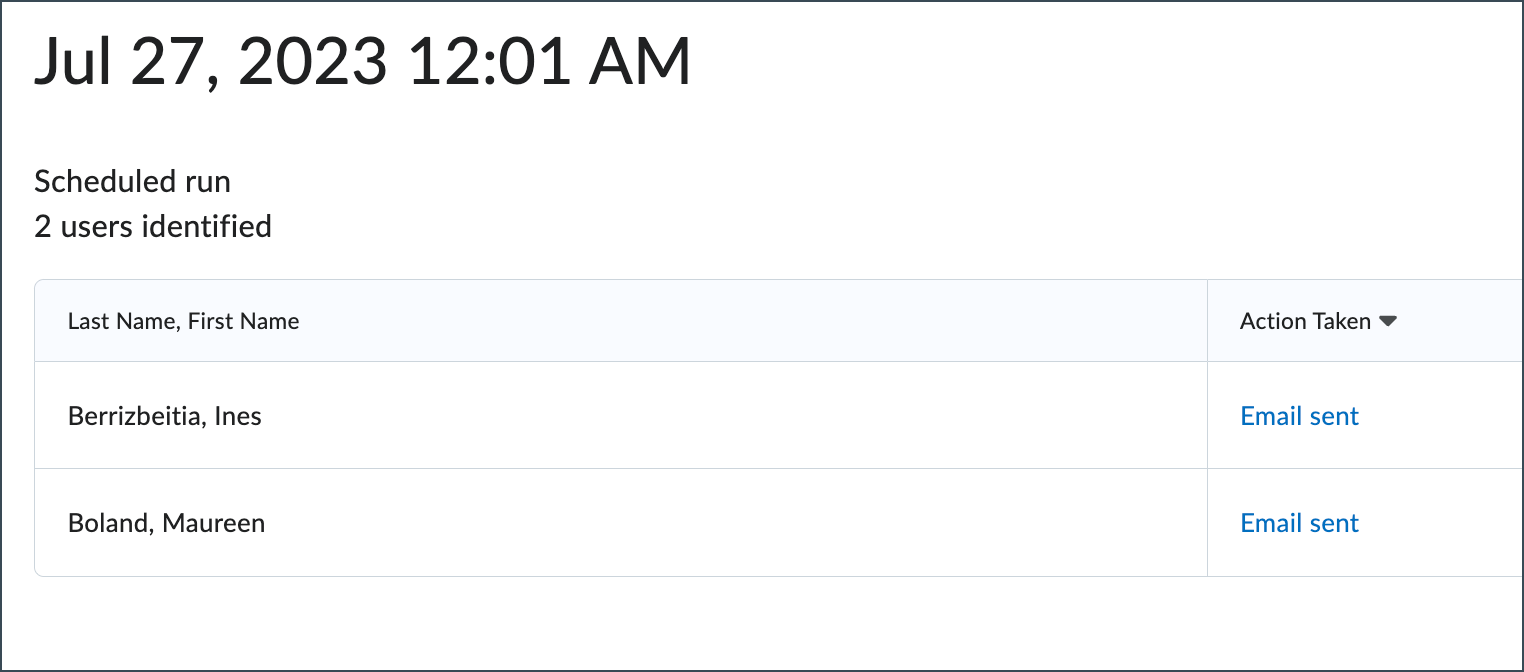
With the list of already created IAs, you can see how many students were identified in the last run the IA completed. Click on the # users identified link to see the names of students who were identified.
![]()