
Connecting Your WebAssign Course to Brightspace
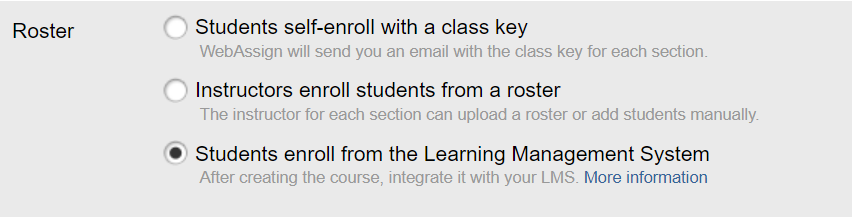
- . In WebAssign, create your course the usual way. For the roster method, choose Students enroll from the Learning Management System.
- Select the term, textbook, etc. and finish the course setup in WebAssign. You do not need to set up the gradebook in WebAssign since Brightspace will manage the grades.
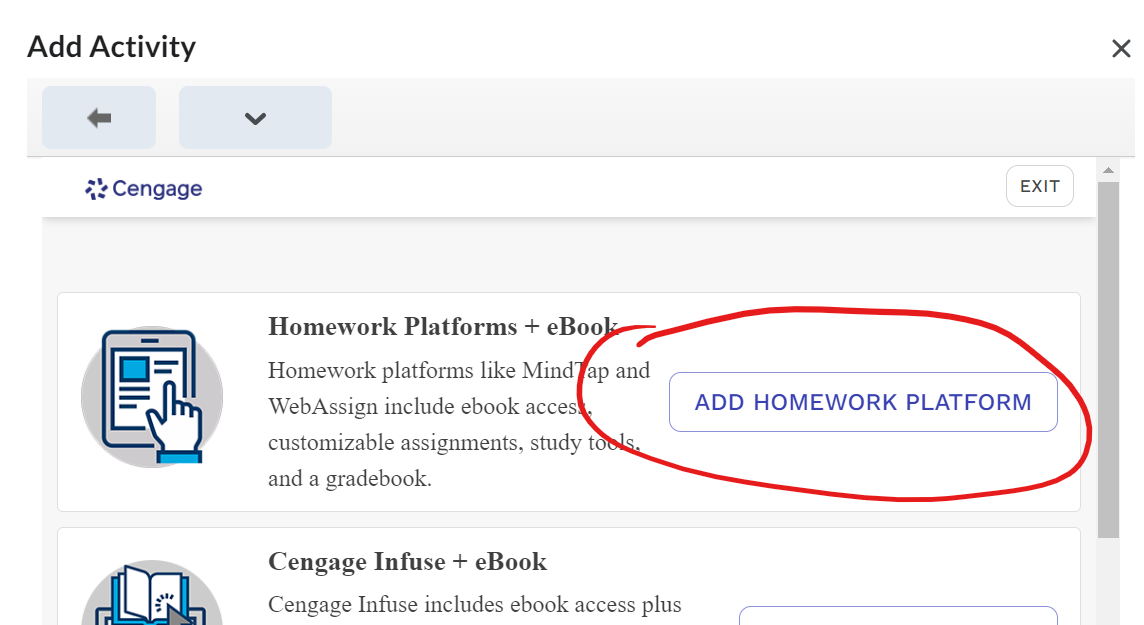
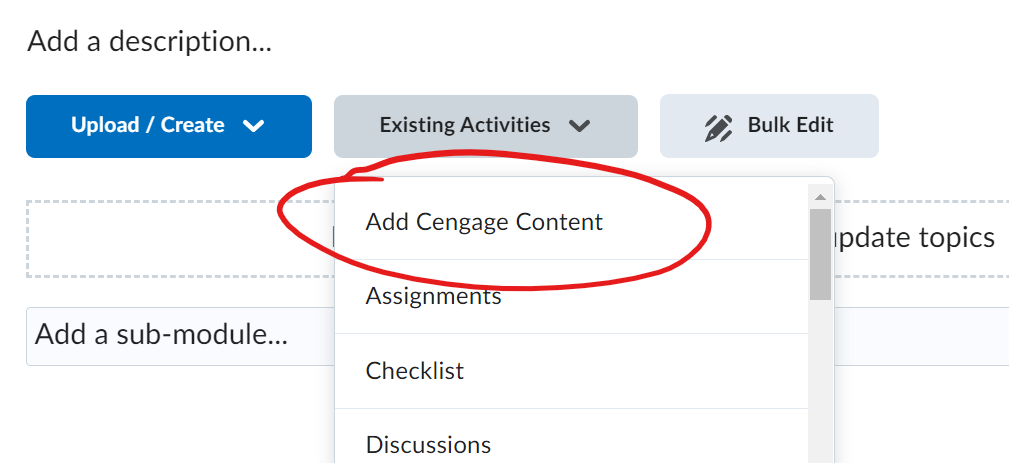
- In Brightspace, create a new module or edit an existing module. Within the module under the Existing Activities dropdown, choose Add Cengage Content.

- Click on Add Homework Platform.
- In the list of available texts, find the text for your course, and click Link to Course.
- On the next screen choose Link to an Existing Course, scroll down and select the course you wish to link, then click Continue. Your WebAssign course is now connected to your Brightspace course.
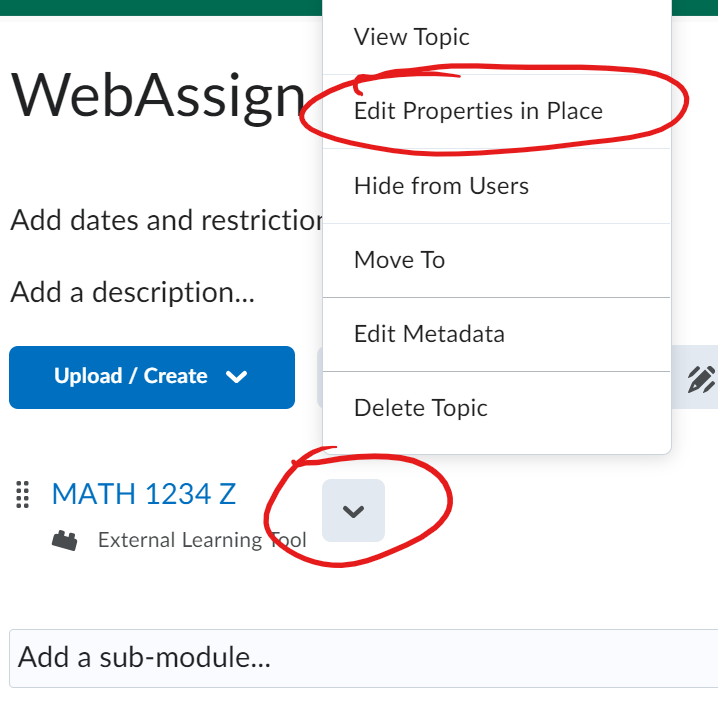
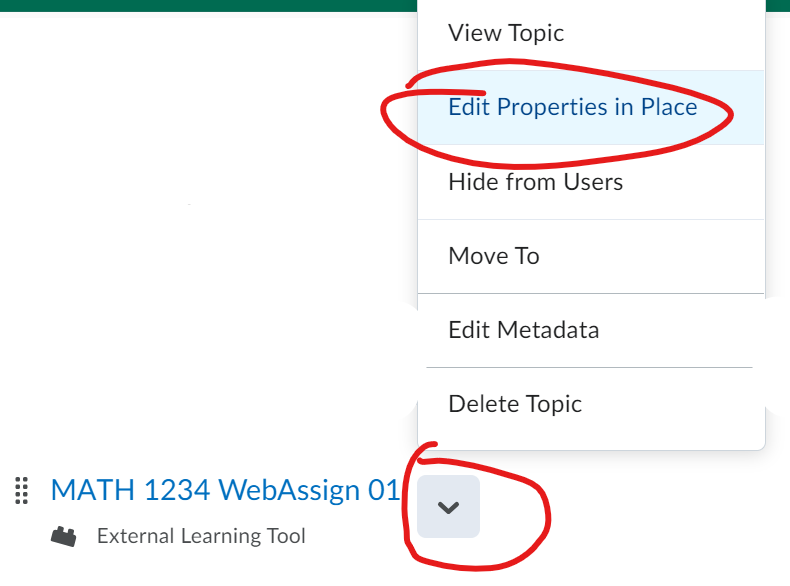
- In the Brightspace module where you added the WebAssign homework platform, there is now a hyperlink to your WebAssign course. The name of the link will be the name of your WebAssign course. If you wish to change the name of the link (perhaps to “WebAssign”), open the dropdown next to it and select Edit Properties in Place. From there you can edit the name of the link.
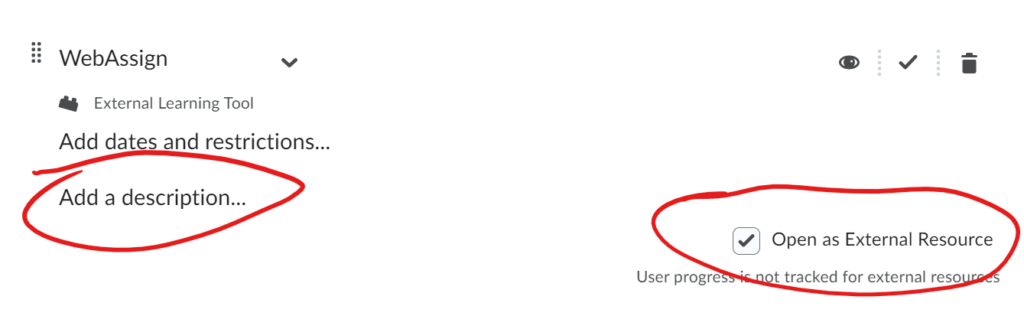
- Add a description if you like, and check the box to Open as External Resource.

Once you have connected your WebAssign course to your Brightspace course, you can add links to the eBook and WebAssign assignments.
Adding a Link to the eBook
- Within a module, click on the Existing Activities dropdown and select Add Cengage Content.

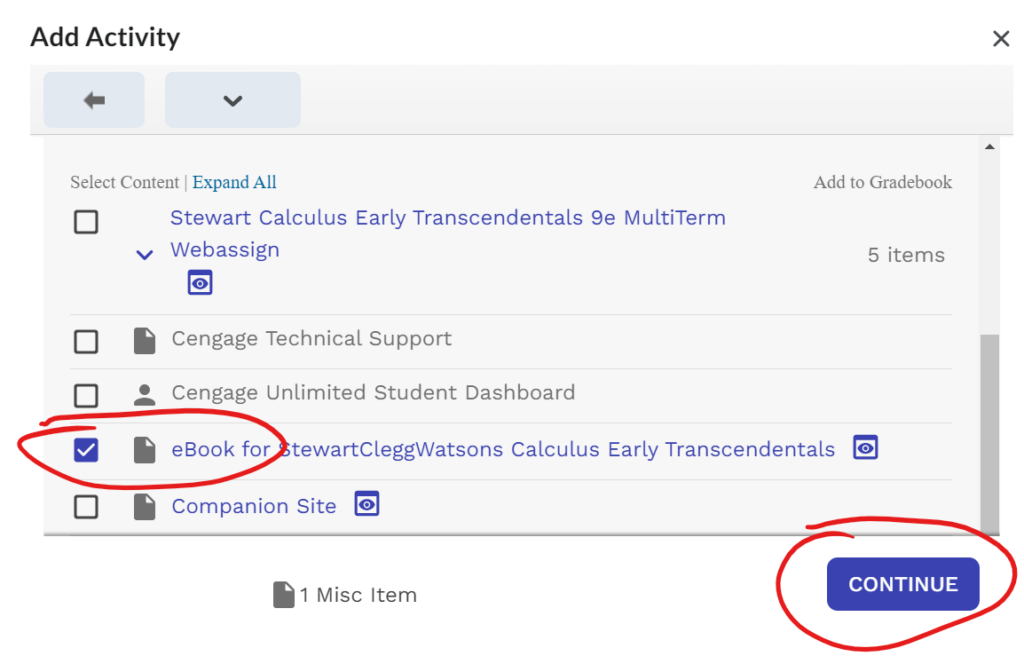
- Next to the textbook for your course, click on Select Content.
- Select the eBook and any other content you would like to add, then Continue.

Linking to WebAssign Assignments
- In WebAssign, schedule an assignment for your connected course.
- In a Brightspace module for your connected course, under Existing Activities choose Add Cengage Content.
- Next to the textbook for your course, click on Select Content.
- Select the assignment(s) you wish to add. Add to Gradebook will be selected automatically (unselect this if you don’t want the assignment added to Gradebook). Then Continue..

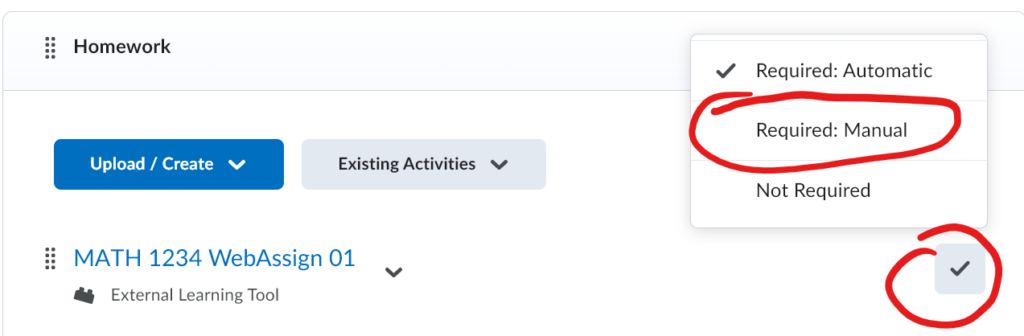
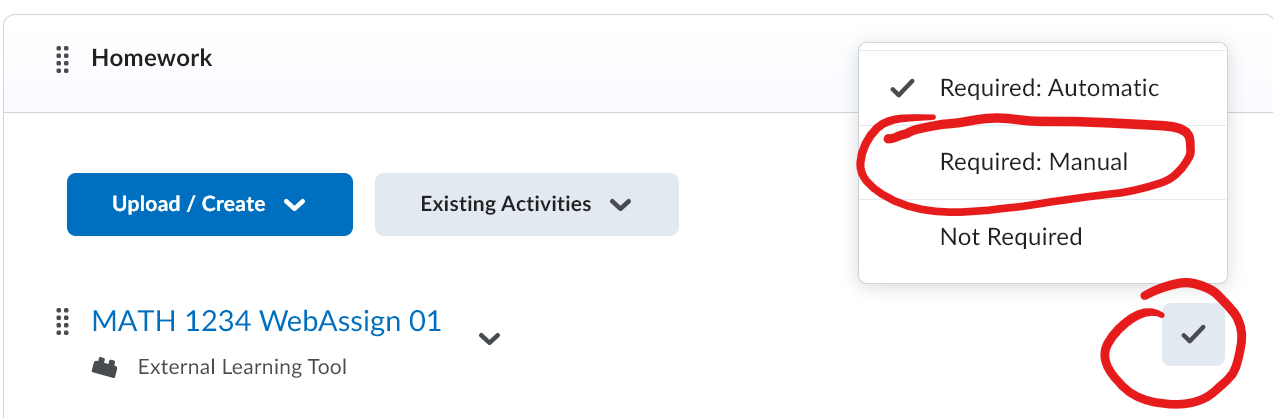
- Next to your linked assignment, open the Completion Method menu (the checkmark) and choose the method you would like. For WebAssign assignments, it’s best to choose Required: Manual. This allows students to mark the activity complete themselves (that way they can keep track of WebAssign assignments that they haven’t finished and need to go back to later). You can choose Not Required if it’s an optional assignment. The Required: Automatic method is not recommended, as Brightspace cannot track completion from an external source such as WebAssign.
- Click on the dropdown next to your linked assignment and select Edit Properties in Place. From there you can add details such as a description and due date. The due date is necessary if you want the assignment to show up on the Brightspace Calendar.

Grade Sync Between WebAssign and Brightspace
Once you have linked a WebAssign assignment to Brightspace, it will show up in the Brightspace gradebook. If you have set up a category for WebAssign in your Brightspace grades, you will need to edit each WebAssign assignment in your Brightspace gradebook and select the appropriate category.
Grades should sync automatically from WebAssign to Brightspace but this doesn’t happen immediately. It can take up to 24 hours for WebAssign grades to show up in Brightspace. You can also manually send scores from WebAssign to Brightspace from the Score View in your WebAssign course, but it can take up to an hour for the grades to show up, and WebAssign will only allow one manual sync per day.
If you have problems with grade sync, you can try removing the WebAssign assignment from Brightspace and delete it from the gradebook, add it back, then manually sync scores from the Score View in WebAssign.