
University of Vermont
PROCEDURE FOR ULTRASONIC QUARTZ CLEAN-UP
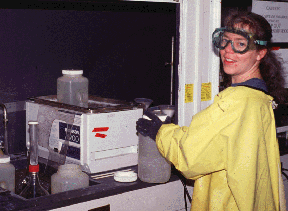
SAFETY PRECAUTIONS
Both concentrated HF and HNO3 are potentially dangerous acids. Under no circumstances should either acid be allowed to contact the skin, nor should the fumes be inhaled. These acids should be used ONLY in the fume hood and only if the user is wearing FULL protective clothing including eye protection.
1. ALWAYS WEAR GOGGLES WHEN HANDLING ACID
2. ALWAYS WEAR FULL RUBBER SMOCK, THICK NEOPRENE GLOVES, AND CLOSED TOED SHOES WHEN HANDLING EVEN DILUTE ACID.
3. BEWARE THAT LIDS MAY NOT SEAL TIGHTLY, LIFT BOTTLE BY BASE
4. NEVER WORK LATE AT NIGHT WHEN YOU WOULD BE ALONE.
5. RINSE ANY SPILLED OR SPLASHED ACID IMMEDIATELY WITH COPIOUS AMOUNT OF TAP WATER.
6. TIGHTLY CAP HF BOTTLE AFTER EVERY USE. DO NOT LEAVE UNCAPPED EVEN FOR A MOMENT.
7. LEAVE SIGN ON HOOD SO OTHERS KNOW ACID IS BEING USED.
****NOTE WELL!!! Ultrasound can not run more than 14 hours without being topped up with water. Always set the time to limit run time to no more than 14 hours. FAILURE TO DO THIS RESULTS IN REPAIR BILLS > $400 *****
PROCEDURE (Start first thing in the morning)
CHECK THAT BOTTLES ARE CLEAN BEFORE PUTTING SAMPLE IN THEM...
1. Weigh about 40 to 50 g of mineral separate into a 4 liter bottle.
LABEL BOTTLE and LID with sample name using tape. Do the same for all 9 bottles
2. Fill all bottles with DEIONIZED water leaving several inches of head space.
3. PUT ONE BOTTLE AT A TIME IN HOOD.
4. IN HOOD, add 80 ml HF and 50 ml HNO3. Cap and place bottle in Ultrasound. Repeat.
5. Fill ultrasound to within one half inch of top. Put on Plexiglas cover.
6. Turn on heat, ultrasound, and timer. Let run at least 8 hours. CHANGE OUT BEFORE GOING HOME IN EVENING.
7. Drain acid into waste container; add 700 g of CaCO3 for 3 bottles of acid. ADD SLOWLY. IT WILL FIZZ. Cap waste container to minimize splash.
8. Rinse bottle and quartz twice with about 100 ml of DEIONIZED water. RINSE WELL. DRAIN TO SINK IN HOOD.
9. Refill bottle with fresh DEIONIZED water and acid mixture.
10. Run for at least 14 hours (OVERNIGHT)
11. Drain acid into waste container; add 700 g of CaCO3 for 3 bottles of acid. ADD SLOWLY
12. Rinse bottle and quartz twice with about 100 ml of DEIONIZED water. RINSE WELL.
13. Refill bottle with fresh DEIONIZED water and acid mixture.
14. Run for at least 24 hours. Make sure to top up ultrasound after first 14 hours.
15. Drain acid into waste container; add 700 g of CaCO3 for 3 bottles of acid. ADD SLOWLY
16. Rinse bottle and quartz at least four times with about 100 ml of DEIONIZED water.
17. Put bottle in oven to dry with lid ajar. Keep oven under 65 oC.
18. As soon as quartz is dry, transfer to 50 ml tube along with label. To do this, invert bottle onto creased piece of clean paper and tap bottle bottom. Fold paper and funnel quartz into clean tube. WIPE COUNTER AND CHANGE PAPER BETWEEN EVERY SAMPLE.
19. Rinse 4 liter bottle carefully with DEIONIZED water and a scrub brush making sure to remove ALL quartz. Use no soap. Rinse bottle in and DEIONIZED water. THIS IS A VERY IMPORTANT STEP.
IT IS IMPORTANT THAT THROUGHOUT THIS PROCESS CROSS-TALK BETWEEN SAMPLES BE KEPT TO A MINIMUM. THIS MEANS EVERY BOTTLE MUST BE CAREFULLY RINSED BETWEEN SAMPLES. CHECK YOU BOTTLES BEFORE USING THEM FOR BOTH CARRIED OVER QUARTZ AND CRACKS.
Repeat this process until the 50 ml tube contains at least 30 grams of quartz, 40 grams is best.
When enough quartz has been made, take tube upstairs for mineral testing by ICP.
******for samples failing mineral test, re-etch once for 24 hours. For samples failing mineral test miserably (>500 ppm Al), re etch once but for 48 hours total.
ONCE WEEKLY CHECK ULTRASOUND CLEANING EFFICIENCY USING BRANSON TEST
WITH SLIDE AND SOAP